
Router Table & Sanding Station
As I mentioned in the latest update to my shop layout, I'm opting to go with a standalone router table (again), and a new sanding station. Click the links below to take you to each project.
Rockler Sanding Station
For a couple of years, I had a SuperMax drum sander on an old Rockler router table stand. Below that, I had three drawers which contained my handheld power sanders, various types of sandpaper and other accoutrements for all of the sanders. This became my de facto sanding station.

Don’t mind the workbench in the background…this was A WHILE ago.
While it held all of my sanding gear, I was still doing all of the actual sanding on my workbench. As time passed, I began to realize that I was simply not utilizing the drum sander very much and it was a purchase I should have never made. On top of that, the three drawers were growing more and more full and disorganized. I needed to do something else.
After not much debate, I decided to simply sell the drum sander to someone who would get much more use from it than me. As for the old router stand, it just kind of sat around in a corner collecting dust and junk on the small horizontal work surface that remained, all the while still housing my growing collection of sanders and sandpaper.
For a time, I thought about making a sharpening station out of that old stand, but I simply don’t do enough tool sharpening to make that worth my while. I also needed more space and better organization for all of my sandpaper and sanders.
Speaking of my sanders, I was beginning to amass quite a few different sanders, and they were taking up a bit more space than I preferred. I had the first ROS I ever bought, a 5” Craftsman with no real dust collection, a 5” Bosch (which was my goto for most jobs), a 5” Makita (who’s dust collection wasn’t great), not to mention a handheld Harbor Freight strip sander I bought for one specific purpose and a couple of Ryobi battery-operated sanders.

I also have a Ryobi belt sander…almost forgot about that. It wasn’t stored with the sanders because there WASN’T ENOUGH ROOM IN THE DRAWER!!
On top of all of those, within the last year I discovered the 3M Xtract ROS and have transitioned to both the 5” and 6” models exclusively. Their performance and dust collection are vastly superior to all other sanders I’ve used in the past. As for the other sanders, save for one of the Ryobis, the belt sander and the strip sander, I’m going to likely just donate all of those to Habitat for Humanity. This will cut my handheld sanders by half.

My pride and joy set of sanders…the 6” and 5” 3M Xtract ROS…TOTAL game changers.
As previously mentioned, my sandpaper collection has grown out of control as well. Even with removing the drum sander paper when selling the SuperMax, that didn’t make much of a dent in the drawer. If I only had 5” paper this wouldn’t be a problem, but I now have a 6” ROS as well. In addition, I have two different types of 3M 5” sandpaper discs. I NEED MORE SPACE!!!
To make room for another stand in my garage workshop, I would need to move some things out. The old Rockler router table stand will be sold…it’s simply not big enough for me to be useful anymore. Also, my Rockler Material Mate is kind of in the same boat with just sitting and collecting dust. Its only purpose currently is storing my small air compressor and it’s attachments…not exactly worth the floor space at this point. The Material Mate will be sold as well. The compressor will just sit on the floor by the garage door.
As a replacement, I’ll go with a Rockler Rock-Steady Shop Stand. This specific stand is 32''W x 20''D x 32''H, quite a bit larger than its predecessor. In place of the adjustable feet, I’ll install 3” casters as I need most everything to be mobile in my shop (garage Tetris is always a real possibility).
For a top, I figured I would just remove the Rockler top I had attached to the Material Mate. However, the more I thought about it, the more I liked the idea of having a t-track top in the workshop again. I was always up-in-the-air with that idea for my workbench, but with a larger top than I had previously on the old router stand now in play, this might actually work out for the better.
That’s great, and all, but what about the top from the Material Mate? Well, Rockler makes a Folding Top Extension Kit that is designed to attach to their new Rock-Steady stands. I could simply attach the other Rockler top I have to that and, effectively, double my work space for the same footprint. Now we’re cookin’ with gas!!
I wanted to enclose most of the stand as possible, except for the back. The back really can’t be closed off with sets of Rockler Drawer/Shelf Brackets installed. I wound up using all plywood scraps I had on hand for the sides and bottom. I even had to use multiple pieces for the sides as I didn’t have enough larger singular pieces.
As for the drawers, I wasn’t exactly sure how many drawers I would need. With that in mind, on my workbench I laid out the dimensions of the inside of one of the drawers and used that as a base unit for each of them. I was able to easily get all of the sanders in one drawer.

Hopefully I don’t buy any more sanders.
Next up was the sandpaper. Since I have both 5” and 6”, I wanted to separate them. All of the 6” 3M Xtract Cubitron II mesh fit in one drawer and the 5” sandpaper fit into another. I have a few different kinds of 5” paper, actually. I have the 3M Xtract Cubitron II mesh as well as the 3M 775L Cubitron II. I also still have a number of discs of Gator sandpaper I was using prior to discovering the 3M stuff. I was able to divide a single drawer into two sections, one for each type of paper. The Gator will sit on top of the 3M 775L Cubitron so that I can use that stuff up first. It doesn’t stand up for long when sanding, so I’ll likely go through it rather quickly. I don’t want to simply throw it out.


This leaves me with still more sandpaper, actually. I have standard sheet sandpaper as well as some sanding blocks. Those will get their own drawer too.
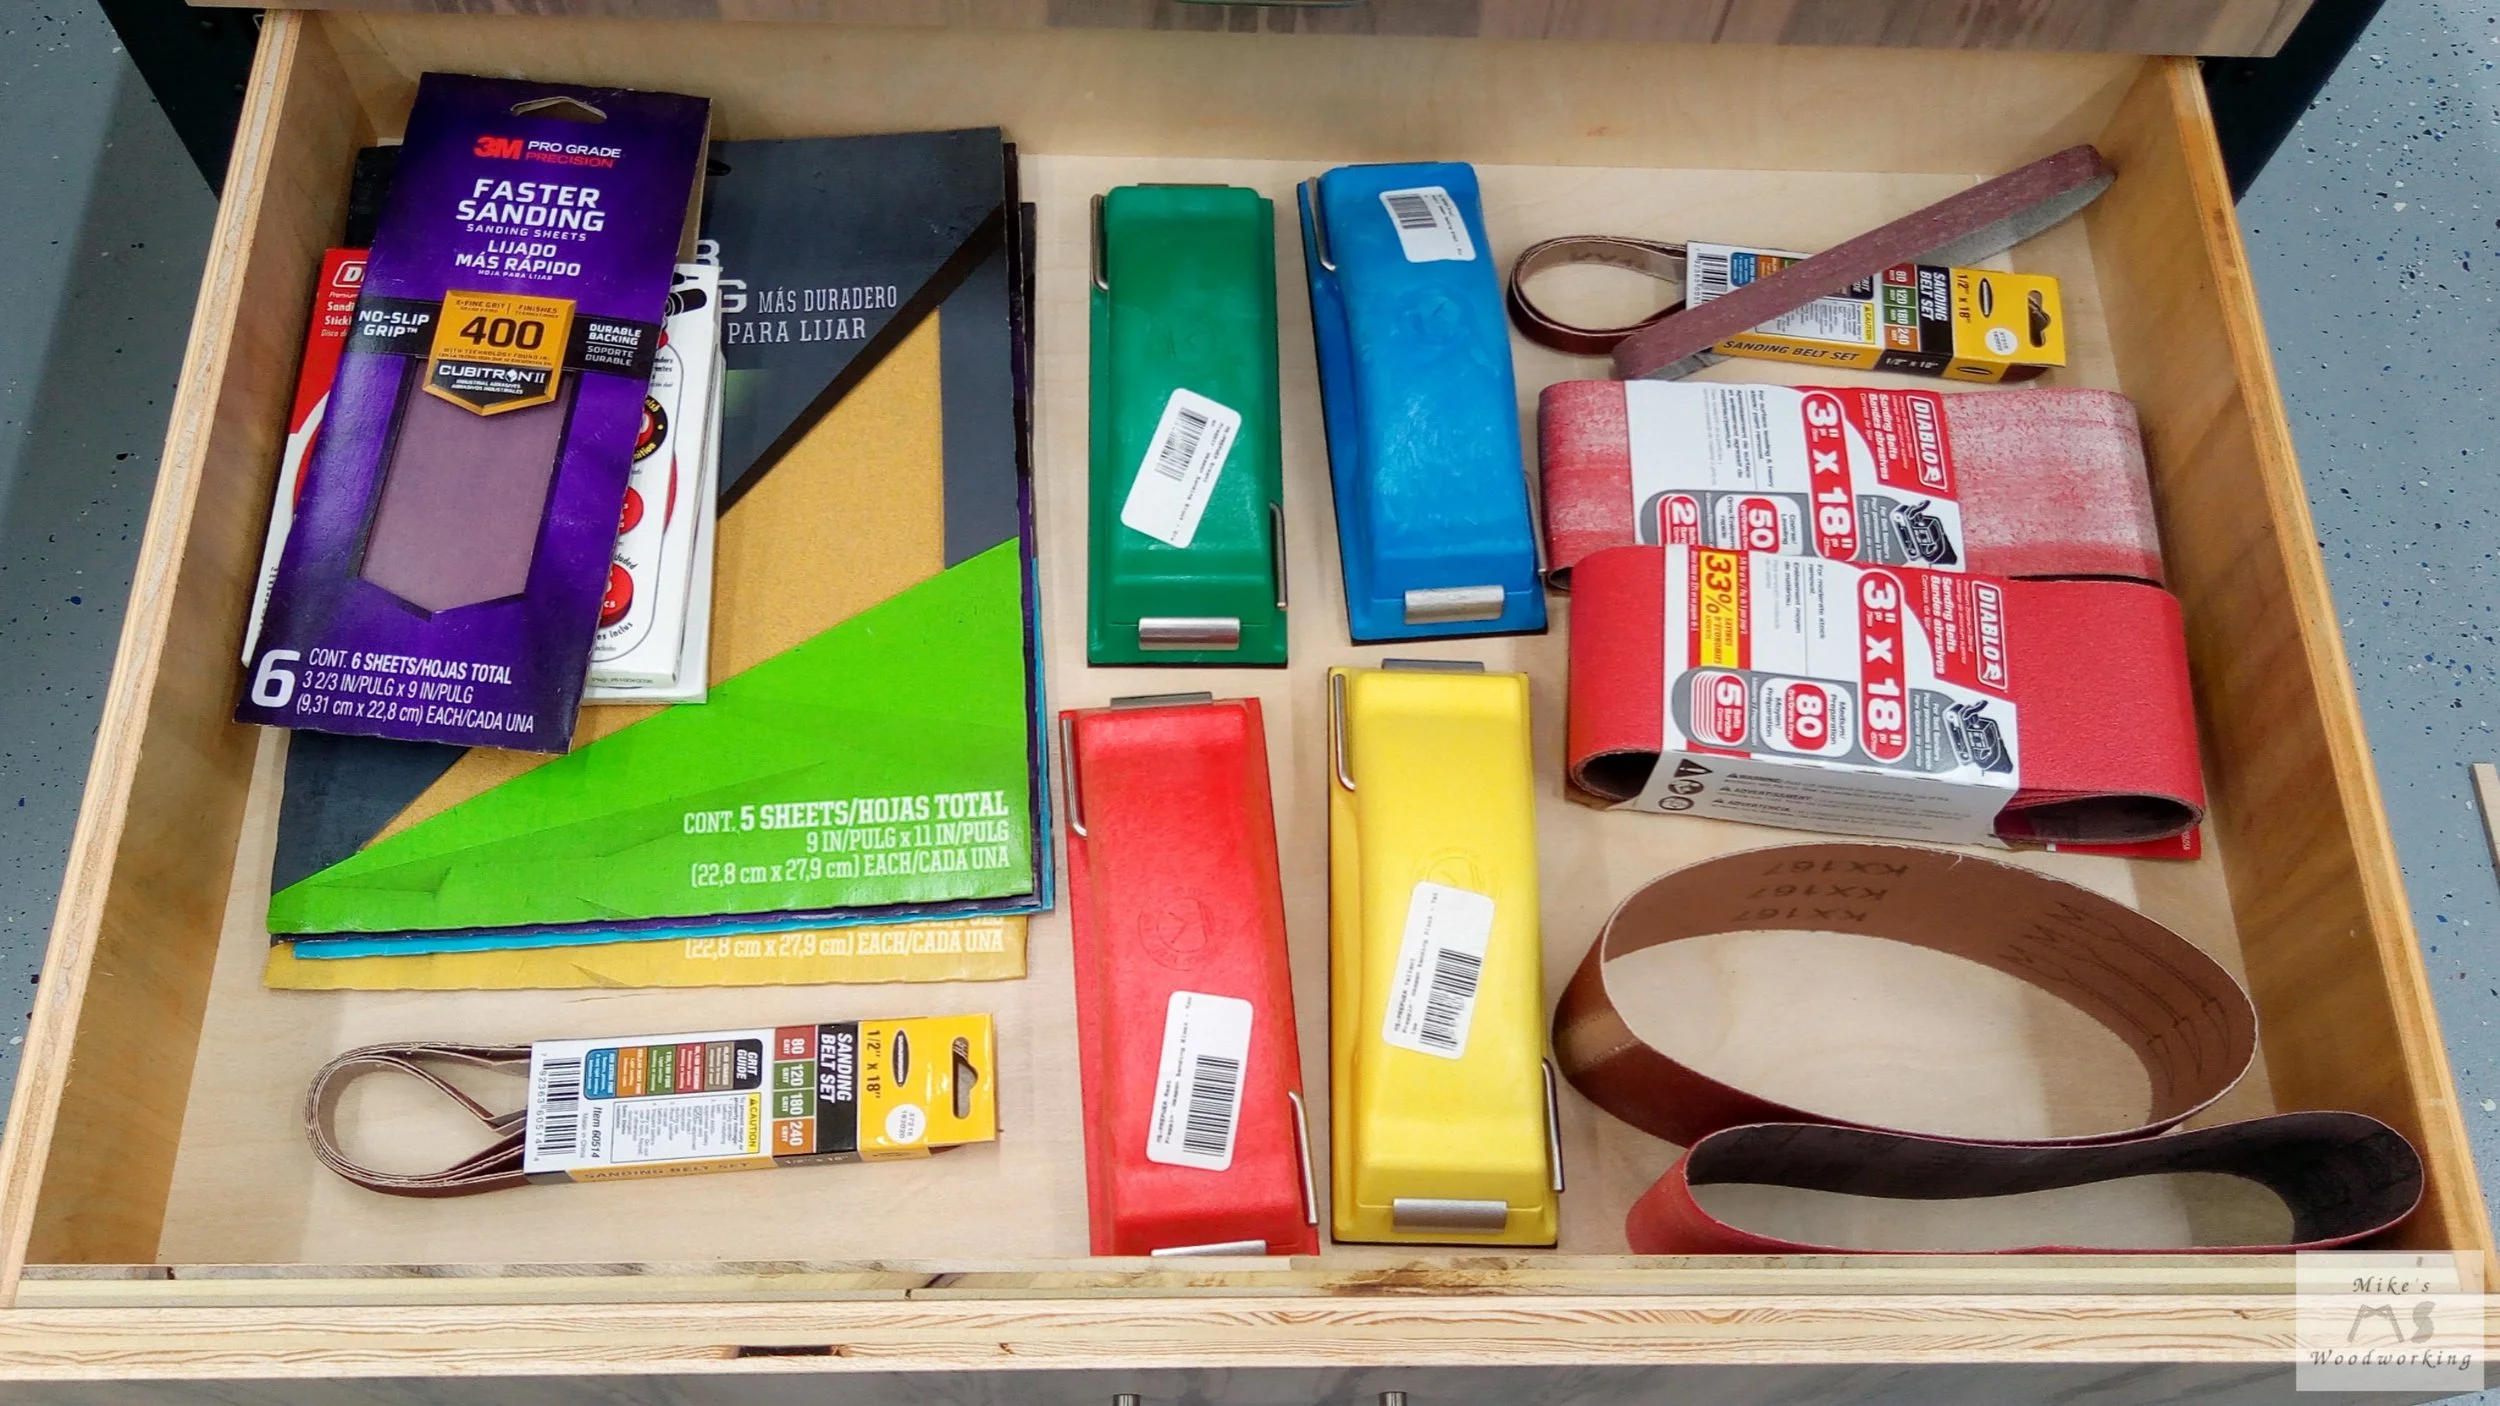
I put the sanding belts for the belt sander and strip sander in this drawer as well.
Lastly, I have a bunch of t-track clamping accessories back from when I had t-track installed in Workbench 3.0. They’ve been sitting in a drawer under my current Rockler Workbench since I built it a couple of years ago. Their rightful place will now be the new sanding station.

PLENTY of room for expansion in this drawer.
Now that I know how many drawers I’ll need, and their overall dimensions, I need to scrounge for some scrap plywood. It would be great to use 1/2” material for the drawers…every little bit of space in a drawer helps. I found a bunch of pieces of some old stuff I had from years ago from Lowe’s/Home Depot, and I found a few pieces of Baltic birch scraps as well. The sides and fronts/backs were accounted for…well, almost. One drawer would have both the front and back just a little shorter than the sides…oh well…it’s for the shop, so I don’t care.
With just about every piece of 1/2” plywood gone, all I needed were the 1/4” drawer bottoms…not looking good on that front. I had a couple of pieces that might work for two drawers, but those pieces were already allocated for other projects. I guess I’d have to buy a sheet of 1/4” plywood. I headed on down to Hardwood Lumber and Millwork in Lakeland, Florida, and took care of that. The one final purchase I made were for the 18” drawer slides. I simply had no more spares, so I bought more of the soft-close variety from CabinetPart.com as I’d done for my office projects last year.
I cut and fit all of the 3/4” plywood for the bottom and sides of the stand. With there being multiple pieces for both the bottom and sides, I had to cut a couple of pieces to fit the gaps remaining from the other smaller sections. Because of the shape of the inside of the Rockler stand legs, I rounded over the corners of the bottom pieces and the edges of the sides so they would sit flush with the inside of the legs. I screwed up on one cut for the right side and had to make a small 1/2” filler strip to cover the remaining opening…oops…nothing a few brad nails couldn’t fix.
The drawers were more standard construction…grooves for the bottoms and pocket screws to hold everything together. I made sure to NOT drill pocket holes where the grooves were…I think I’ve finally learned from past mistakes. No screw-ups on the drawers except for when cutting a couple of the 1/4” plywood bottoms. I somehow forgot that I was using 1/2” material instead of the 3/4” I modeled in Sketchup. It’s a good thing I had a large 1/2 sheet of extra plywood because I needed it.
The drawer faces were more scraps from the office projects. I didn’t much care for grain matching and mismatched species…I was about using up what I had. With more of the same drawer pulls found throughout my shop, this project was a wrap.

Just a bit of mismatched grain in these drawer faces…just a little :)


Above you can see the finished stand with both the t-track top and the folding extension. I didn’t get into putting together the Rockler stand and its accessories as their instruction manuals are more than adequate for that task. A pretty simple project, all things considered.
Kreg Router Table
As for the router table, along with the problems of its location (as mentioned in the article cited in the beginning), what really got me to thinking about a standalone setup was a new motorized router fence and lift I saw demonstrated by David Picciuto from Make Something that really caught my eye. It was the Shark RS1000 Pro, and it was similar to a CNC setup. I’ve long wanted to make boxes with regular box joints or dovetails, but making those with other kinds of jigs or with hand saws was very intimidating to me. This would allow me to make those kinds of joints very precisely and in a fraction of the time.
The router stand recommended for use with the RS1000 was the Kreg Multi-Purpose Shop Stand, along with the corresponding Kreg Precision Router Table Top.
With all of these new shop stands and the RS1000, I was looking at shelling out A LOT of money. However, once I sell the Material Mate, old router table stand, not to mention my old router table setup that is attached to my Sawstop, I should be able to recoup some of the cost of the new gear.
A couple of things of note when it comes to the RS1000. First of all, it takes up A LOT of room from front to back. When the fence at its furthest point, it sticks out 22” from the edge of the router table top. Given the location I chose for this new router table stand, that won’t be an issue for me. Secondly, this new router lift is designed only for standard 3-1/2” router motors. This means that the hefty Porter Cable router motor I have in the old router table will not work (too big) (a Triton router likely won’t work either). Luckily, I have two DeWalt router motors, one of which has variable speed, and just so happened to be installed in my previous standalone router table. The PC router motor will simply be sold with that router setup, only increasing its value.
As with any good router table, it is an absolute MUST to have good dust collection in the form of a dust collection box surrounding the router and lift. There is a bit of an issue with this when it comes to the Kreg top. Unlike most other router table tops, which have an inset groove to hold the insert plate in place, Kreg uses a set of router table levelers with the opening for the insert plate cut straight through the top. A standard dust collection box, like the Dust Right Router Table Dust Bucket, cannot attach to the bottom of the Kreg table without modifications.
A LOT of the reviews on this particular dust box cited extensive modifications being needed for it to work with the Kreg table. This really deterred me from wanting to buy it. I figured I would have to just make a plywood box around it and hope for the best. No one really got into the details of what exactly was needed in order to attach the Dust Right option to the Kreg table in the comments or Q/A section on Rockler’s website.
However, I found a video by So We Bought a House… that showed exactly what to do. It was really as simple as adding a couple of 3/4” spacer blocks under the table to offset the height of the Kreg plate levelers.

A screenshot of the video showing the spacer blocks.
Now, with the dust bucket attached to the spacer blocks, there IS a bit of a gap between the bottom of the Kreg top and the dust bucket. However, like most router dust boxes, there is an adjustable vent on the side that limits the amount of air that can get into the box, so that could simply be adjusted accordingly. In my case, with the Harvey G-700 I’m using, there is MORE than enough adequate suction to compensate for that gap and still collect most/all of the chips/dust.
Putting the Kreg shop stand together was quite simple…just follow the directions and you’re good to go. After attaching the top, plate levelers and spacer blocks, I went ahead and attached the Rockler dust bucket. I flipped the assembled cart upside-down onto my workbench to do this part since it would be MUCH easier with gravity holding everything in place versus working upside down. While I was at it, I attached the 2” stem casters I previously had on the old Rockler router stand that I’m going to sell (again, work WITH gravity whenever possible).
Next up is to install the RS1000 itself. The nice thing about the RS1000 is the manufacturer has a decent video on how to install and set everything up. I’d almost argue it is better than their manual to some degree.
First I needed to install the router lift and insert plate. The directions were pretty straight forward for this (again, the video also helps), however I had some issues with running the cables in my setup (a bit more on that later). Next was to attach the RS1000 to the Kreg router table top. It could help to have a second person to do this part, but a couple of clamps did the trick for me.
Four holes need to be drilled in the router top to allow the RS1000 to be held firmly in place. I suppose one could freehand drill those holes and hope for the best, but I just used my Rockler Portable Drill Guide instead. I bought this last year for use on my office furniture projects and I’ve found it extremely handy on multiple occasions.
With the RS1000 bolted into place, I was ready to plug everything in and see how it works…well, not so fast on that. I needed to route a few cables to the motorized lift inside the router dust box. There is a hole in the back meant for the router power cable to go through, so I figured I could use that…nice try, buddy. The cables use serial connectors, and one of them simply did not fit through the small opening in the back of the dust box. I was forced to route it through the adjustable air vent on the side. This wasn’t ideal, as I planned on completely closing off the vent, but I simply had no choice. I don’t think that will make much of a different in the end with air flow.
I eventually got everything connected and it was time to fire this baby up. Being able to move the fence and the height of the router with extreme precision, at the press of a button, was SOOOO satisfying. I installed a straight-cutting router bit into the router, and once I figured out how to zero the fence and the bit, everything was good to go. I took measurements in a few places and everything was absolutely dead-on-balls accurate.
There wasn’t a lot of room under the dust bucket, but there was still room for a small drawer, plus I wanted to install a plywood bottom and sides on the stand. I used most of the scrap plywood from the Material Mate storage box to make all of these parts, along with a few other plywood scraps I had on hand.
I had to cut the bottom into two pieces because I simply could not install it any other way, given the lack of space. The drawer stores my air compressor hose and accessories in it. The neighboring Rockler Table Saw & Router Cabinet houses all of my router bits and accessories there. After getting the safety power switch attached, I’m now in business.


With everything finally installed and set up, now it’s time for me to complain a bit about Next Wave. First, all of the parts for the RS1000 were shipped in multiple boxes inside of one box…that’s fine. However, the hardware needed for some parts of the installation were located in a completely different box than it should have been. Also, it turned out that they actually SHORTED me on the washers I needed to bolt the RS1000 to the router table. I just so happened to have the right size washers on hand, but I actually was a few short so I had to go buy another box. For the price I paid, I SHOULD NOT be missing ANY hardware in the box.
The manual for the RS1000 is NOT the greatest in the world. There is no listing of what hardware/parts are included in the boxes, no list of tools included OR needed to complete the installation. I bring this particular point up because it got me a bit upset.
The optional miter fence, which I purchased, came in its own box (again, with all of the other boxes, inside of one single box). The fence was secured in place to the linear rail with an oddly-sized set of screws. I triple-checked all of the hardware included and found no allen wrench that would fit, including the two that were included. Both of my standard sets of metric and imperial wrenched didn’t fit either. I actually measured the opening on the screw and it was around 3.5mm or 9/64”…NOT a size in ANY standard allen wrench set of EITHER unit.
I sent a message to Next Wave asking about the screws, that no wrench was included and how the miter fence was pretty much useless and worthless at this point. I finally got a response back and here’s a direct quote from their reply to me, “The Allan head screws to mount the linear rail for the Miter gauge are 9/64 drive. Thank you for bringing this to our attention. You are correct we do not provide a 9/64 wrench in either the RS1000Pro nor the miter kit. I will pass this information to our packaging/engineering teams.”
That’s it…that’s all I was told. Nothing about sending me a wrench (or the washers I was shorted). Fortunately, I was able to find a cheap set of allen wrenches that included the oddball 64th-inch measurements at, surprise surprise, Harbor Freight. Once I had the correct wrench, I was back in business. Again, for the price I paid for this thing, you would think they would include an odd-sized allen wrench for the user.
Something else that goes along with the non-existent parts list, is the fact that I have parts/hardware that I have no idea what they go to in the first place. There are these two metal rods with no labels on them and no mention of them in the manual or the video. They could be an integral part to something and I would have no clue…terrible.
Lastly, the touchscreen pendant used to control the fence and lift is fairly intuitive, but not perfect. It is difficult to use with just one’s fingers. Now, I have fairly small hands so I’d probably be fine, but most others would struggle. The video shows the user utilizing the eraser end of a pencil on the touch screen throughout. Honestly, I would prefer to have a dedicated stylus attached to the pendant. Yes, most everyone has a pencil with an eraser in the workshop but, again, for this amount of money the little things are what makes the difference.
Maybe I’m just being petty, but I don’t think a 9/64” allen wrench and a stylus is asking a whole helluva lot. As for the manual, I mean it doesn’t have to be the end-all-be-all manual like Sawstop uses, but it should be better than it is. I will say that it is spiral bound manual, so that’s at least SOMETHING.
Project Wrap-Up
Despite the litany of gripes with Next Wave in regards to the RS1000, I’m extremely happy with the way both of these builds came out. As of the writing of this article, I have not actually made any cuts with the RS1000 Pro. I have some small boxes I want to make using box joints, so that will be my first real test. I’ll post an update once I get a bit of use out of the new router setup.
These relatively small projects got me into the shop for a couple of weeks for the first time in a number of months. The long span of time away seemed to serve me well as I felt very refreshed once I got back into a groove in the workshop again.
Why, you might ask, was I away from the shop for so long? Well, I’ve got other things going on in the background besides woodworking that I’m trying to get off the ground, namely writing my first novel. Yes, I said writing a novel, but that’s a story for another day…and a whole different section of this website.