
Christmas Presents, 2021
In 2020, I made a total of five Christmas presents. Four of them were for my friend Shanti’s two daughters and Lisa’s cousin Bill’s two sons. They were all a variation of the same gift, the COG Puzzle. The other present was a picture frame for a cross stitch project Lisa made for Bill and his wife, Wesley. Everything turned out great and everyone loved their gifts. The only think that sucked was that I couldn’t present any of the gifts in person (stupid COVID-19 pandemic).
This year I’m being a bit more ambitious. I’ve got a total of seven presents in mind.
Here are links to each project as this article is a bit long:
The Dice Tower
This is a present for Lisa’s cousin Bill and his wife Wesley. They both LOVE to play Dungeons & Dragons with their friends (and I think their boys play as well). I figured the best gift for them would be a Dice Tower. This would let them roll all of the many dice they use and randomize the rolls a bit better, all while keeping the dice from scattering everywhere on a table (especially with the boys rolling them). The Dice Tower is based on a set of plans made by Marc Spagnuolo at The Wood Whisperer.

The three Dice Towers Marc made.
I’m not going to get into too many specifics with this particular project as I am following a set of paid plans. My methods for completing the project were slightly different than in Marc’s video, and I’ll go over that aspect of this build.
Back to Basics...Well, Kinda
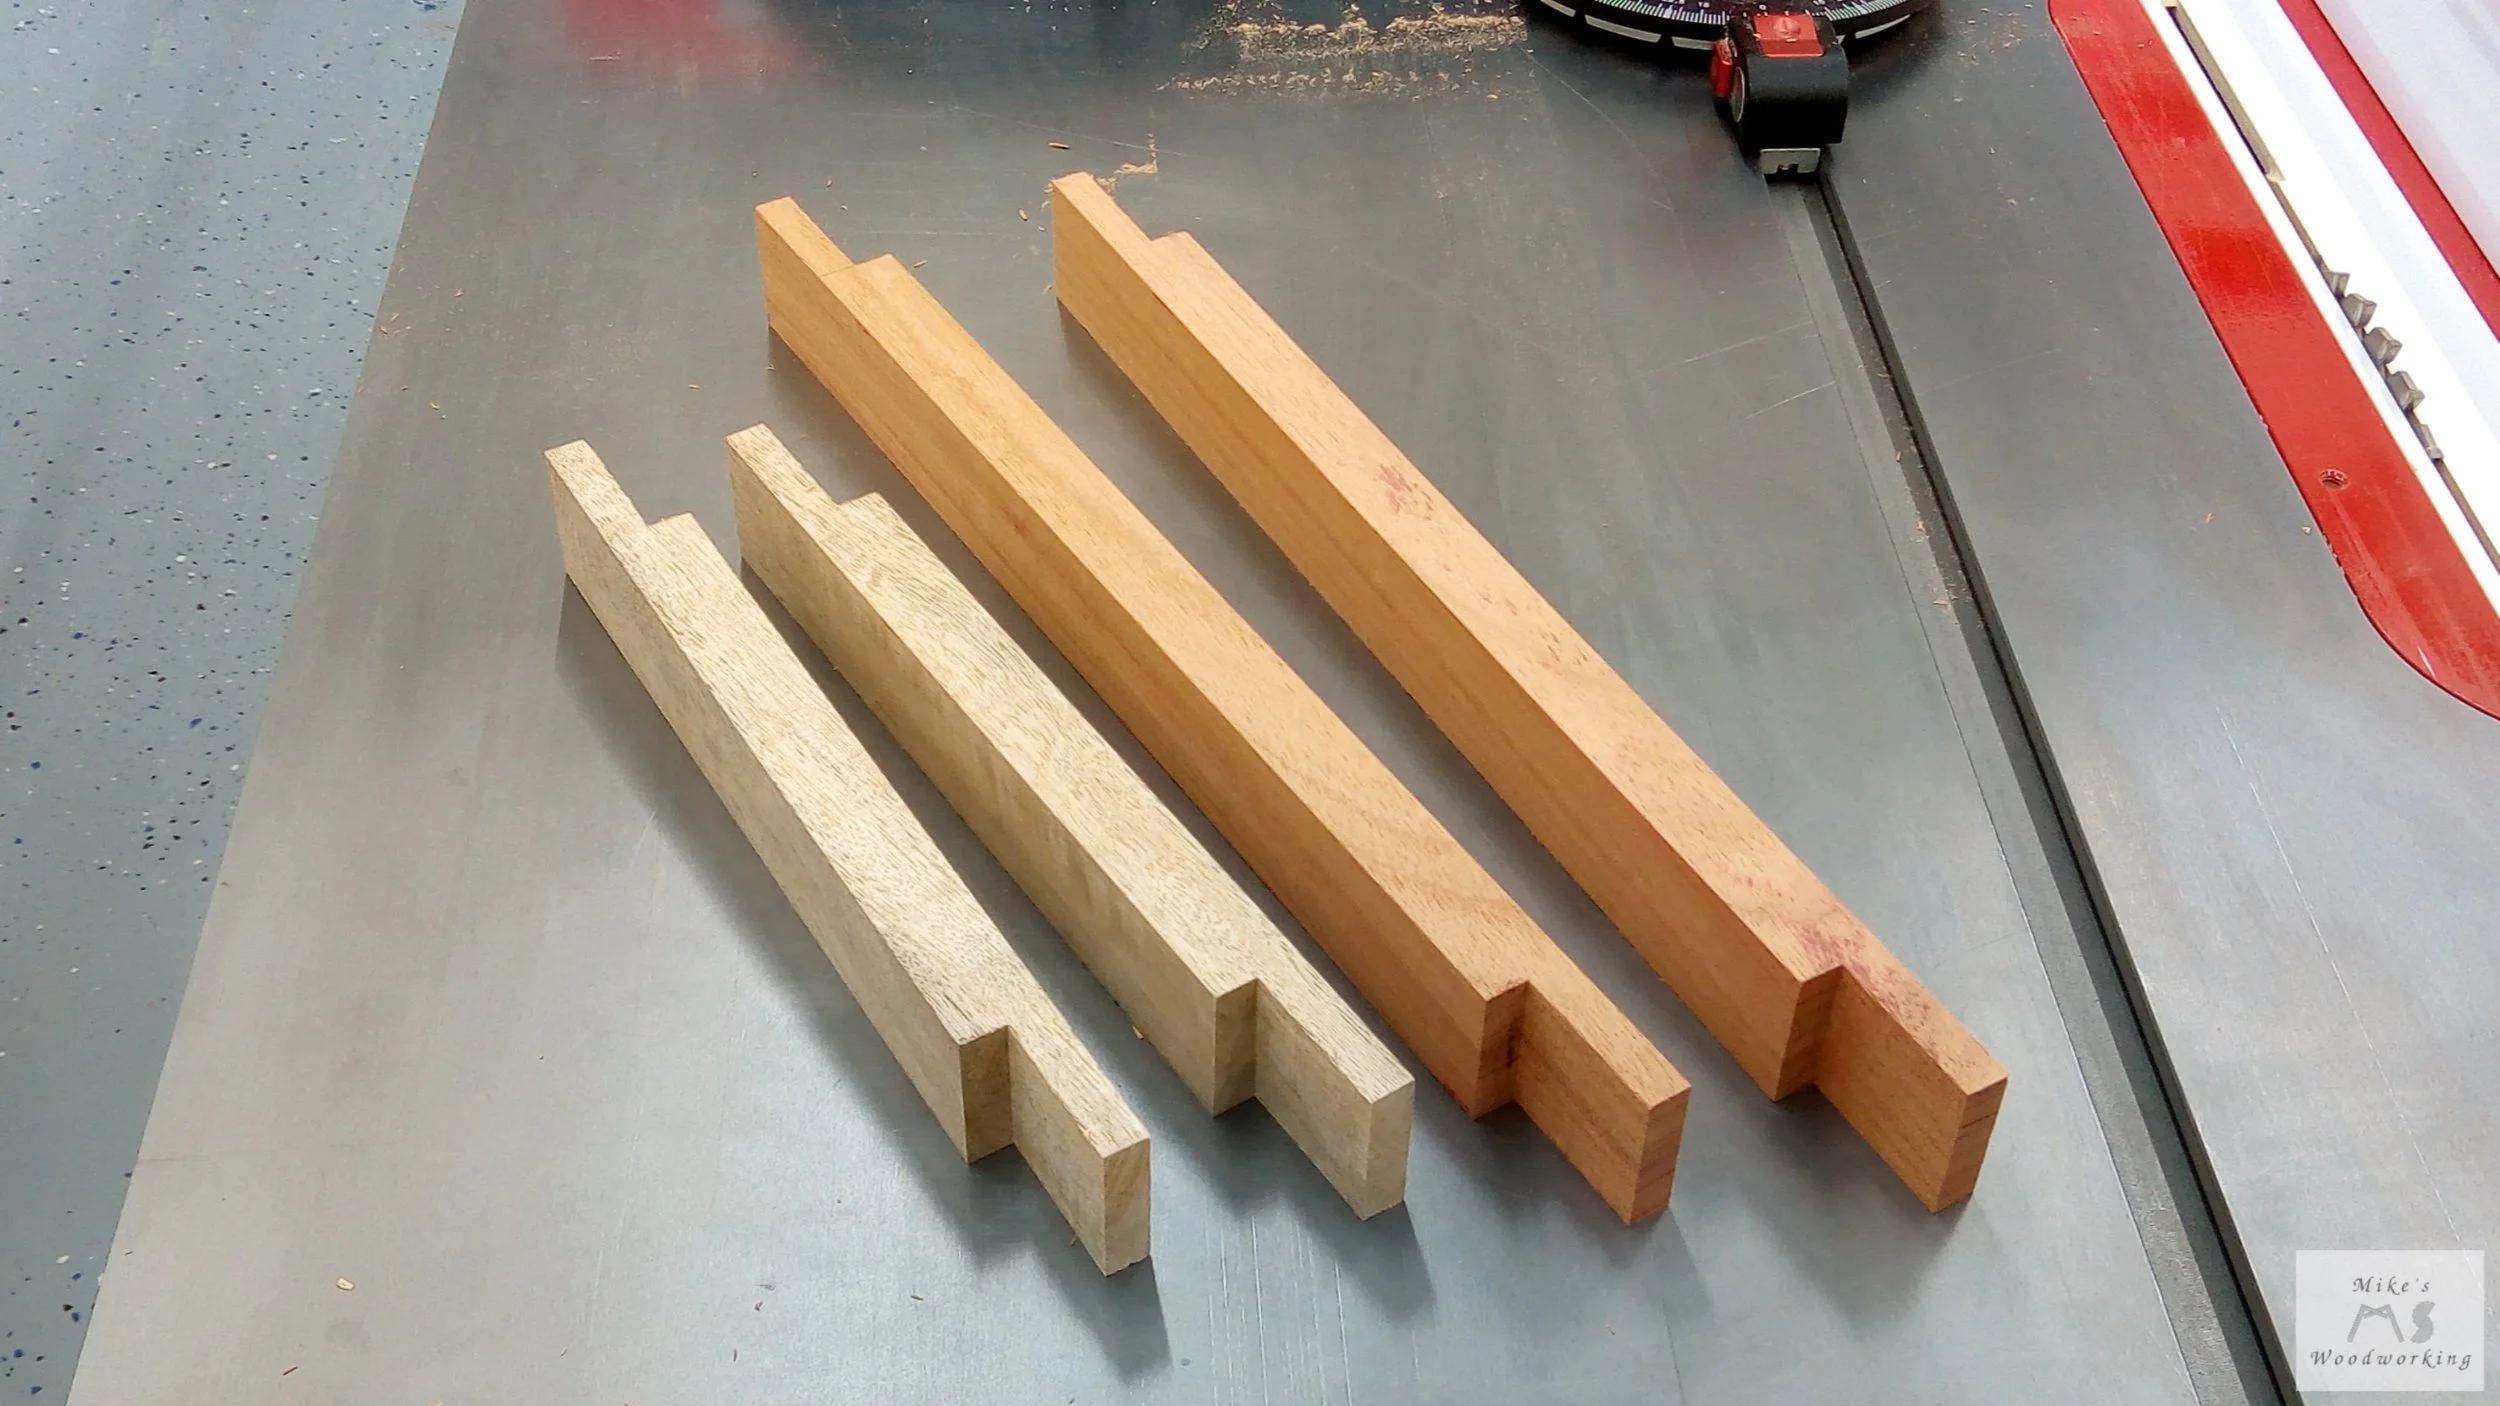
I opted to use white oak for the Dice Tower as I had quite a bit still on hand from the failed Hall Bench project a few years ago. Since I required 1/4” material for the entirety of this project, I only needed a few pieces of 3/4” material that I could “simply” resaw. I have simply in quotes as processing rough lumber is a little more labor intensive for me now that I no longer have a jointer in the shop.
All of the shorter pieces of white oak I wanted to use had a slight twist in them. To remove the twist, I first ran the pieces through the planer on a sled, shimming each piece to prevent any rocking. With the one side now flat and even, I could flip the pieces over and plane the other side. Next it was over to the table saw and my new Rockler Taper/Straight Line Jig to get one straight edge. With S3S lumber in hand, it was over to the band saw to resaw each of the pieces in half. One final trip through the planer and I had pieces that wound up being just slightly under 1/4” (not a big deal on a project like this).
Take #1
I was going to work on the tower portion of this project first since the tray’s dimensions were dependent on the size of the tower. I cut the tower sides to final dimensions based on the plans. Next up I needed to cut miters on the sides of each piece. I tipped my table saw blade to 45° and cut the first side of each piece. For the other side, I snuck up on my mark and made the final cut on each piece.
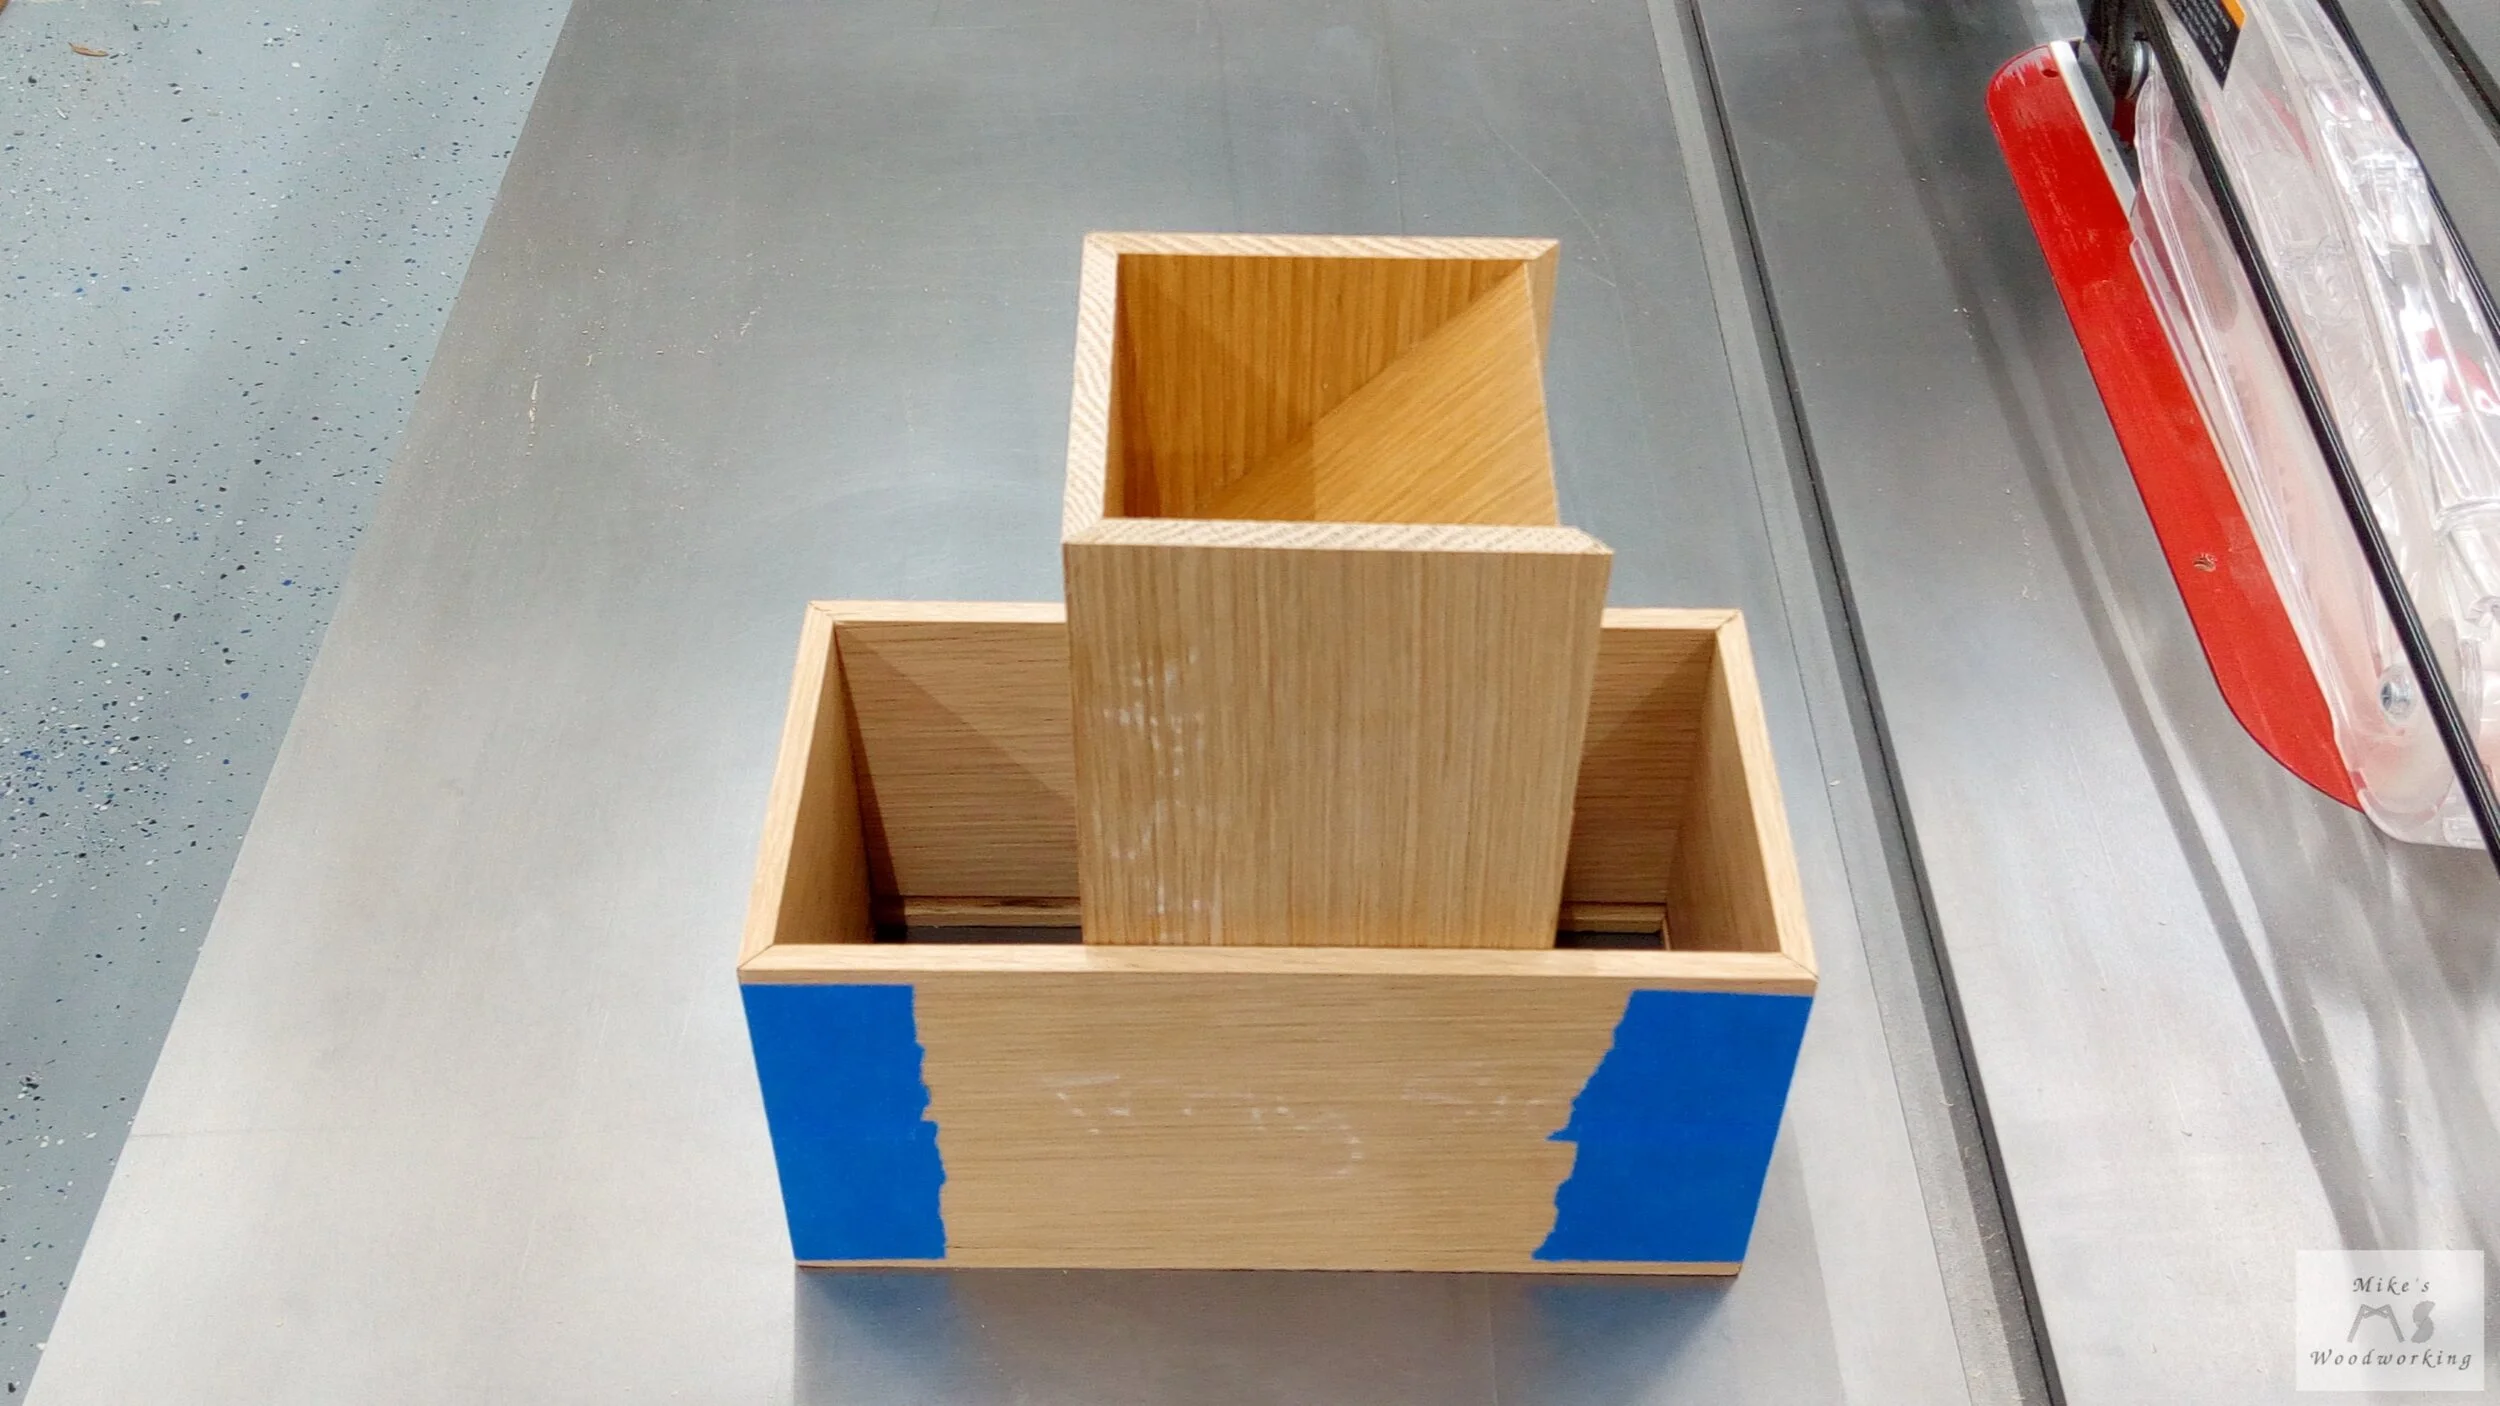
The quality of the miter cuts was not the best, and I was not entirely happy with the results. This was all due to a VERY dirty saw blade. I taped the tower box together to get a look at the miters and they definitely had some chipping along the joints. This could likely be sanded out, so I just left the edges alone for now.
Next up were the two ramps that went inside the tower. I measured the inside width of the tower mock-up and it was just a shade over the planned dimensions (likely due to my slightly undersized material). I cut the pieces to final dimensions and proceeded to cut the miters. These came out just o.k., and I was not too thrilled with their appearance. I’m still not very experienced with cutting miters on the table saw, so I think the pieces shifted a bit on me.
I only needed to clean the edges up a bit, so I wasn’t sure how to go about that. It then dawned on me that my oscillating belt sander would be the perfect tool for the job. I took my stock table saw miter gauge, attached a piece of scrap plywood to it for more support, and set it to 45° to the belt. With the added fence attached to the miter gauge, I had plenty of support for the two pieces, and cleaning up the miters was a breeze. They didn’t come out absolutely perfect, but as they are not structural miters, they were just fine for this application.

I laid out the tower sides on my workbench and marked where to place the ramps. Gluing all of these pieces together was going to be tricky. I was only using regular Titebond wood glue so I didn’t have a ton of working time. I applied glue in the long miters and then a tiny amount to the sides of the ramps. With everything in place, I folded up the box and had the whole thing taped together. I adjusted the ramps as best as I could and applied two clamps to hold the ramps in place while the glue dried. I tried to remove as much glue squeeze-out as I could before it dried and left the box to dry overnight.
Take #2
The following day I removed the painter’s tape and the box was rock solid. I was not happy with the results, however. There was a bit of dried glue in places that were going to be very difficult to remove, and I didn’t want to proceed further with the tray. Instead, I opted to completely remake the dice tower and do some things a little differently.
For my second go-around, I was going to try a few different things. Instead of cutting the longer miters on the table saw, I used a chamfer bit at the router table. Also, I would pre-finish the inside faces of the tower pieces with spray lacquer to make cleaning up any glue much easier. Finally, I’d make the miters for the ramp pieces entirely using the oscillating belt sander.
I ran some test material through the router table to dial in the height of my chamfer bit. I bought a brand new one from Rockler to make sure I got the best results possible. In addition, I also left the pieces for the sides longer than necessary so that I could trim them and eliminate any chipping caused by the chamfer bit on the ends of the white oak. All four pieces came out great and the joints were spot on.
The ramps were shaped on the belt sander as before. One edge did not turn out super crisp, but I was able to clean it up and make it work. I had the luxury of being able to flip the pieces around to hide the worst edge since it would be inside the tower. The results were fine.
My only concern now was attaching the ramps to the now lacquered sides of the tower. I knew regular wood glue wouldn’t work on lacquer, so I grabbed a couple pieces of scrap and tried attaching them with some superglue instead. I left the glue to dry overnight and the test piece seemed to hold up quite well. This was going to be my best option. I was trying to sand the areas where the ramps would be attached to the sides, so I could use wood glue, but that was a colossal pain in the ass, so I abandoned that idea entirely.
I ran a bead of wood glue along the miters and attached the ramps to one of the sides with superglue. I folded the box up like before, with superglue on all of the necessary edges of the ramps, and taped the box closed. The little bit of wood glue that squeezed out was easily wiped away with a damp rag. I think I was finally able to pull this off. I left the box to dry overnight and would proceed from there (hopefully).

I again used some clamps to keep the sides and ramps together. I added a third clamp for one of the corners.
Take #3
The next morning I removed all of the clamps and tape and the box was, again, rock solid. The superglue appeared to be holding well and the joints were good. One had a small gap along one edge, but some sanding would take care of that later.

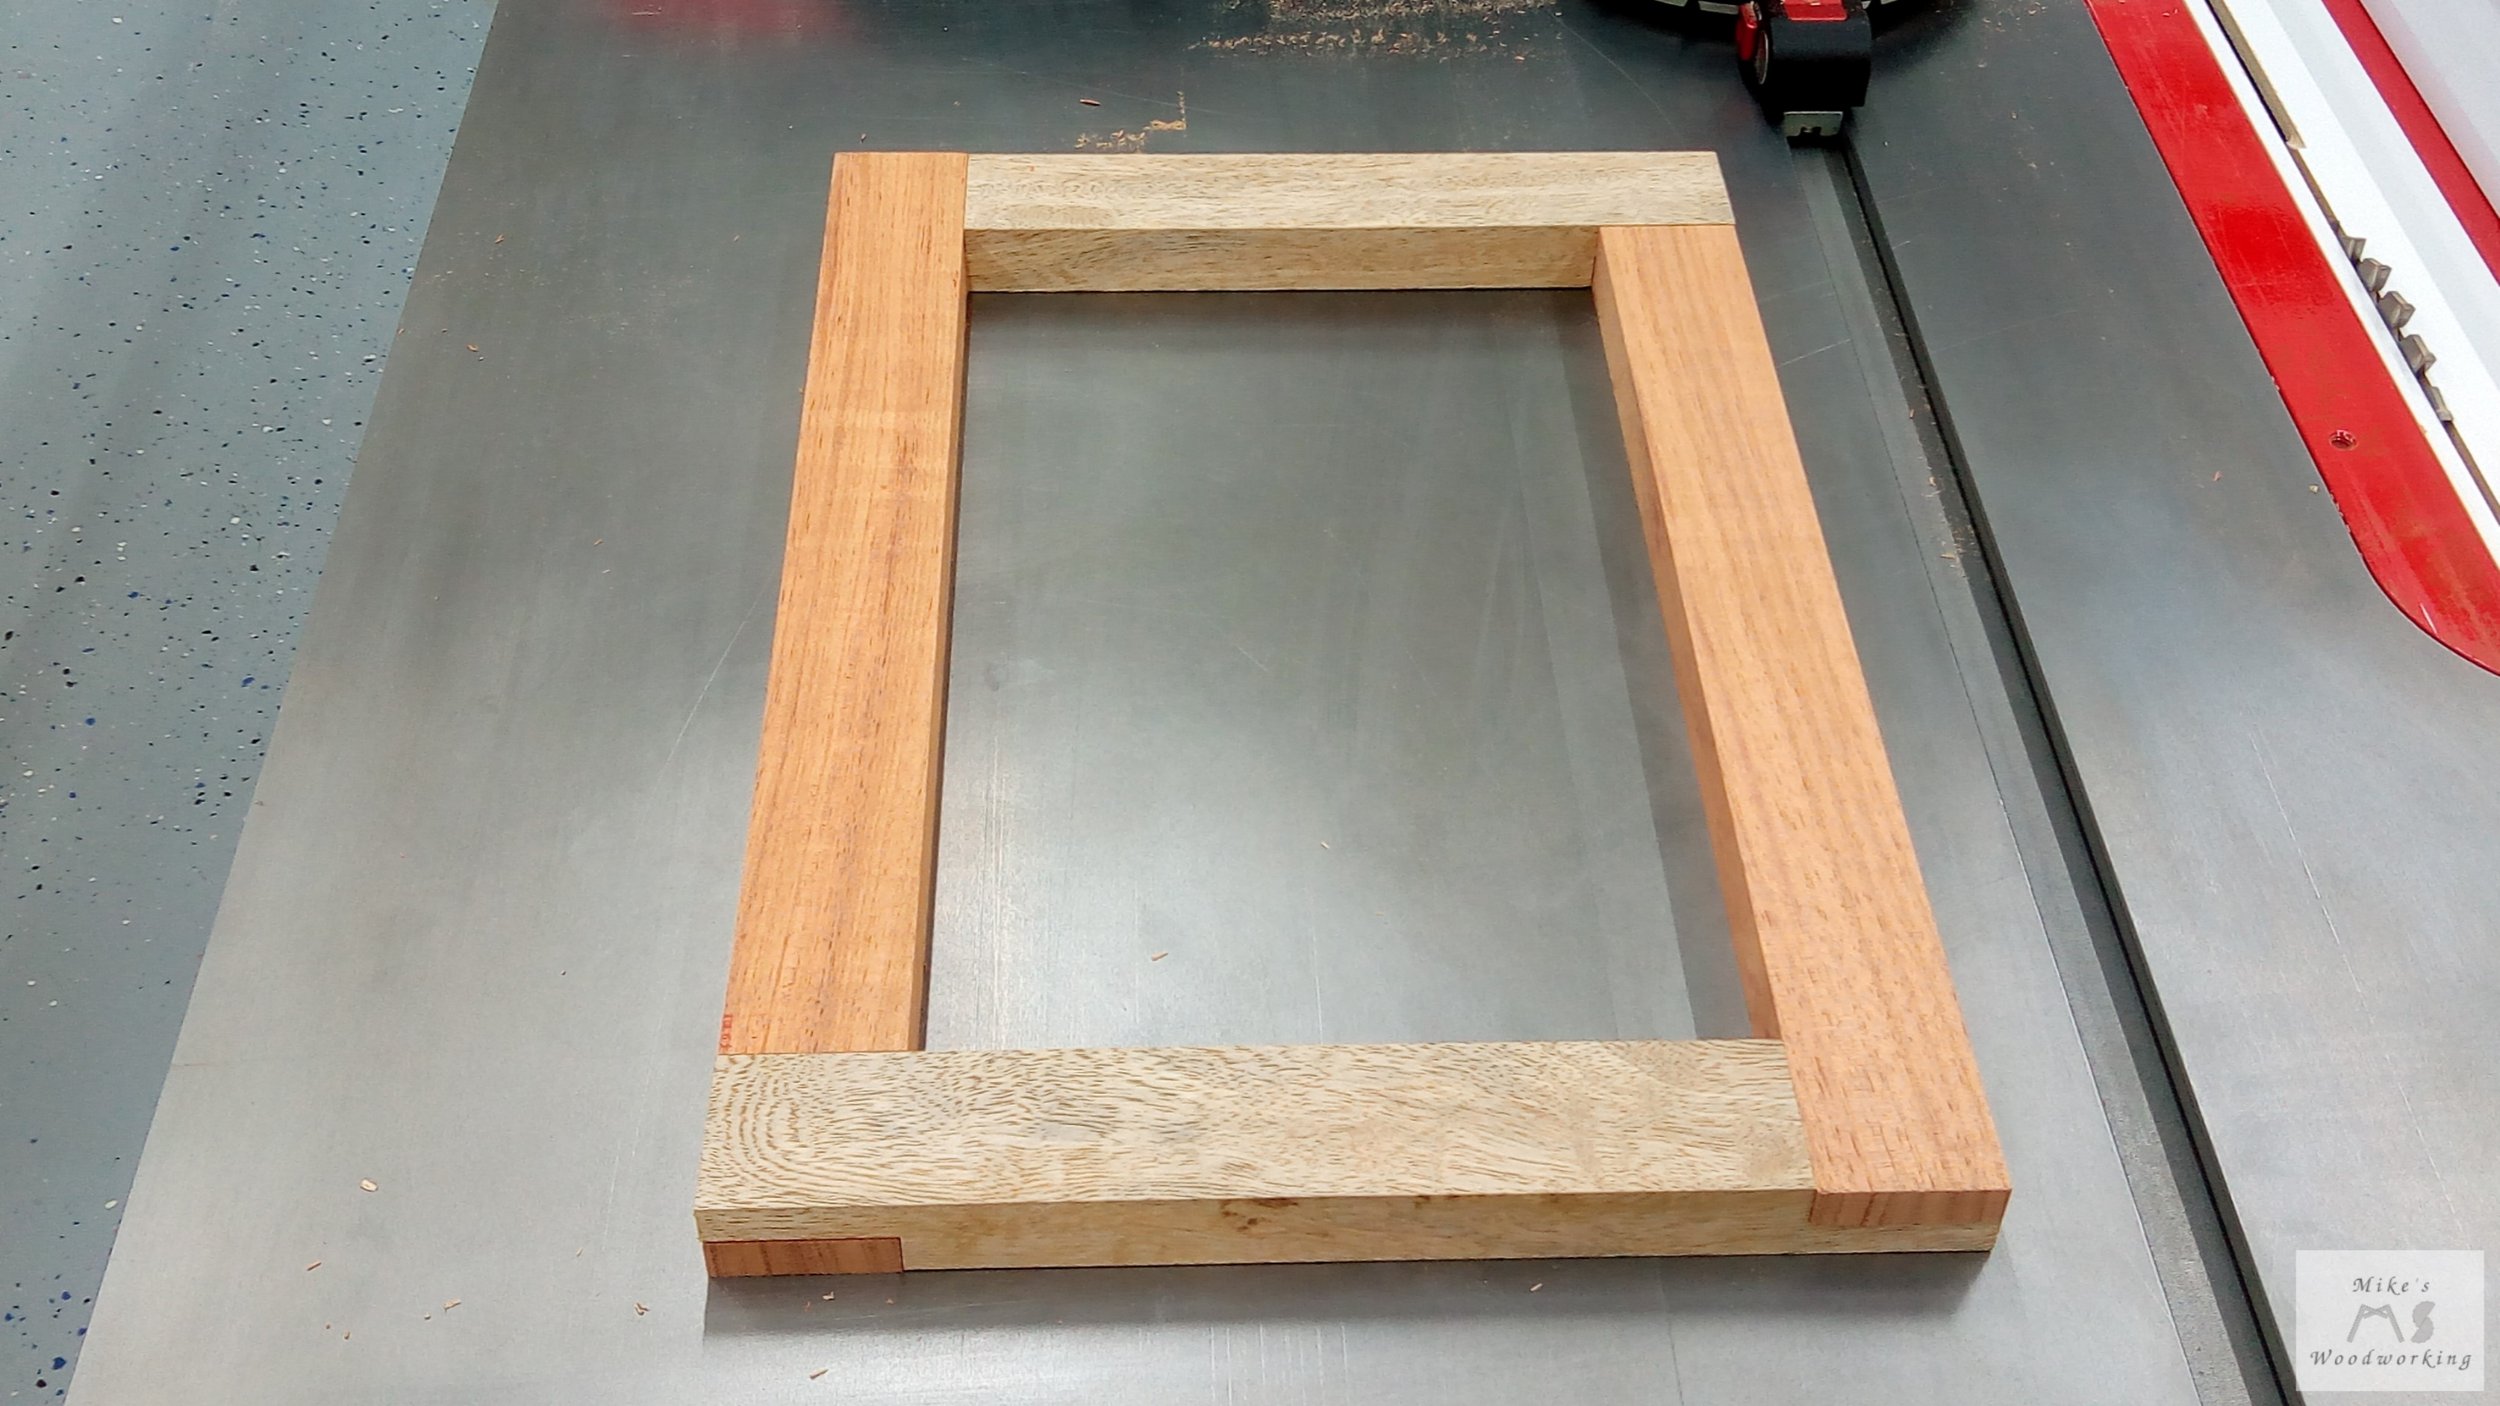
With the tower all but finished (sanding and lacquer not withstanding), I could now move on to the tray. I had to run a groove near the bottom of each piece to accept the bottom panel. Next came the miters. While the tray had similar construction to the tower with mitered joints forming a box, the shorter edges of the pieces would need the miters this time. I simply could not safely perform this at the router table, and the belt sander wasn’t precise enough. I would have to use the table saw for this task.
Before cutting the miters, I made sure that my blade was now clean after the previous iteration of the Dice Tower. After some careful measuring of the tower, I made my cuts on the table saw with my Harvey miter gauge. I was not confident at all while running these pieces through the saw, especially the shorter ones, and it clearly showed. Also, I was trying to cut the miters on the side of the blade that was tipping away from the miter gauge. This was causing the pieces to move while cutting them, creating a wavy edge.
After jacking up these pieces, I used the pieces I had set aside for the tray of the first Dice Tower and used those instead. I cut them to width and ran the groove again without issue. This time, however, I wanted to make sure my miters would come out perfect.
I wasn’t feeling good with using the miter gauge with the blade tilted, so I decided to try something different. I took my cross-cut sled and cut a slot in it with the blade tilted to 45°. This would give me a zero-clearance groove to prevent chipping, plus it would allow me to used my Katz-Moses stop block to help hold the pieces in place so it wouldn’t shift on me. This worked out absolutely perfectly, and my miters came out great…weeeeeeeeeeeellllllllllllllll just hold that thought there, sonny.
Oops…
I taped the tray pieces together so I could test the fit of the tower. I noticed right away that I had a small problem.

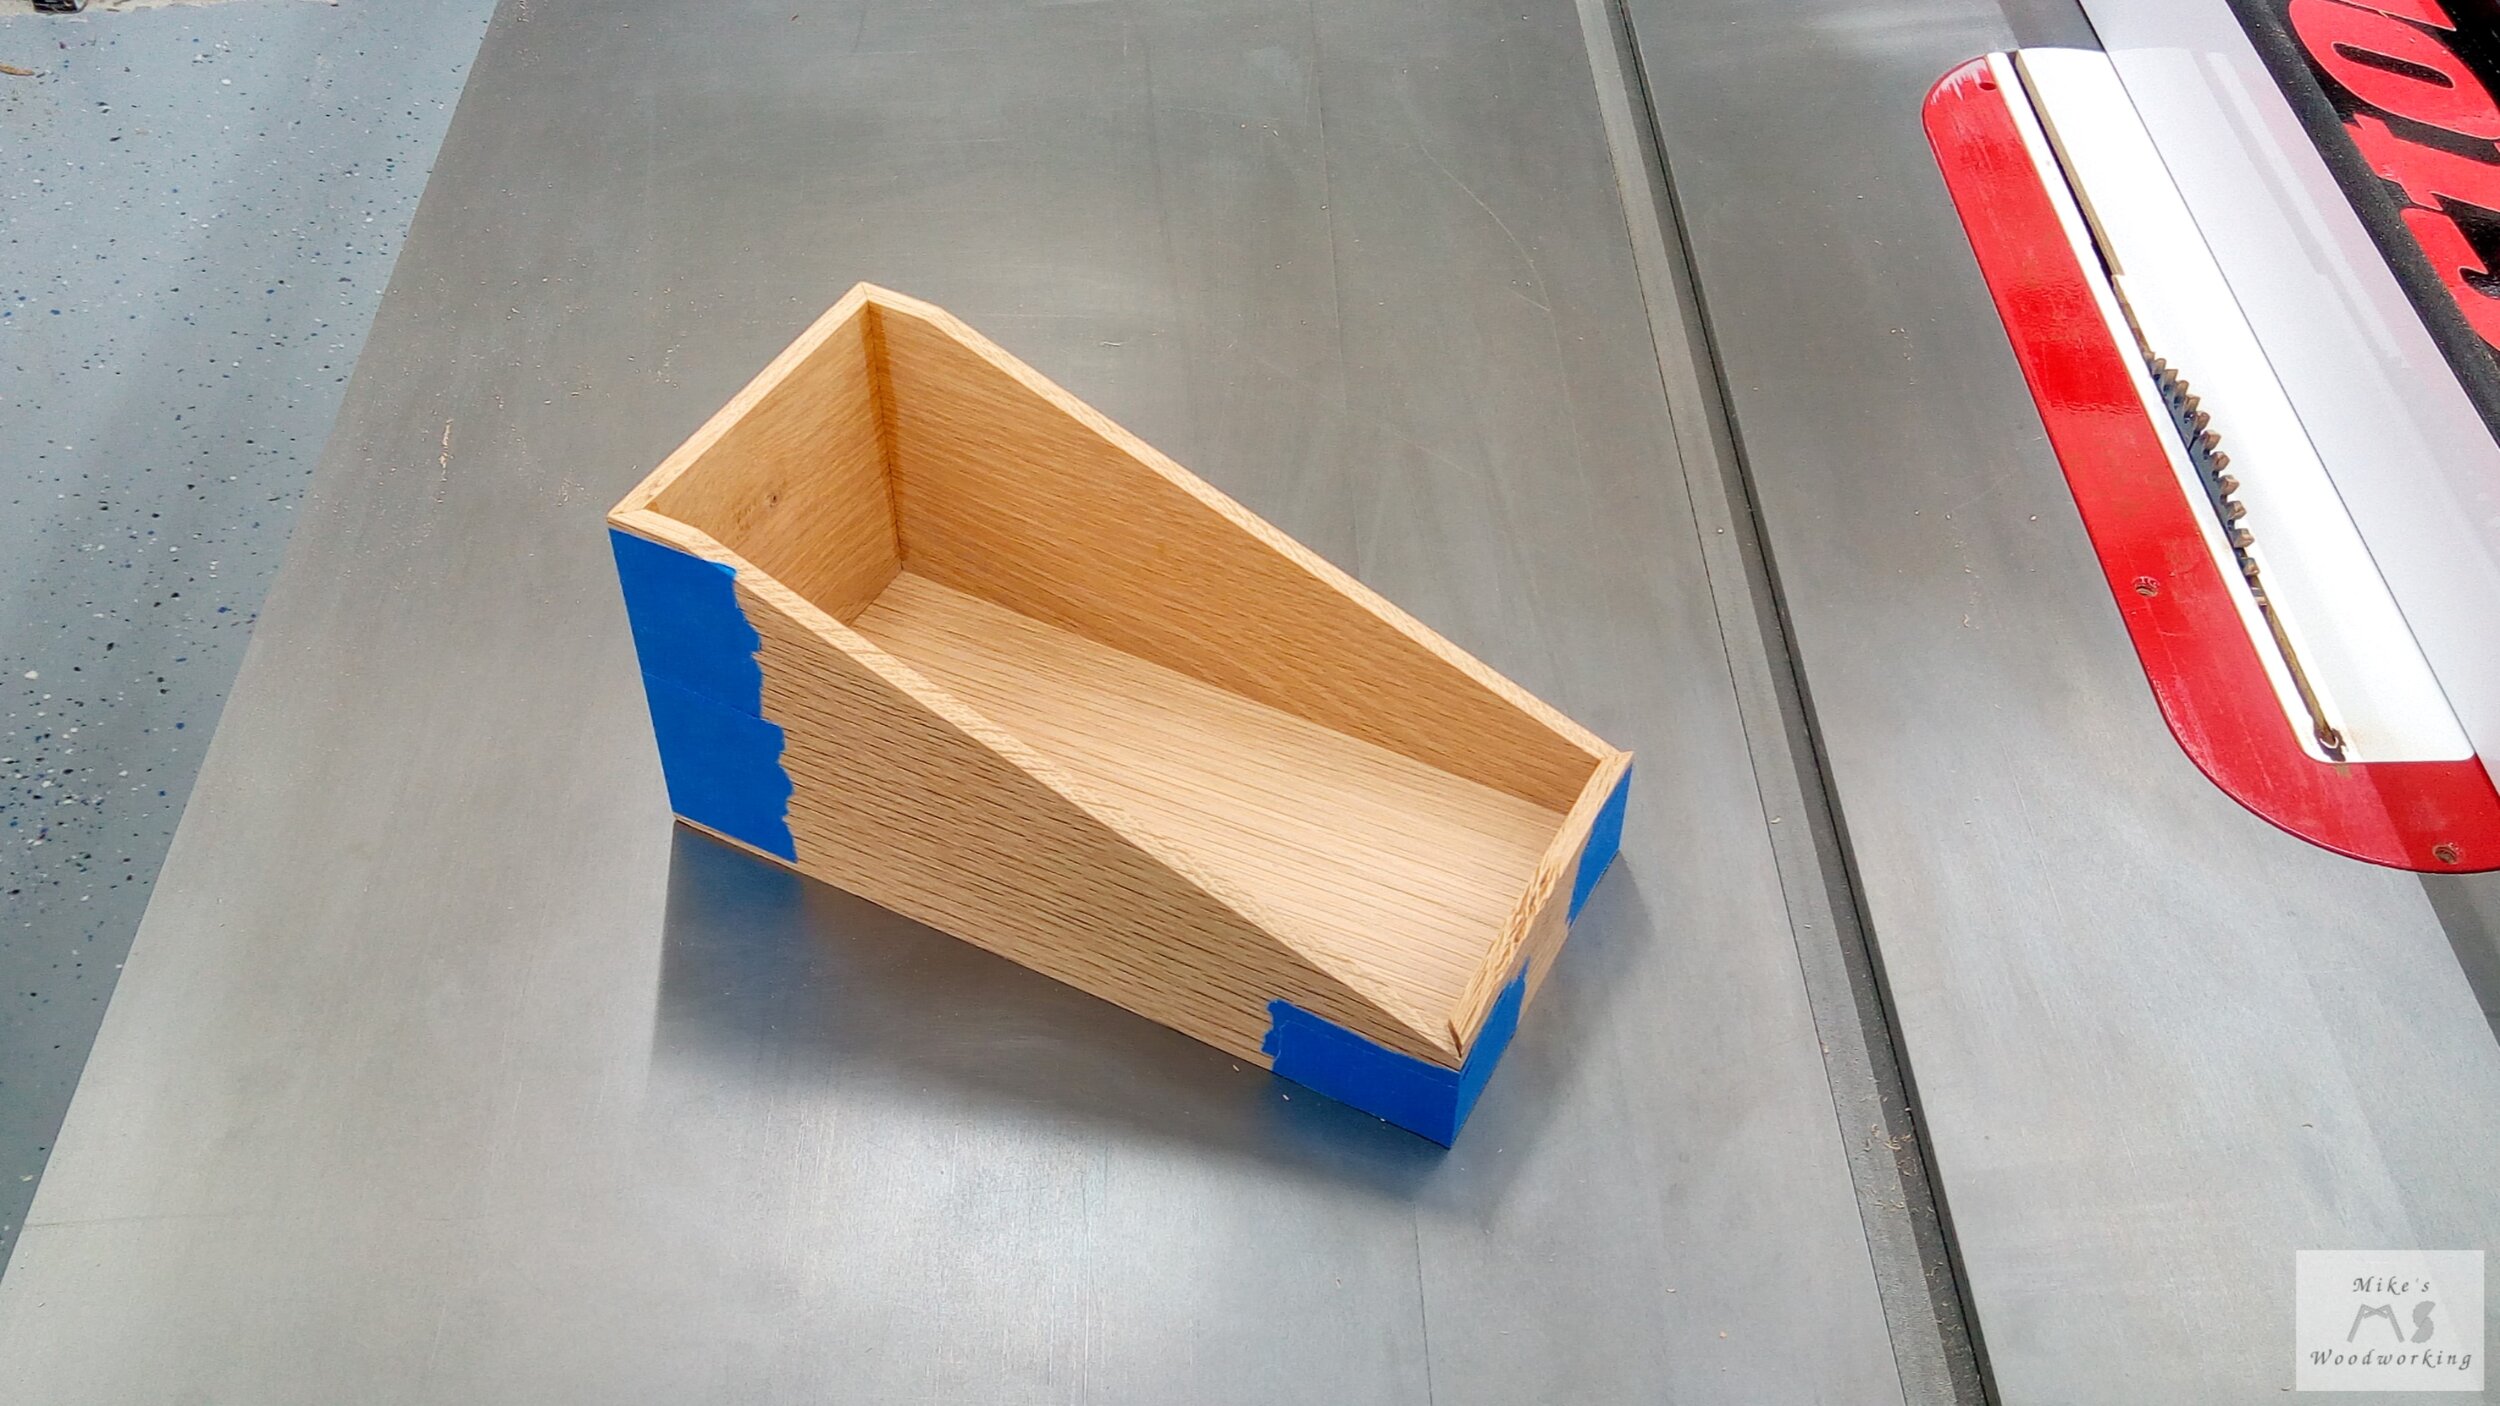
As you can see from the above pictures, the tower fit perfectly along its width, but when I went to test the length I saw that I had cut the sides too short. How was this possible? I quickly found where my error arose and it was my own fault. When setting the stop block on the sled, I failed to take into account the miters. This caused the sides to be cut short by over 1/2”. I cut MORE material to make the tray sides again and THIS time I made sure to set my stop block properly. I made the cuts again, mocked up the tray, and everything was perfect.
With everything cut properly, before I could glue up the tray I needed to cut the bottom to proper width and length. This was a lot of trial and error, but I got it to fit just fine. Next I needed to cut a diagonal along the sides of the tray pieces as well as cut the front piece shorter. I made my marks on the sides, drew my lines and ALMOST screwed up again. I needed to make these pieces mirror images of each other and not exact copies (the grooves and miters necessitate this). Thankfully I caught that before any cutting commenced. With everything marked, I made the diagonal cuts at the band saw as it was the easiest method. I taped the sides of the tray together and ran the freshly cut edge along the belt sander to clean them up and even them out.
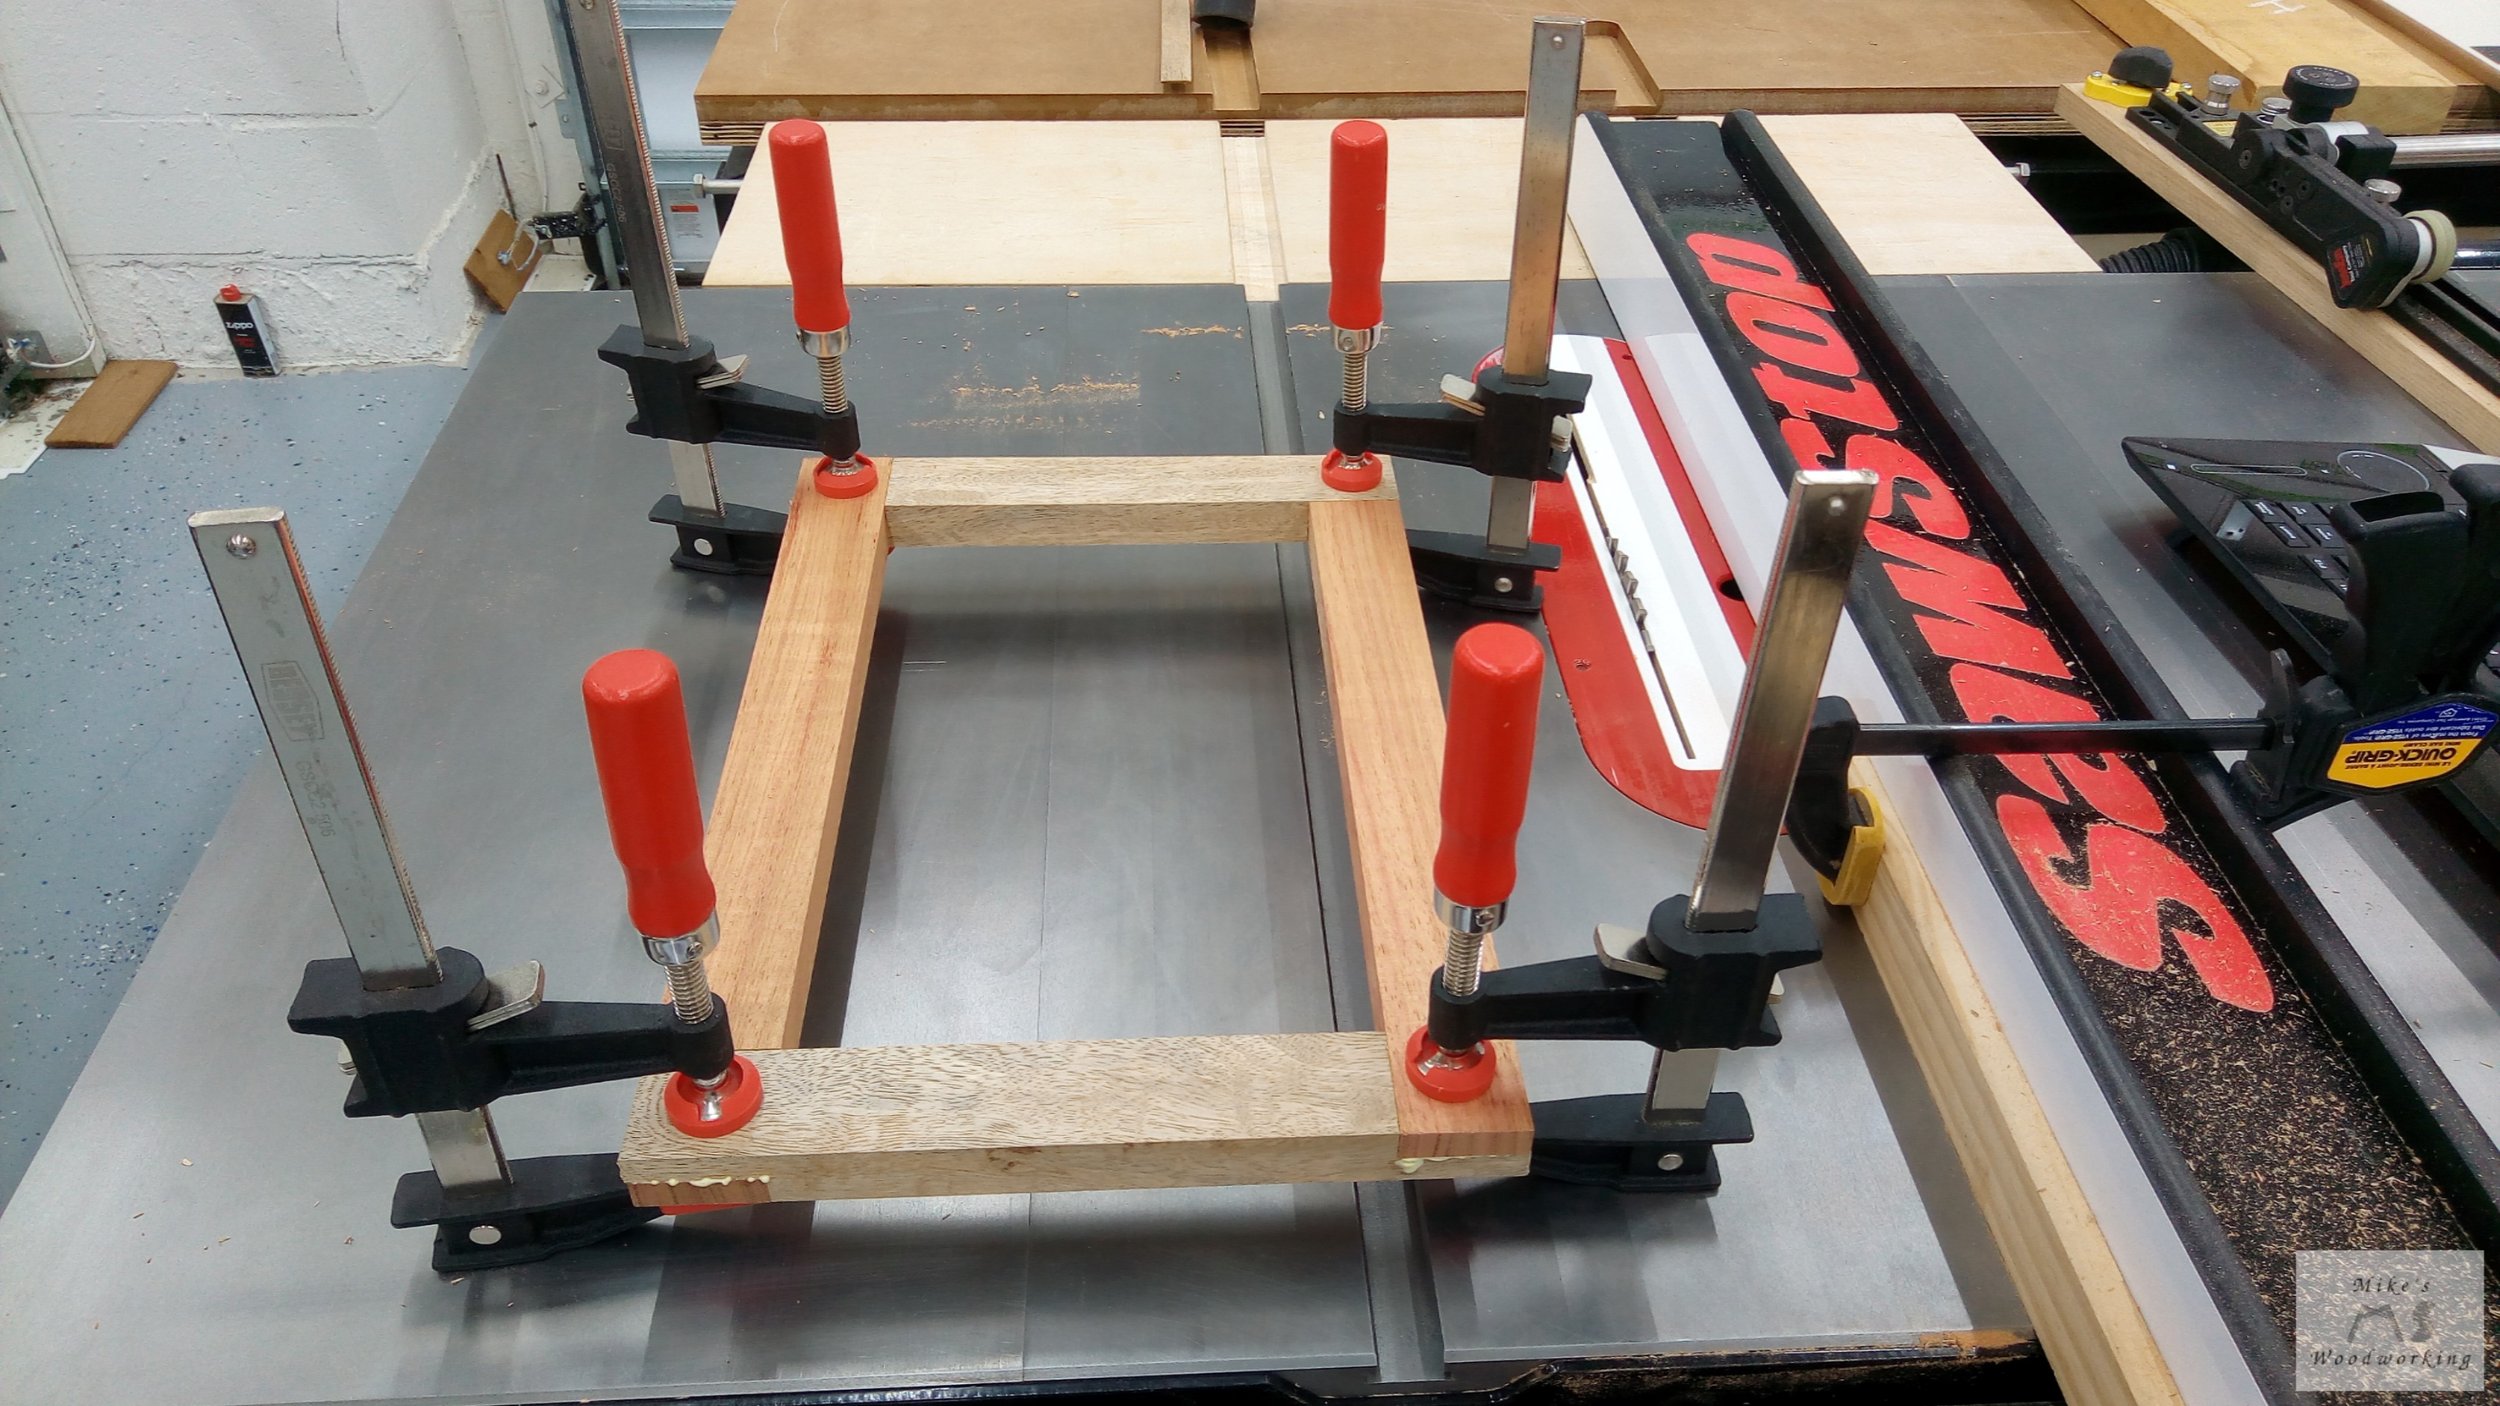
Gluing up the tray was much like the tower, only I had a bottom panel to contend with this time. I applied a small amount of glue in a few spots in the groove for the bottom and a small bead for the miters. I wasn’t too concerned with squeeze-out on the inside miters as this area would be covered later by flocking material. I folded up the tray, taped the corners and left it to dry overnight.
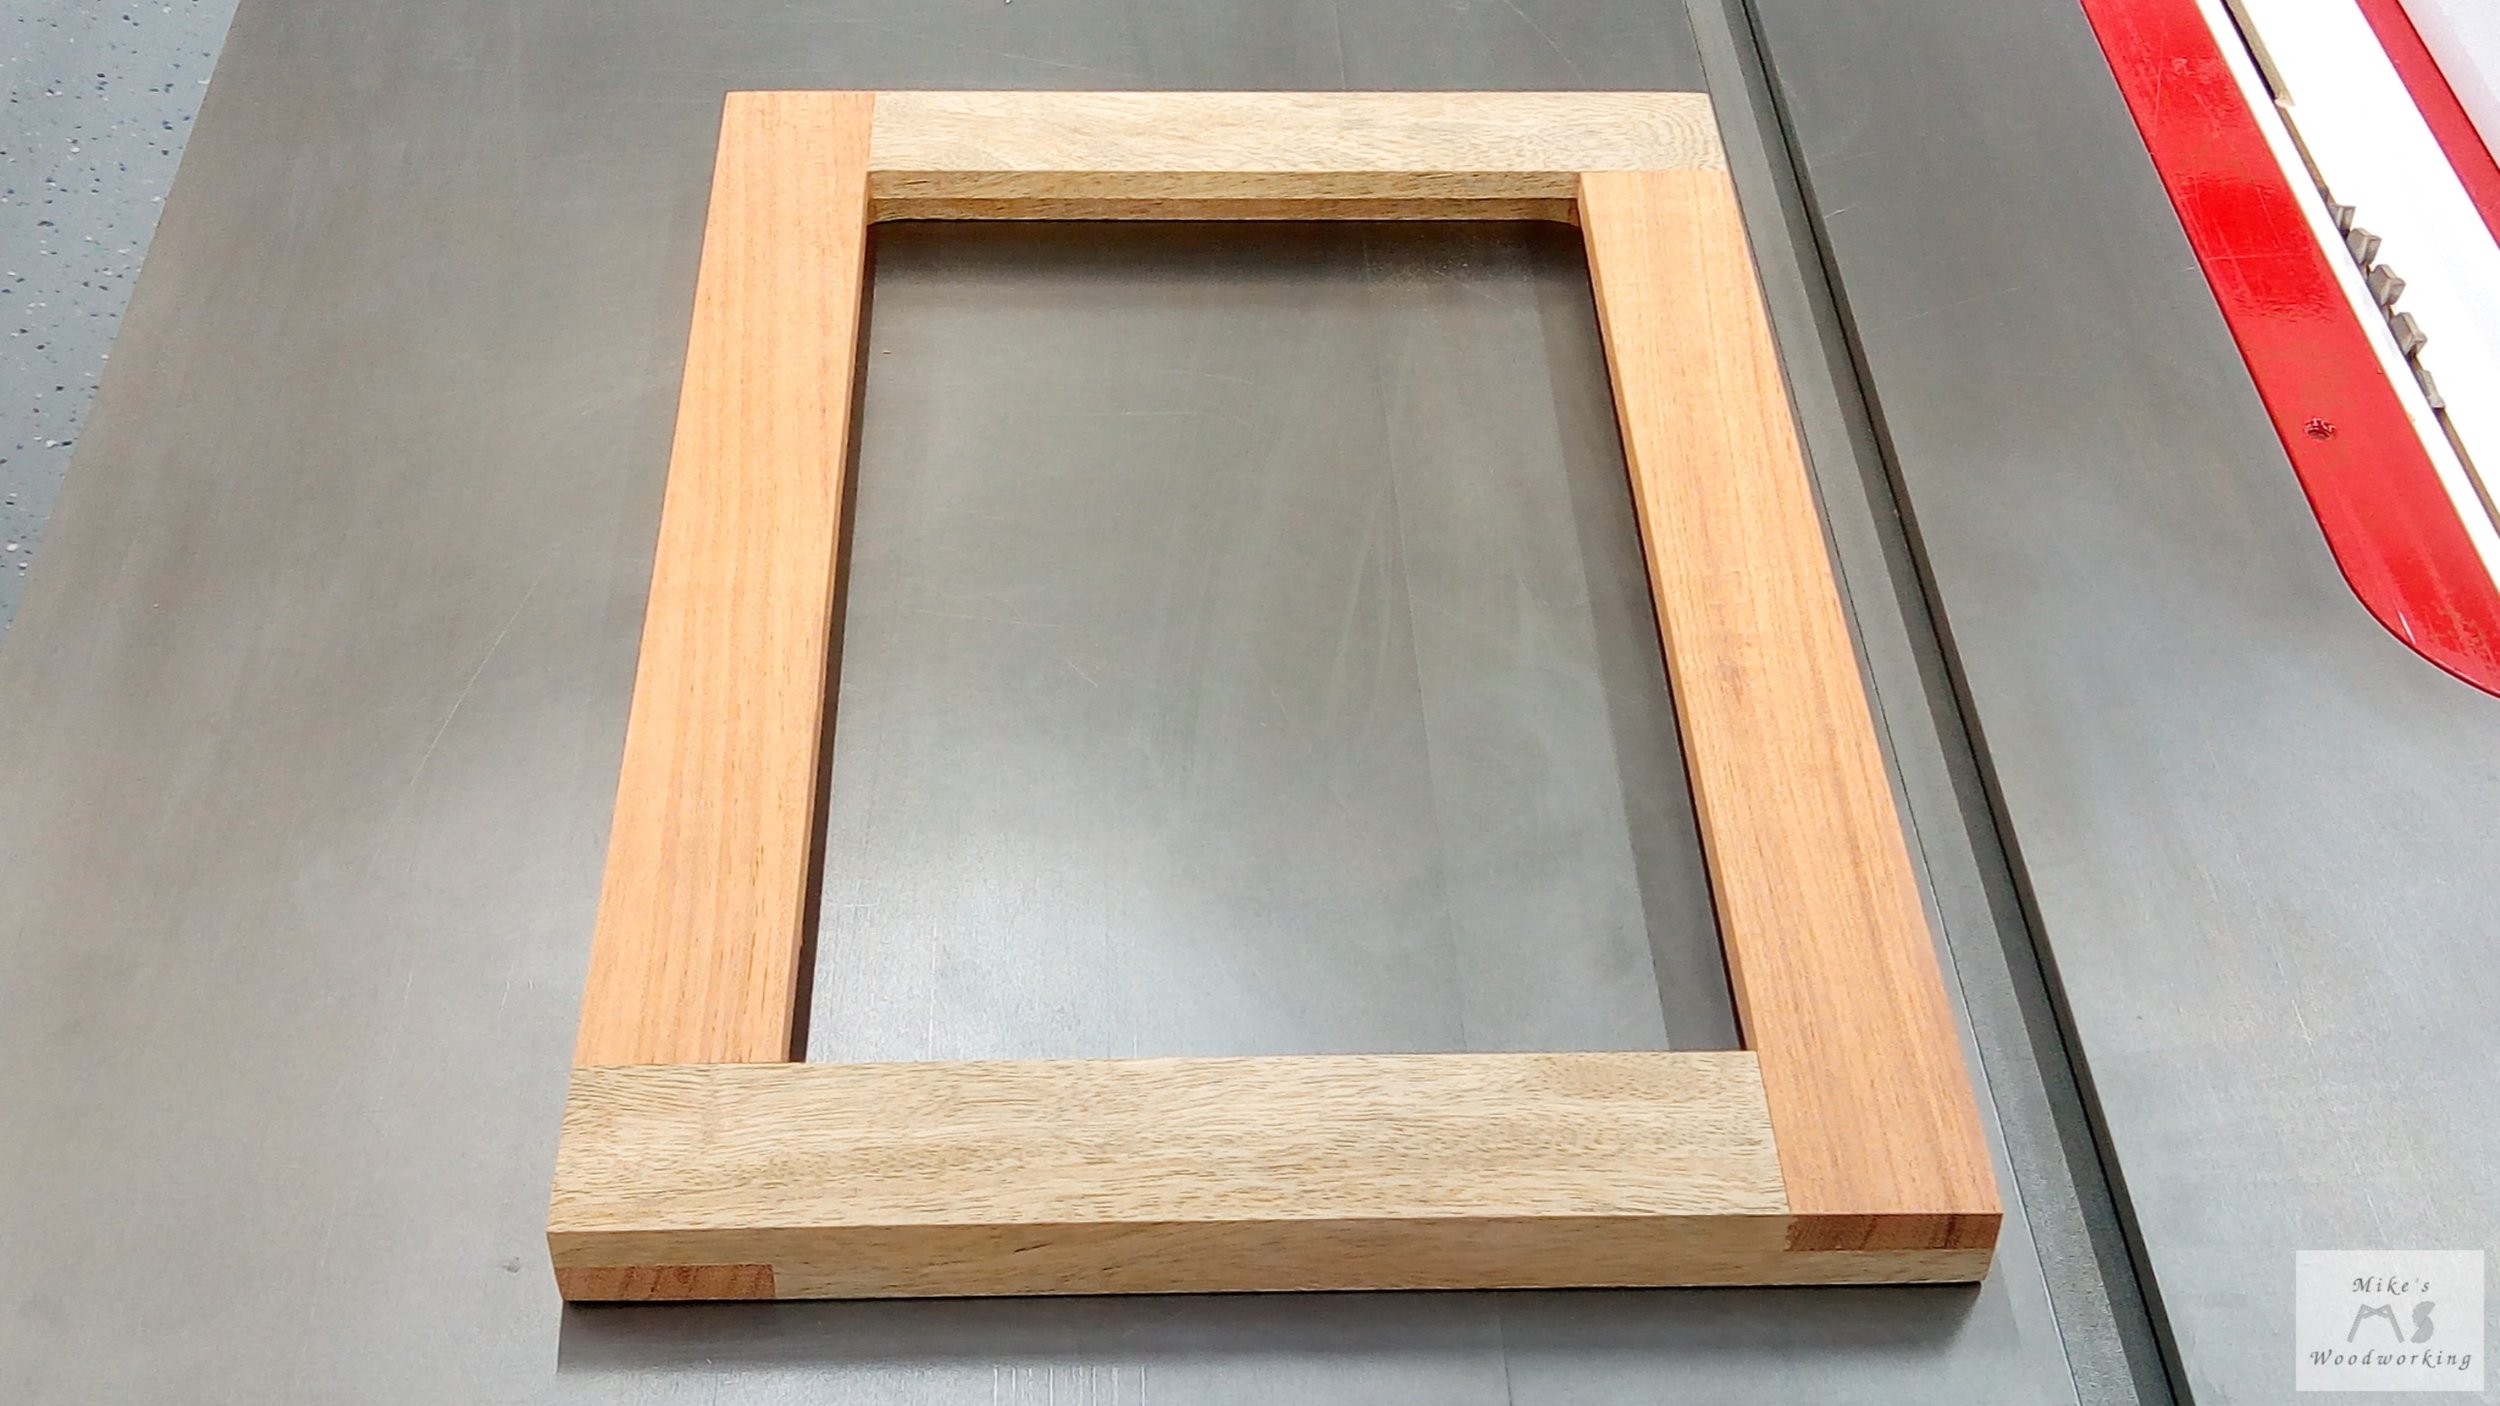
The Plane Truth
By the next morning, everything was dried and the tray was solid. I double-checked the fit of the tower prior to gluing up the tray and it fit perfectly. The only thing left on the tray was that small lip on the front piece. Because of the angle of the sides, the front was cut slightly higher than the short edge of the sides. In Marc’s video, he shows using a block plane to clean up most of this and then sanding all of the edges flat with a sanding block. There’s only one problem with that…I don’t have ANY hand planes in my workshop.
I decided to head on down to Rockler and asked for some help with the hand planes. I explained what I was looking for and I was pointed towards the Stanley #60-1/2 Sweetheart low angle block plane. When I got home, I took it out of the box, cleaned it up, set up the plane, and tested it on a piece of scrap white oak laying on my workbench. The first few strokes were a bit rough, but it was cutting very nicely and left a super smooth edge.
I started working on the front of the tray and it was a bit rough. It seemed like the grain was going in two different directions and causing the plane to snag. I kept working from both sides of the piece and got most of the top of the front planed down. There was still a bit left to remove, but I figured sanding could take care of it. That was it for the day.
The next morning I went back and decided to mess with the plane again. I eased the blade back a bit more and tried cutting with that. It was much easier to run the plane over the edge of a board now that I wasn’t taking so much material in one shot. I tried it again on the tray front and I was able to easily shave away the remaining material in smooth continuous strokes…problem solved.
Show Me ‘Sand the Dice Tower’
I glued sandpaper to some scrap plywood and made a couple of sanding blocks to blend the edges of the sides and front of the tray. This only took a few minutes and everything was nice and even. I continued to sand the rest of the tray up to 180-grit. There was some staining from the glue squeeze-out that I wiped up before the glue dried still in the corners, but I didn’t bother removing it. Between the lacquer and the black flocking adhesive and the black flocking material, none of that would be seen anyway.
I continued to sand the rest of the tray and then proceeded to do the same with the tower. I went from 80 to 120 to 180-grit on both pieces, utilizing the pencil trick to make sure I was sanding each surface completely with each grit. I also took the opportunity to ease all of the edges with 180-grit as well. I did not want any sharp edges or points as this project might very well be used by kids, not to mention it just feels so much nicer with smooth edges.
Now that everything was properly sanded, I vacuumed off the dust and then took some mineral spirits to wipe down all of the unfinished surfaces. After letting the mineral spirits evaporate, I sprayed on three coats of lacquer on the tray. It was important to seal the wood completely on the inside of the tray as the flocking adhesive might seep into untreated wood unevenly and caused a horrible finished product. Once the inside of the tray was done, I flipped it over and applied three coats of lacquer to the bottom as well.
What the Flock are You Talking About?
With the tray finished, I decided to let that cure overnight before proceeding to the next step. The inside of the tray called for it to be flocked (at least according to Marc’s plans). It wasn’t entirely necessary, but I liked the look of Marc’s finished Dice Towers, so I wanted to go the same route. I was a complete newb when it came to flocking. I’d only seen it done a couple of times on YouTube, most recently in Marc’s video showing the building of his Dice Tower.
For those who might not know what I’m talking about, flocking is the process of depositing many small fiber particles (called flock) onto a surface. An adhesive is applied to the desired surface to be “flocked” and a fine powder is sprayed onto the glued surface. Once the adhesive dries, any excess flocking material can be shaken or vacuumed away leaving a velvety surface behind.
Before attempting this on the finished product, I wanted to try it out on some scrap pieces first. I had already ordered the flocking adhesive, flocking fibers, the flocking applicator, as well as some small brushes from Amazon. I made sure to read and follow the instructions provided with the adhesive. It was really a simple process.
First, make sure the surface is cleaned and sealed with shellac or lacquer (already done). Next brush on a layer of the self-leveling adhesive, making sure to cover the entire surface evenly. Next, generously apply the fibers with the applicator. It is worth pointing out that the instructions specifically state that once you think you’ve applied enough fibers, apply more as you cannot overdo it. Once that is finished, the adhesive can be left to dry overnight.
The next morning, now that the lacquer and flocking test pieces have dried, I took the test pieces and shook off the excess flocking material. I think I probably could have applied a bit more glue to one of them, but they both came out fine otherwise. Now that I’m feeling confident in what I’m doing, it was time work on the real thing.
First I taped off the top edges of the tray sides and front/back to make sure I didn’t get adhesive everywhere. I applied the adhesive to all of the surfaces generously and quickly grabbed the flocking applicator. The adhesive only has 15 minutes of open time, so I had to act quickly. I was EXTREMELY generous with how much flocking I was applying, to the point that I had mounds of it on the surface of the tray. I checked with a flashlight to make sure all of the adhesive was covered and I was satisfied. I left the tray to sit overnight.
The following day I went to check on my flocking job and I was not entirely happy. I might have gone a little light on the glue and/or flocking material in one spot on the bottom of the tray. On top of that, I somehow got some of the adhesive on the bottom of the tray and on one of the sides. Once I got all of the excess flocking material off the tray, I set about to clean up the stray adhesive.
After some checking I found that acetone worked to clean off the unwanted adhesive, but it would likely ruin my lacquer finish. At that point I didn’t care about the finish as I could simply respray the lacquer. I got off most of the adhesive (some was in an all-but-inaccessible crack between the bottom panel and one of the sides). I resprayed the lacquer and smoothed it out with some kraft paper and it came out alright.
I checked the fit of the tower inside the tray and it was still a good fit. I applied three coats of spray lacquer to the tower and buffed that out with kraft paper as well. Other than some curing time for the lacquer and adhesive, the Dice Tower was now finished.
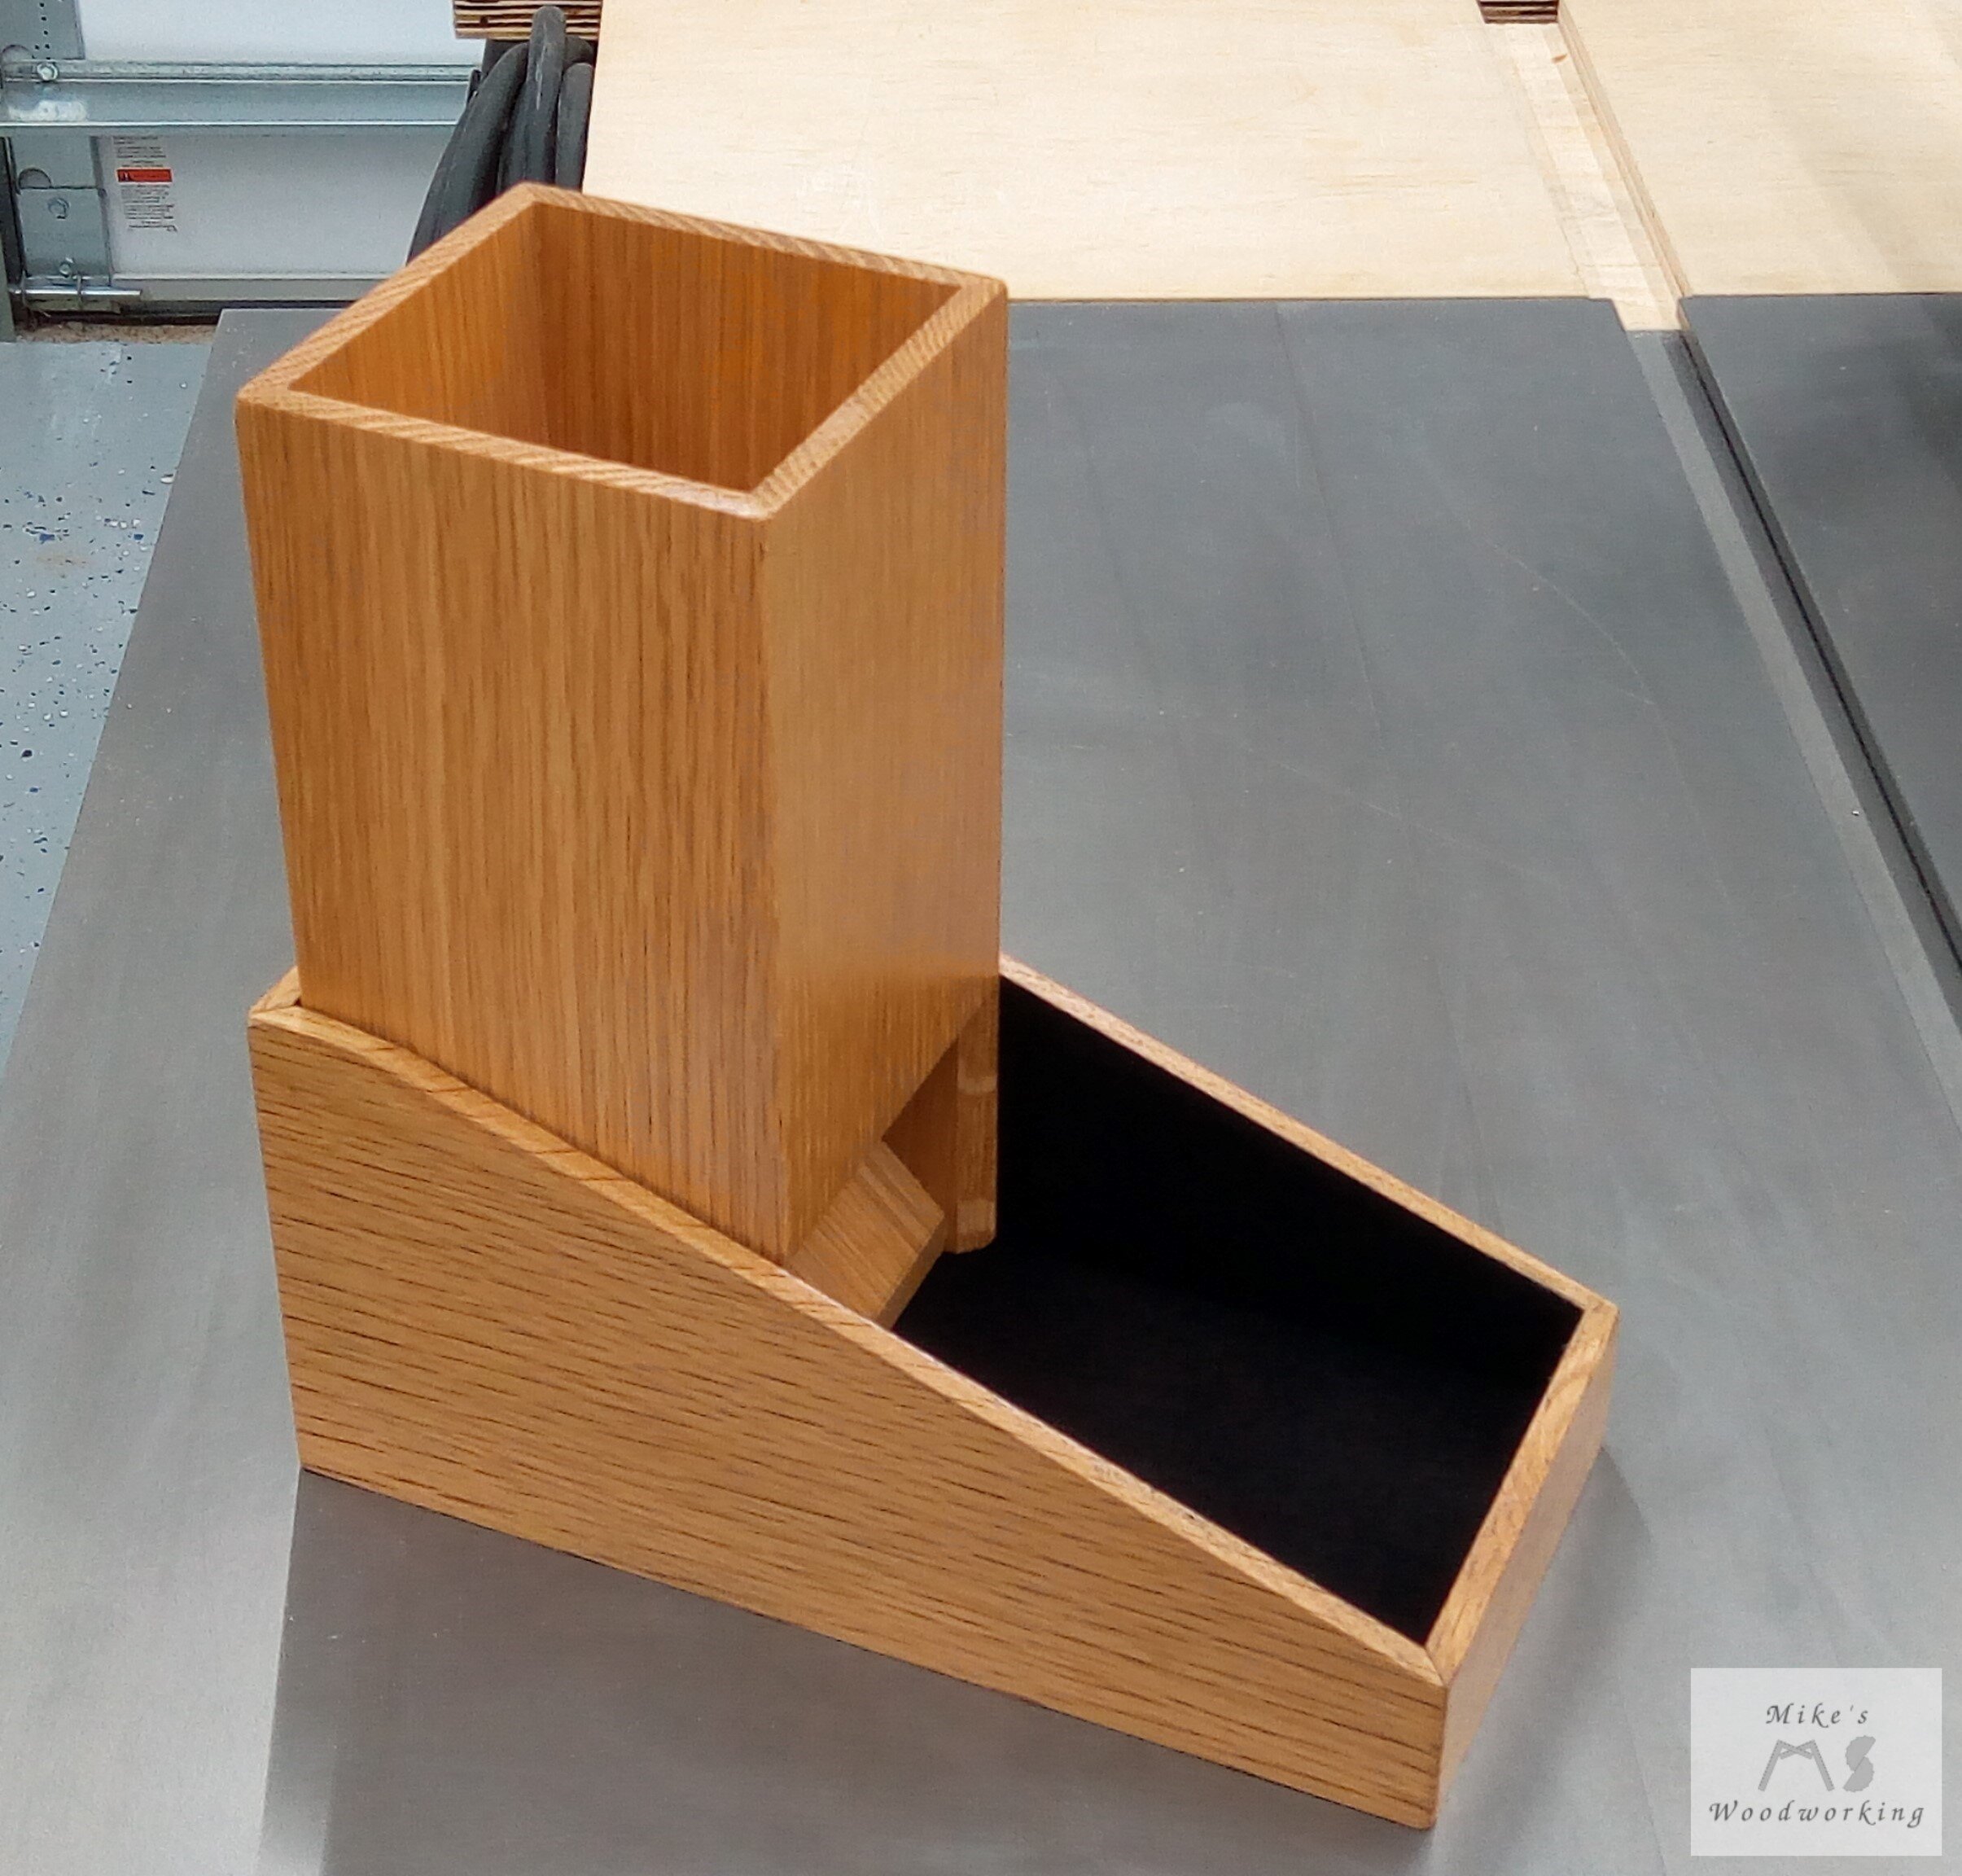

This project kicked my ass a couple of times (especially those miters), but I was able to overcome my mistakes for the most part. I’ve got some learning to do when it comes to applying flocking, but I’ll get more practice on that with another upcoming pair of Christmas presents. Despite all of the hiccups, I’m happy with the end result. Bill & Wesley will likely not notice any of the small flaws, and the Dice Tower should be a huge hit.
Die-Abolical Puzzles
From what I gathered, the COG puzzles I made for Bill’s and Wesley’s boys last year were a big hit. I thought I would give both of them another puzzle this year, only this time it would be a bit more challenging. I did a quick search on YouTube to find videos of other puzzles that I might want to make. I came across a video made a few years ago by Neil Paskin at Pask Makes as part of his “Scrapwood Challenge” series.

It’s a type of packing puzzle where you have to fit all of the pieces inside of a box with nothing sticking out. I liked the idea of this and thought it should be challenging for the boys, much more-so than the COG puzzle. Neil drilled a hole in each side of the box and I had an idea to add to that premise. Since the box was essentially a cube, I wanted to add a lid and make the whole box look like a big singular die, hence the “die-abolical” puzzle name (I know it’s a terrible pun, but I thought it was cute). One other change I’m making to Neil’s design was to make it a bit bigger. His was in all metric units anyway and I needed to make mine using imperial units (us Americans are ALWAYS different).
This project was originally made with scraps in mind, so I’m going to do the same. It should be a fairly quick project as there isn’t much to assemble but the box. After some of the struggles during the Dice Tower, this should offer a bit of a reprieve.
Let ‘er Rip
The pieces for the puzzle are all based off a singular unit size (u), in my case 3/4”. There are three different size blocks that I need to make and they are as follows:
A: 1u x 1u x 1u
B: 2u x 1u x 4u
C: 2u x 2u x 3u
Given my base unit of 3/4”, the blocks will be as follows:
A: 3/4” x 3/4” x 3/4” (5 blocks)
B: 1-1/2” x 3/4” x 3” (6 blocks)
C: 1-1/2” x 1-1/2” x 2-1/4” (6 blocks)
There were only two key measurements that I had to take into account when selecting the scraps needed, and those were 3/4” and 1-1/2”. With that in mind, I quickly found a piece of cherry that was already milled from when I was doing Pictures Frames Galore last year. It was just over the thickness I required and was perfectly flat on both faces and it would be great for the ‘B’ pieces. I then found a skinny off-cut of white oak that had some defects on one end and that would be perfect for the small ‘A’ pieces. For the larger ‘C’ pieces, I had a decent chunk of 6Q walnut, laying around since the Hall Bench project. My original plan was to make the smallest pieces out of walnut and the largest out of white oak, but sometimes the materials on hand dictate our choices.
The only milling needed for the cherry was to clean up one edge with my Rockler straight-line jig. The white oak piece I chose was about 30” long and had a small bow in it. I just cut it roughly in half and cleaned up the rough faces with the planer sled. The walnut was really close to 1-1/2” already in some spots so I had to be careful when milling it on the planer. I only planed one side of it as a result.
Over at the table saw I cleaned up all of the rough edges with the straight line jig. Before doing any cutting I made sure to switch over to my 40-tooth ripping blade. Now it was time to cut the long strips that would ultimately make all of the different pieces. I started with the walnut. I set my table saw fence to 1-1/2” and cut two strips. I took each of those strips and rotated them 90° and made another pass at the same measurement. This gave me two pieces of walnut that were 1-1/2” square. There were actually a couple of spots on the ends of both pieces that weren’t quite 1-1/2” on one edge, but it wouldn’t effect the number of blocks I needed to make.
With the fence still at 1-1/2”, I ripped the piece of cherry into strips as well (three total, but two usable). With all of the 1-1/2” cuts made, I set the fence to 3/4”. I now ran the white oak in the same fashion as I had done with the walnut earlier, yielding me two strips that were 3/4” square. I then took the cherry strips I had just cut, rotated them 90° and ran them through again. This gave me the exact 3/4” thickness I needed on the cherry pieces. With all of my stock now cut to size, it was now time to cut A LOT of puzzle pieces.

Measure, Cut, Repeat (A LOT)
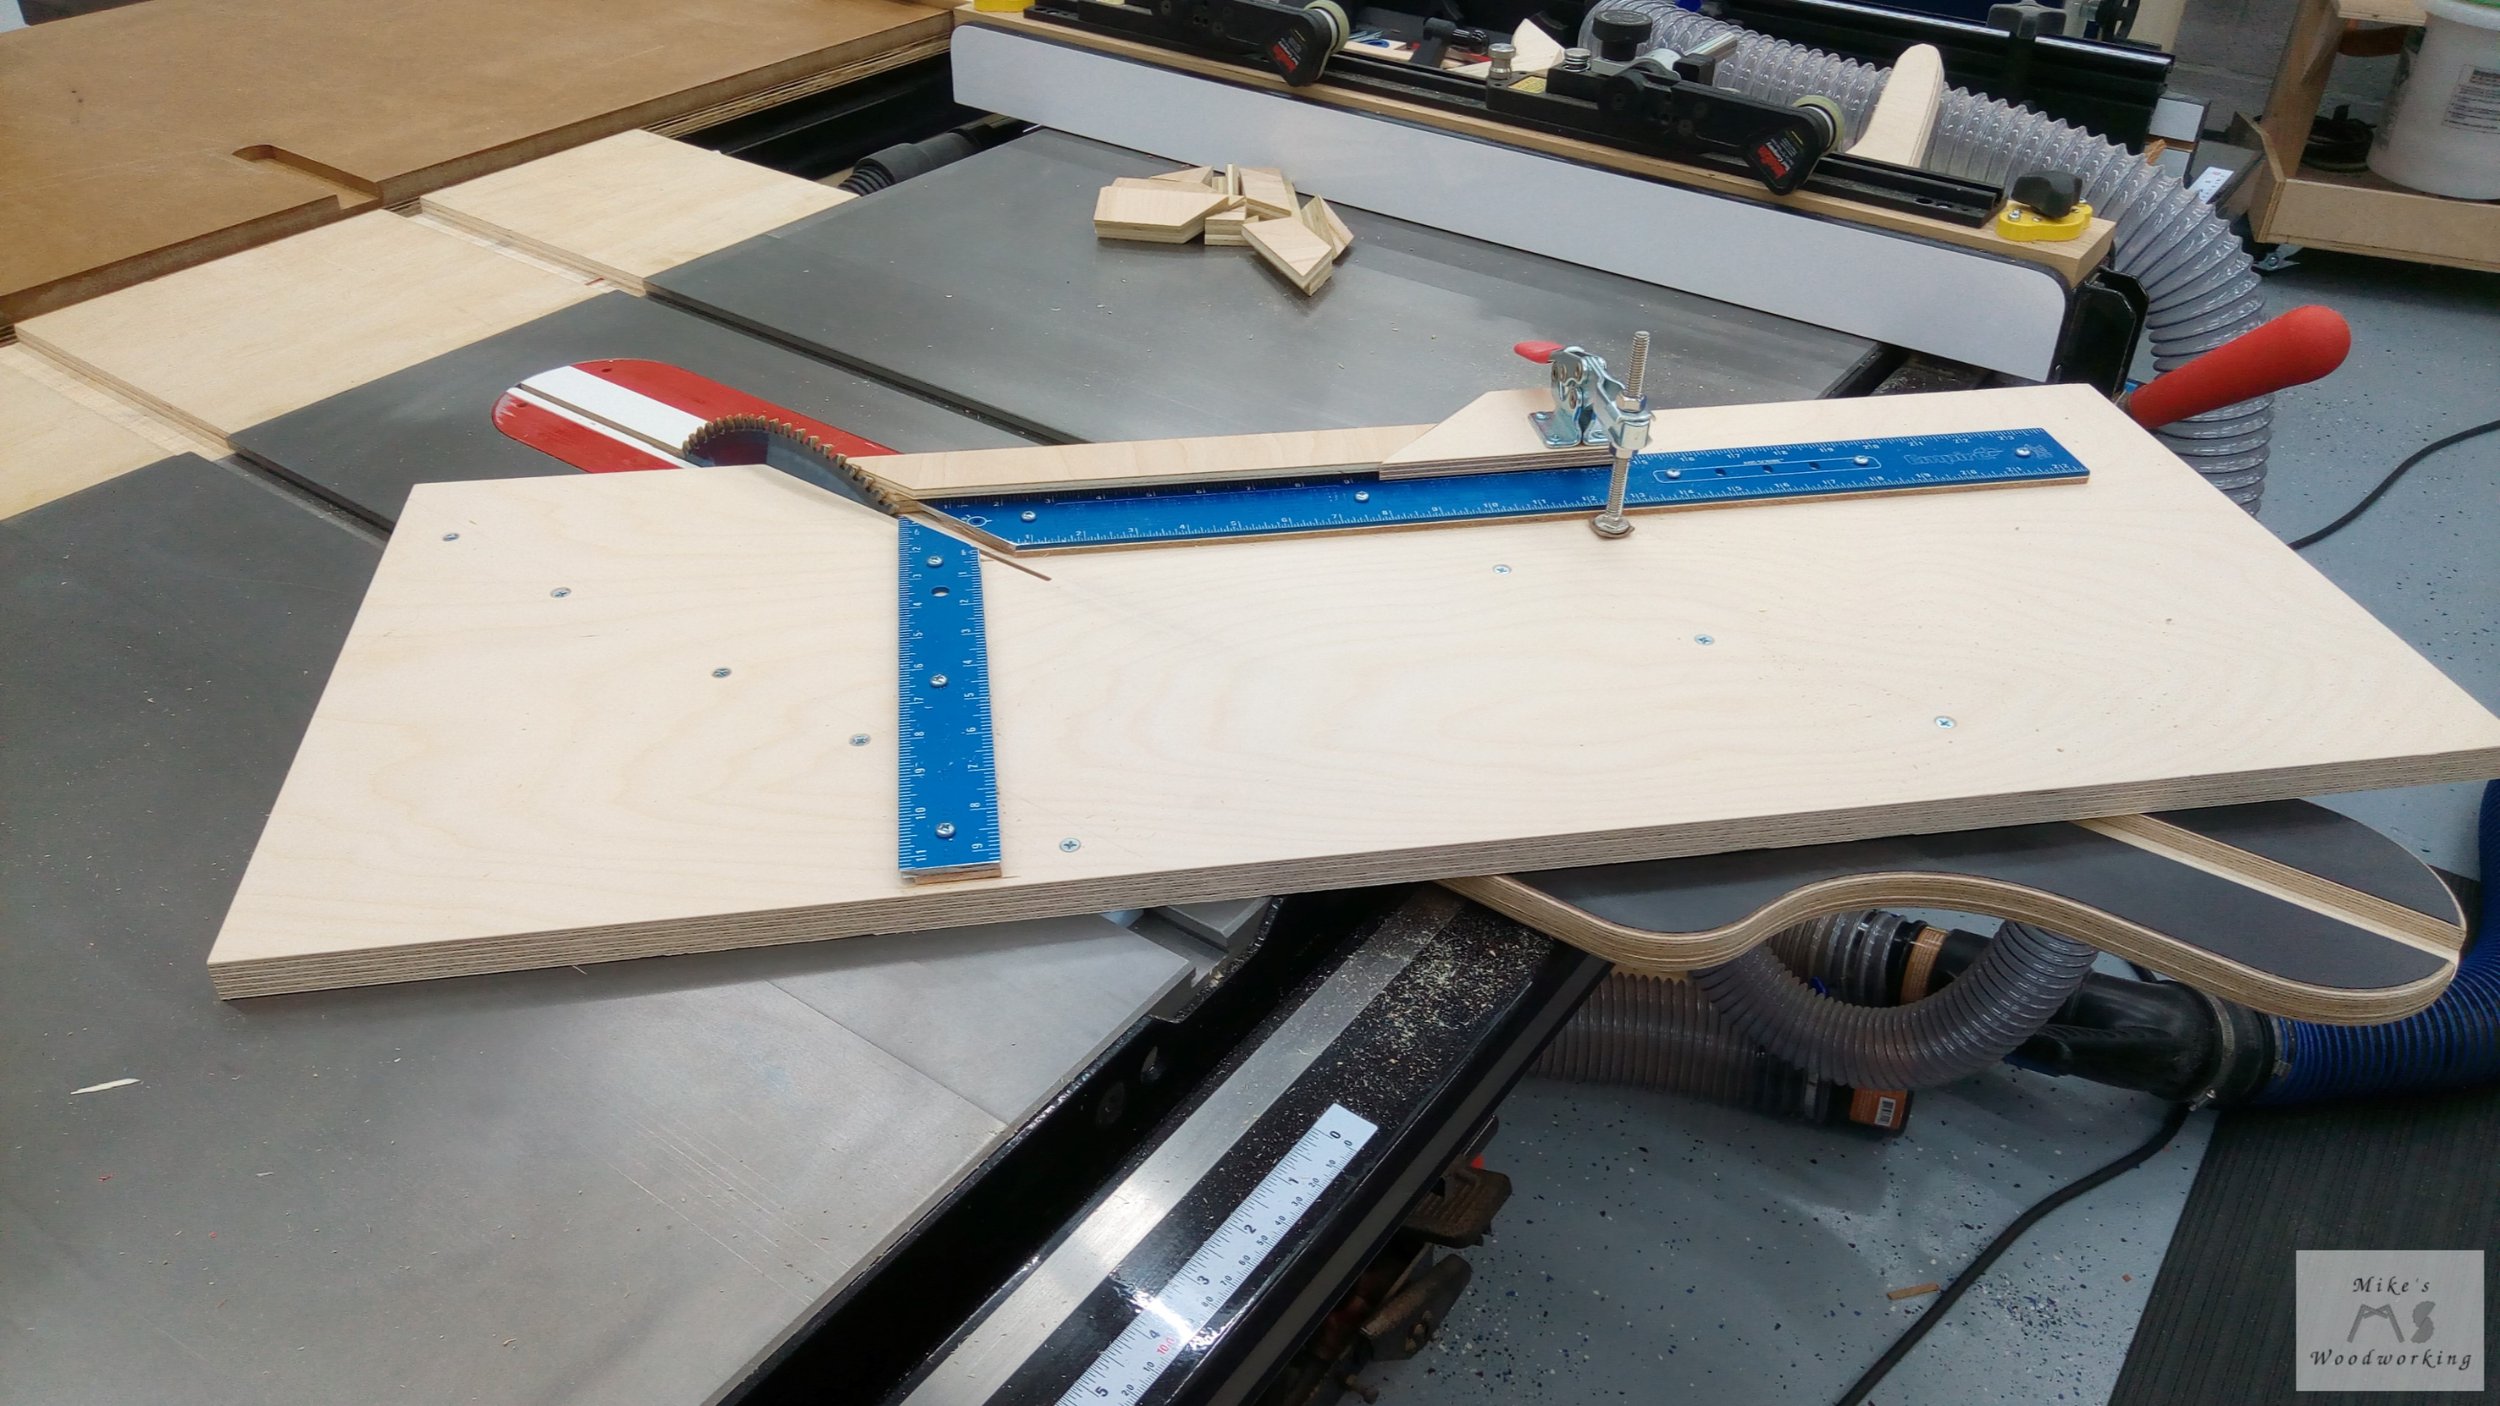
Given the size of some of these pieces, there was NO WAY I was going to use the power miter saw for these cuts. Not only was it dangerous, but the smallest pieces would likely go flying, causing damage to them or me. Much like Neil did in his video, I’m going to use an old-fashioned miter box.
This miter box (minus all of the clamps and the plywood) was given to me by my dad a few years before he passed away in 2011. I haven’t used it a whole lot since he gave it to me (mainly for cutting some dowel stock for a few previous projects), but it was certainly going to get plenty of use with this one. I decided to clamp on the plywood base and backer pieces, much like Neil had on his saw, to give me a good zero-clearance platform. This would allow me to get much cleaner edges on all of my cuts.
I started with the white oak pieces first. I needed 10 total blocks (remember, I’m making two puzzles). I first cut off a small piece from the end of the 3/4” square stock. This off-cut was kept and used to set a stop along the fence so I could make all 10 pieces EXACTLY the same. With the offcut butt against the blade of the miter saw, I used a small scrap of plywood next to it and clamped the stop into place. With the oak off-cut removed, I could commence with cutting each piece.
I must say that it took a lot longer to cut these small pieces than I thought it would. I don’t think it has anything to do with technique, I just think the blade on this saw might need to be replaced. If only I’d realized this BEFORE starting this project.
Next up I decided to cut all of the cherry pieces. These were four units in length and I employed the same method to set my stop block. I cut two small pieces off of the end and used those to get the stop in the correct position.

By the time I was done cutting all 12 pieces of cherry, my right arm was already getting sore. Not to mention my hand was beginning to hurt as well. The only problem was that I still had the 1-1/2” thick walnut pieces left to cut, and I had 12 of those also. At this point it was lunchtime, so I gave myself a bit of a break before having to cut the walnut pieces.
After my short lunch break, it was time to get back to work and finish all of this sawing. I set the stop block in the same fashion, this time using one 1u piece and one 2u piece. I’m not going to lie, but cutting that walnut absolutely SUCKED. I was constantly switching back and forth and sawing with each arm, and I’m more of a right-handed person with a hand saw. Thankfully this miter saw allows a less-experienced person the ability to make quality cuts with their non-dominant hand.
After what seemed like forever, I finally had all 34 pieces cut.

As you can see from the above picture, some of the cuts were a little rougher than others. I needed to sand everything and break all of the edges anyway, so that would take care of any rough spots.
I already had a piece of 180-grit sandpaper glued to a plywood panel, so I just set that on top of my workbench, pulled up my stool, and began the arduous task as sanding. Every. Single. Piece.
I sanded all of the faces first, then did the ends. I then broke all of the edges and finally rounded all of the corners. As boring as something like this seems, I didn’t really mind it quite so much. I just had my radio playing and I sat at my workbench in front of my small air filtration unit and just sanded away. I occasionally vacuumed off the sandpaper to clear off the mounds of dust that were accumulating. It only took maybe 30 minutes to sand all of the pieces.

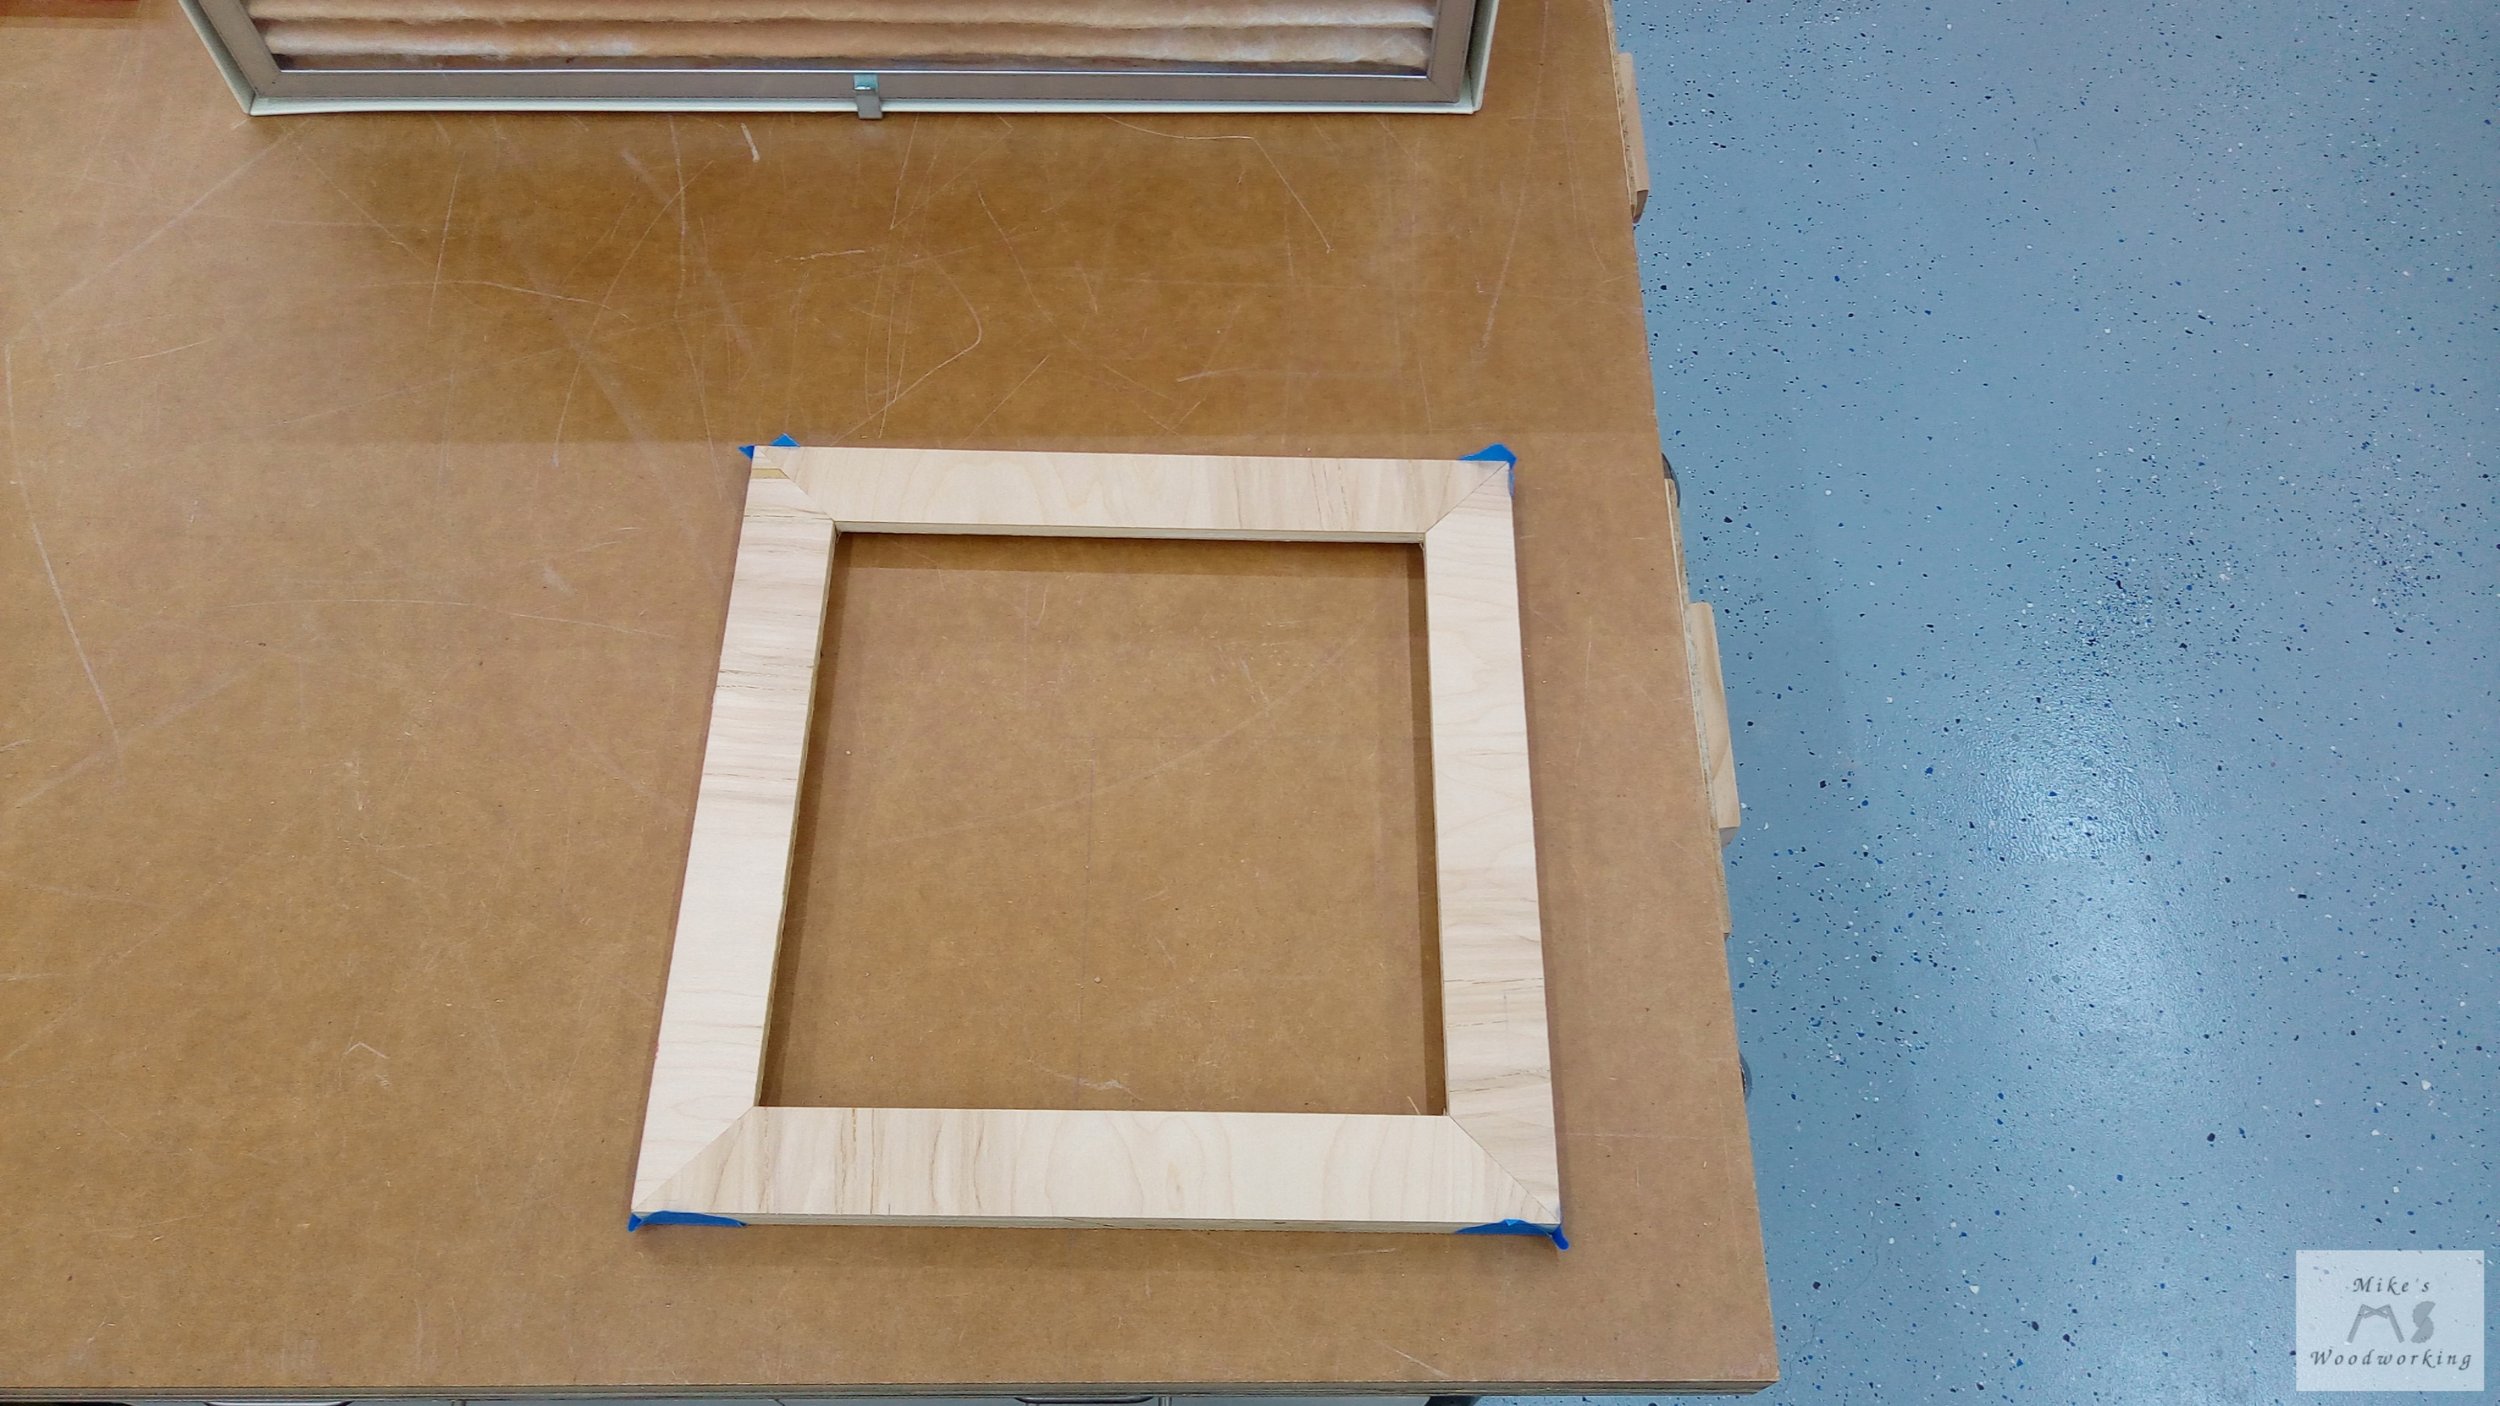
Now that I had all of the puzzle pieces sanded, I wanted to fit them together to make sure I didn’t have any problems once I got to making the boxes. I’m not going to lie, but I had to look back at the video (and go frame by frame) to remember how the pieces went together. Everything came together and the two puzzles look great.
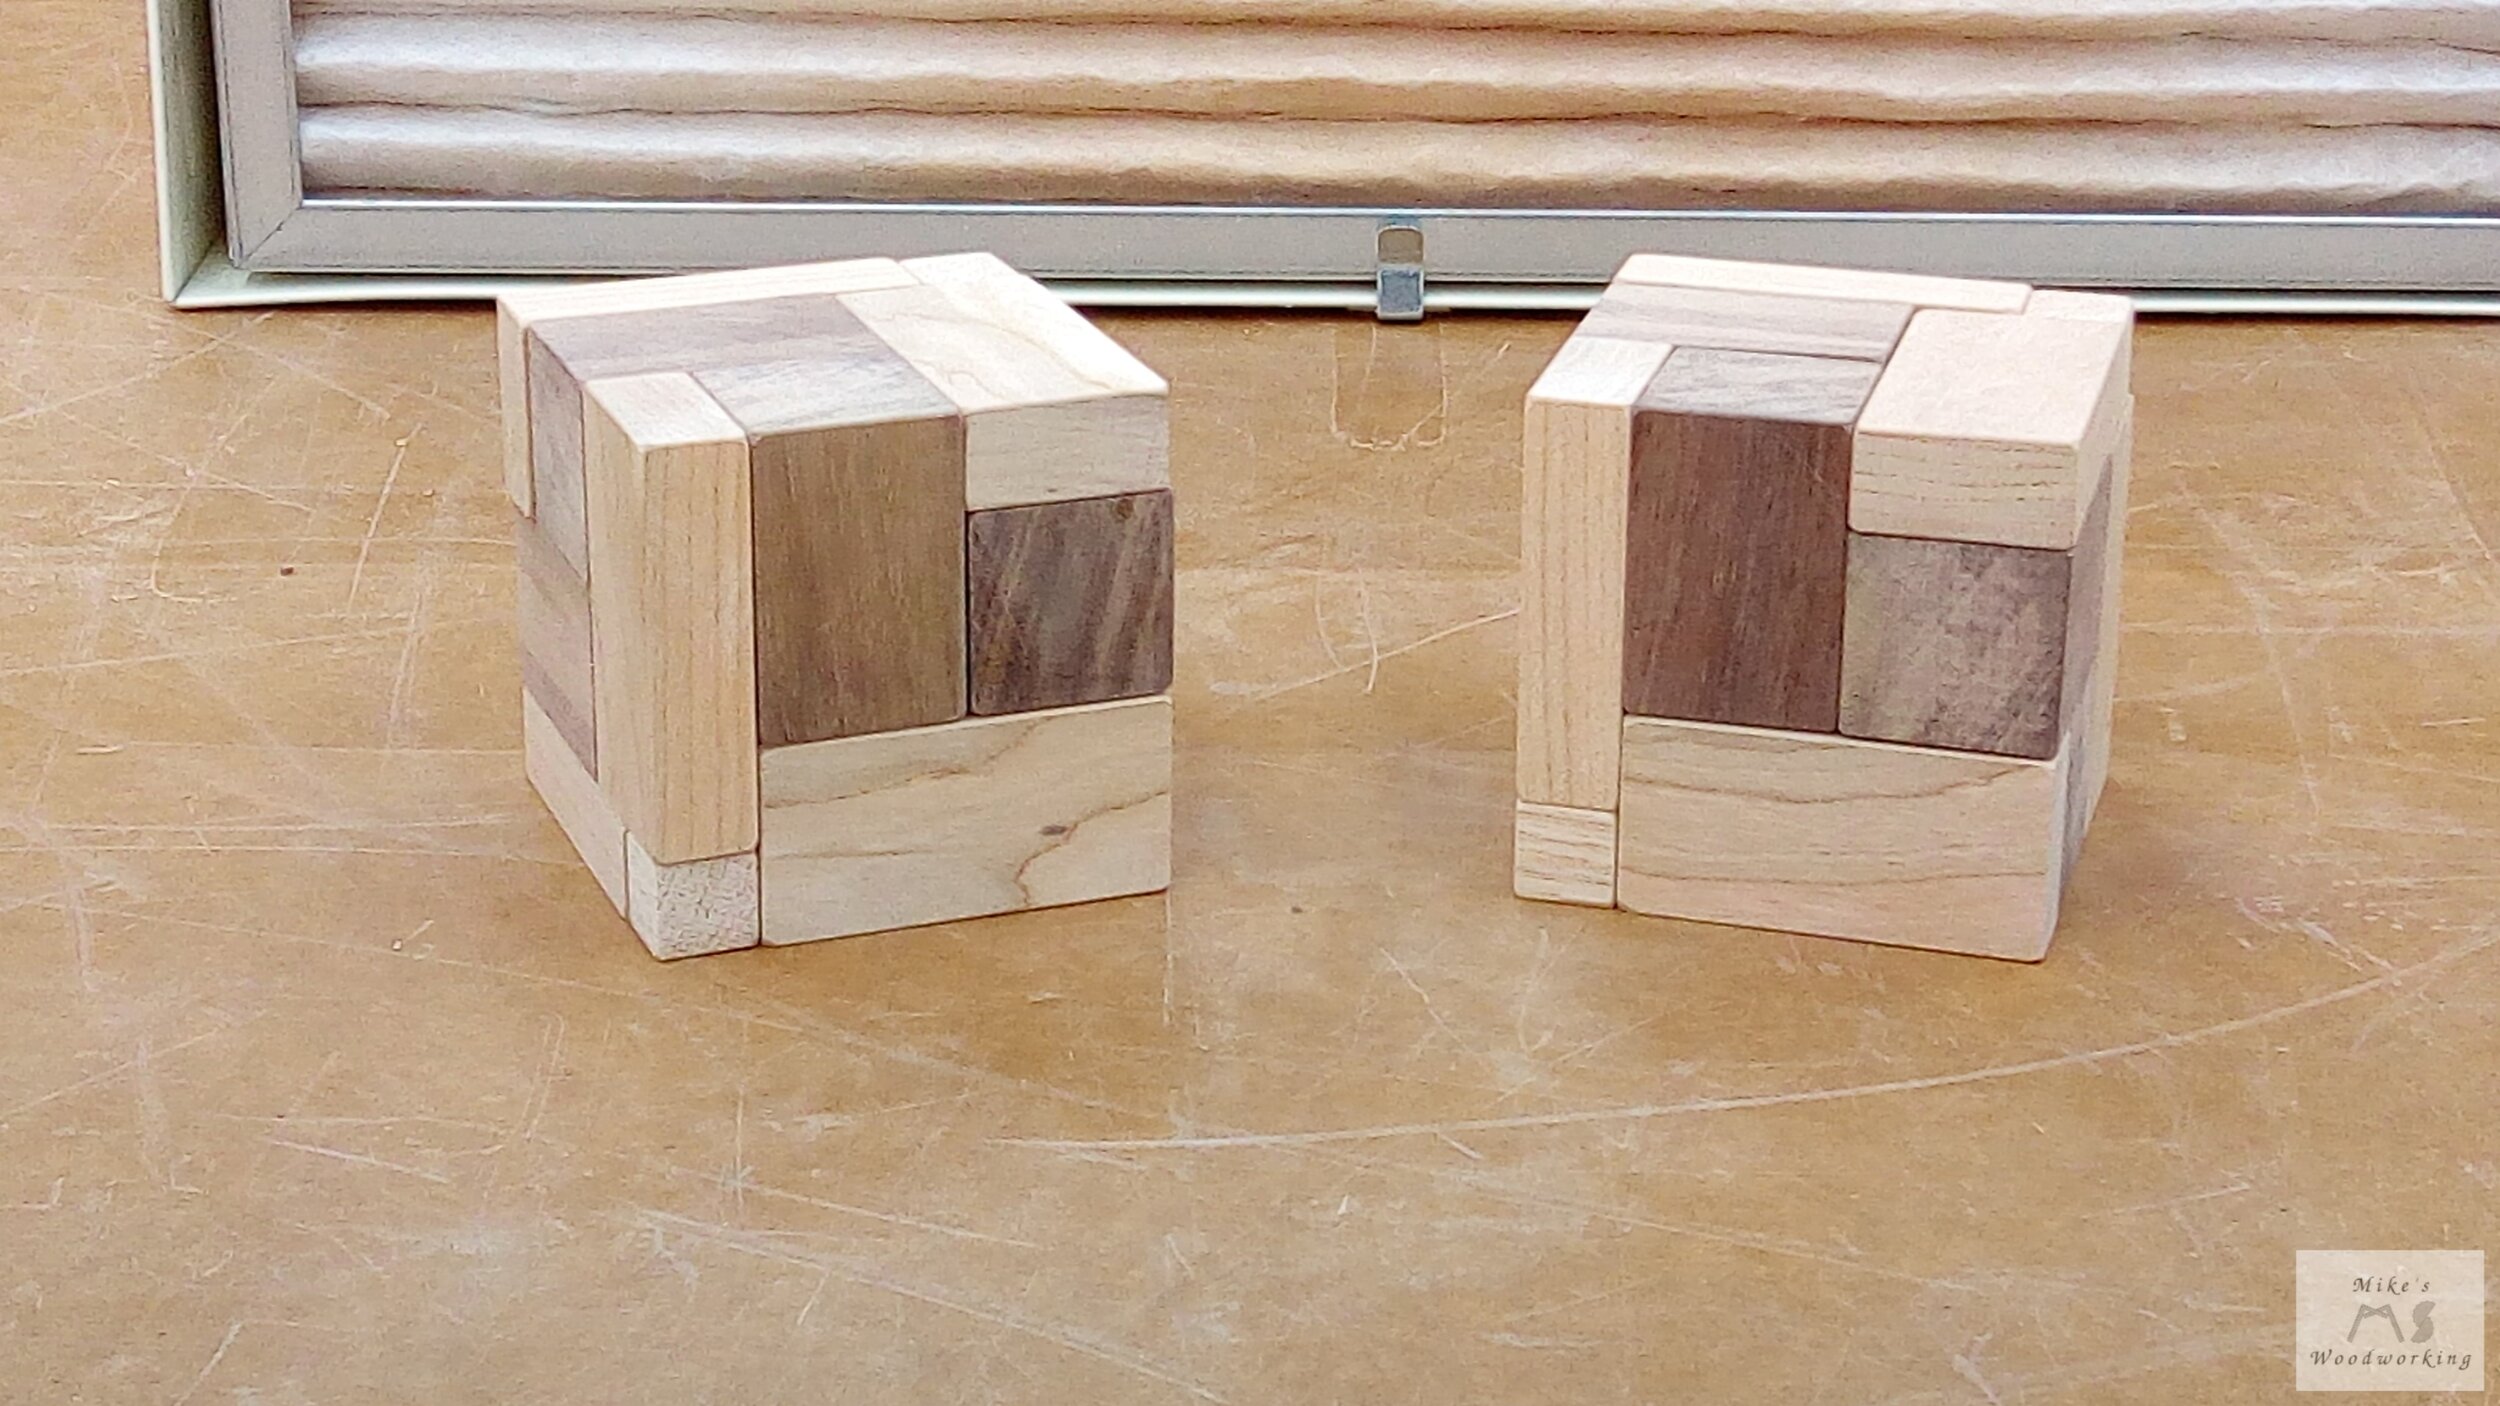
At this point, I wanted to clean off all of the dust from each piece, so I wiped them all down with some mineral spirits. This gave me the opportunity to see what the pieces would look like with a finish on them, and I was happy with how rich the walnut looked. I’m glad I went with the walnut for the larger pieces instead of the small cubes.
Miters Can Kiss My…Well, You Get the Picture
With the puzzle pieces done (minus the finish), I now needed to make the boxes. This was going to essentially be the same construction as the Dice Tower, only no internal ramps were necessary. I opted to use a long thin piece of hickory I had leftover from another project. It was just long enough to make two of the boxes I needed. I cut it in half and milled it just as I had the other material for this project.
I wanted to try my hand at mitering the corners of the box pieces at the table saw again, like I did for the tray of the Dice Tower. Since that yielded decent results, I set everything up and set about cutting all of my box pieces. When I went to mock them up, I was far from thrilled with the results of one of the boxes.

As you can see, the edges were nowhere near straight. How the pieces could have shifted on me is a mystery. Luckily, the other box was well enough to still put together (although I wish I’d just scrapped that one too, in hindsight). I decided to remake the second box, this time out of more scrap white oak. The table saw was out for doing the miters. I went back to the router table and my chamfer bit. After getting it set with some scrap material, I ran the one piece of white oak through on both edges. After cutting the four box sides, I laid them out on the table for a mock up and I was absolutely thrilled.

When the pieces were fit together, you could barely make out where the joints were. My shop-made crosscut sled is simply not good enough when it comes to miters (I have another one on order as of the time of writing this article).
With the two boxes mocked up, I cut the bottoms and lids at this point. Since they were both slightly different, each box was done separately. The hickory one was just a tiny bit out of square, so I really had to finesse the bottom to get it to fit. The white oak box was perfect and a simple square cut was needed.
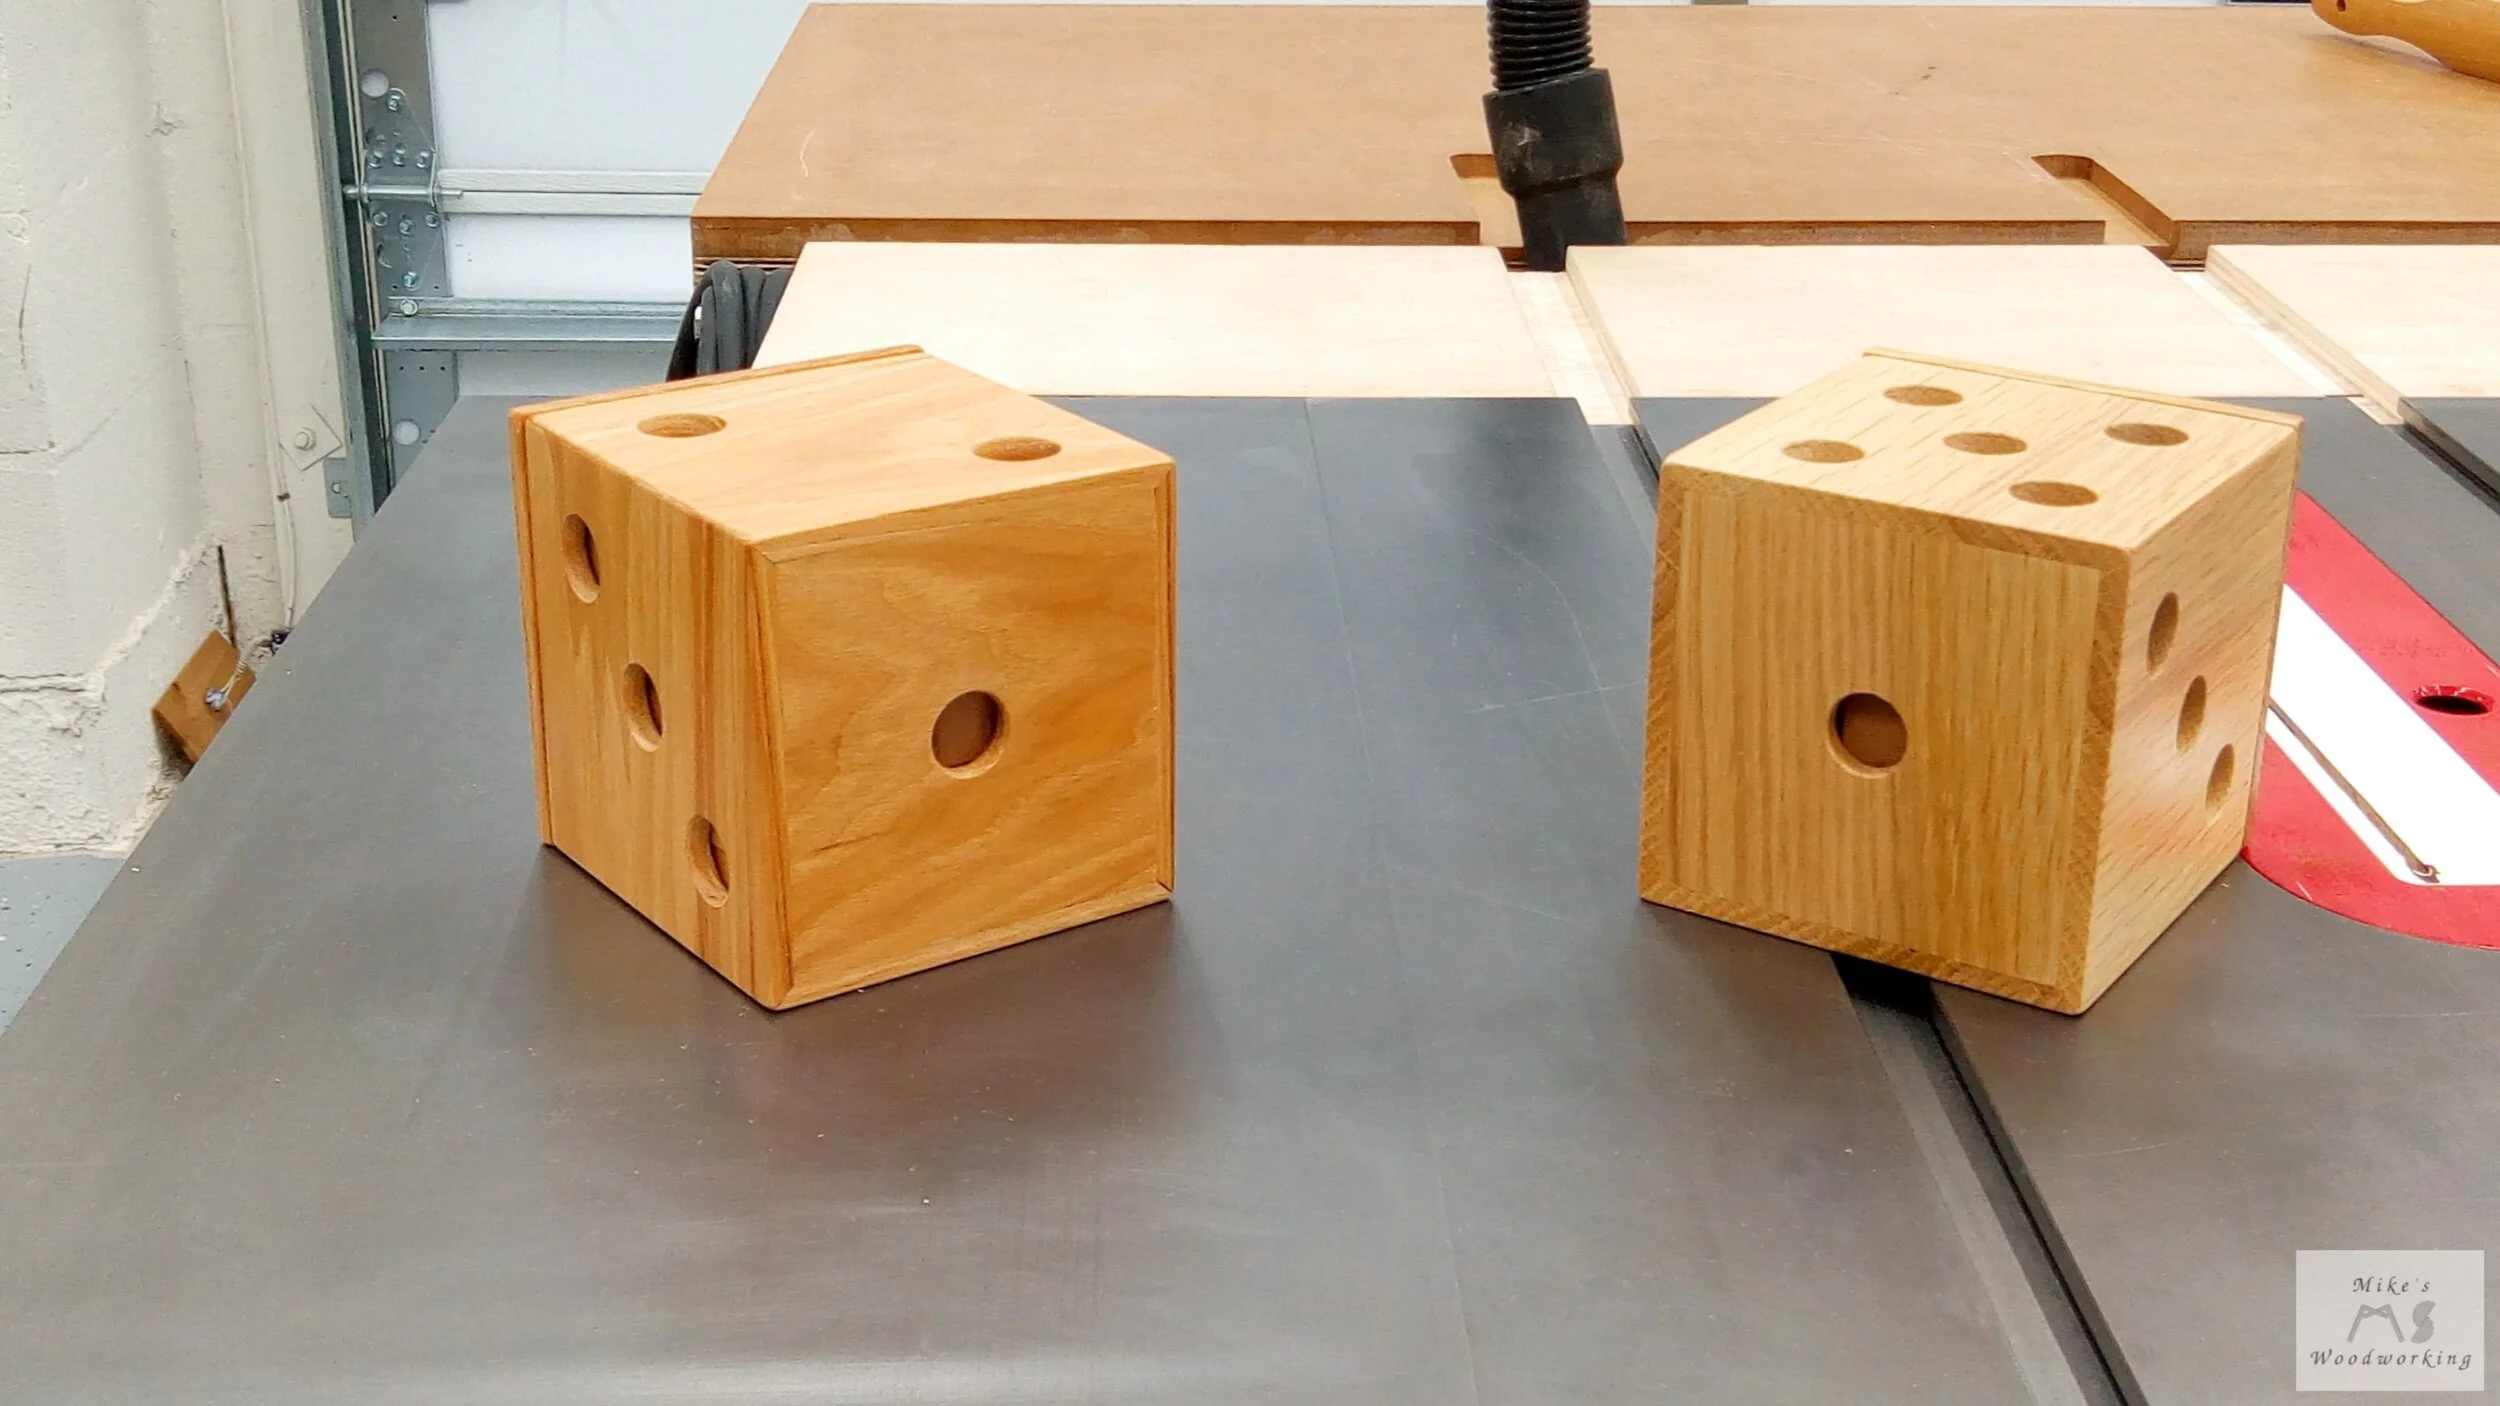
With the bottoms fit into place, I took both boxes apart and laid out for all of the holes I needed to drill to give the finished boxes the appearance of a set of dice. This was a straight forward procedure and took no time at the drill press.
I wanted to round over both sides of each hole at the router table to ease the edges (since little hands would be playing with these puzzles). I again used a test piece and got my 1/8” roundover bit setup at the router table. While making one of the passes, I wasn’t paying attention and the piece caught on the router bit and spun around violently, smacking one of the tips of my fingers. I was alright, but my finger tip was pretty sore for a little while. I finished doing the hickory box pieces at the router table and opted to just sand the holes on the white oak one instead. The router table really scares me, but not to the point of not wanting to use it (like the jointer).
Satisfaction
Before I glued up the boxes, I double-checked that the puzzle pieces fit into each box. To my relief, everything fit like a glove. There was just the slightest bit of play all around the inside of the box (maybe 1/16”). I progressed through 80, 120, and 180-grit sandpaper on all of the box pieces and I was now ready to glue everything up. The hickory box was a bit of a pain, but it went together with a little persuasion. The white oak box fit so well together it could have been done blindfolded. With the boxes now set aside for the glue to dry, I needed to work on the lids.
I wanted the lids to be placed on the tops of the boxes and not slide around. This meant that I had to glue on some small pieces to prevent the lids from shifting. I took some scrap hickory off-cuts from the first box and cut two sets of strips. I glued them into place on the lids and left them to dry. The white oak lid wound up with hickory strips on it, but I simply didn’t care. No one is going to care about the strips holding the lid in place, plus I thought it looked fine anyway.
After leaving the pieces to dry overnight, the next morning I went ahead and removed all of the blue tape I used to “clamp” the boxes together and cleaned up the dried glue on the inside of each box. It was tough to get into the corners with my chisel, but I managed. The outside was sanded through the grits again, to ensure I got all of the glue removed.
Now that all of the sanding was done, all that was left was finish. I wiped everything down with mineral spirits to remove any stray sanding dust (including the puzzle pieces again), and I went with a few coats of spray lacquer. I initially thought about using boiled linseed oil (like I had on the COG puzzles), but I changed my mind at the last minute. The lacquer was quicker and once buffed out with some crumpled kraft paper, the finish was silky smooth on everything.


Overall, this was a pretty quick and simple project, my mitering adventures notwithstanding. I think Bill’s and Wesley’s boys will like these more challenging puzzles. This now, with the completion of the Dice Tower, marks three of seven Christmas presents completed. Next up will be the gift boxes for my friend Shanti’s two girls.
Sunrise Boxes
For my friend Shanti’s two girls, I thought this year I would make something other than puzzles. I opted to go for a gift/trinket/jewelry box instead. I loved the Sunrise Boxes made by Blake Weber, and I had plenty of scraps of cedar around from the Garden Hose Box project last year, so why not use some of them for this pair of presents.

Sunrise Box by Blake Weber
I had three pieces of cedar that were already milled to about 1” in thickness, so I just resawed those in half, glued them up, and made three panels. As some of the parts were going to be a little wider than the thicker boards, making thinner panels was the way to go.
Once the panels were glued up, I needed to flatten them a bit as the glue seams were not perfect. I opted to use my drum sander for this task and it worked like a champ. I don’t use the drum sander a whole lot, but when I do it pays for itself in the time savings alone.

That panel on top with the knot holes worked out perfectly with my parts layout (below).
These are relatively simple boxes, with only butt joints and glue for joinery. The lone mechanical fasteners are the two screws that will hold the handles to the lids. There are only five main parts and no steadfast dimensions for these boxes, so I’m going with the following:
8” x 2-3/4” long sides
6” x 3-5/8” outer sides
5” x 2-1/8” inner sides
7-7/8” x 5-3/4” top
The bottom panel will be made of thin plywood and cut to fit once the box is mocked up.
Since I’m making two boxes, I was careful to lay out everything to ensure I had enough material. Here is how everything lined up.
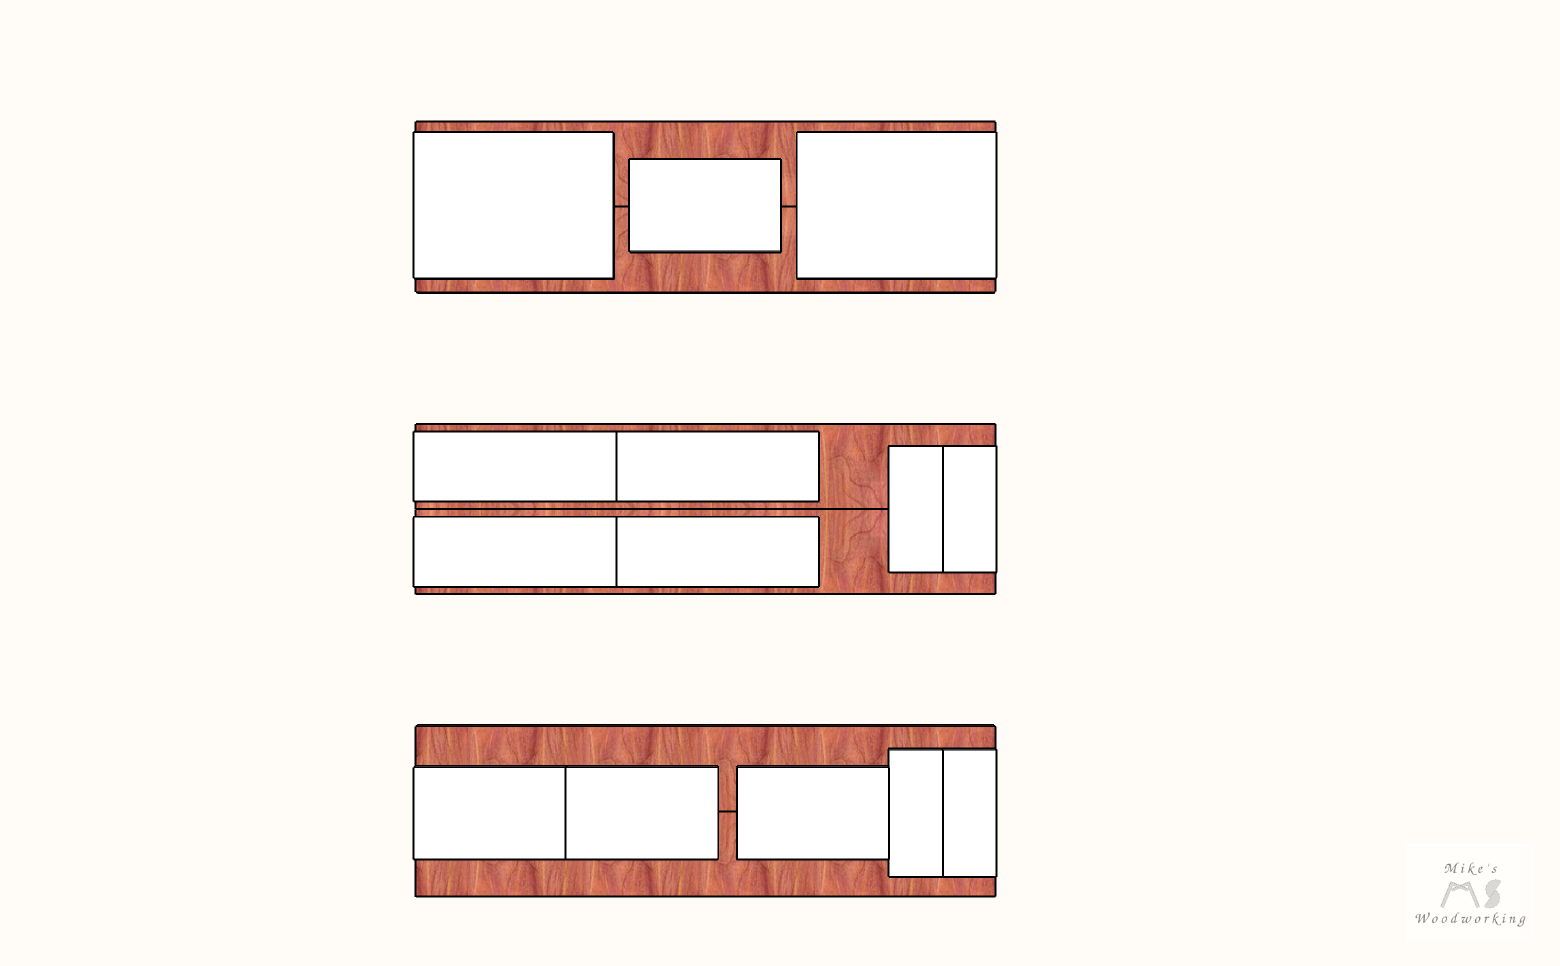
The top panel is the one with the knot holes in it. It has the two tops and one of the outer sides. The middle panel has the four long sides and two of the inner sides. The final panel has the three remaining outer sides and inner sides.
Because of the layout of the box, the inner sides had to span the glue joint of the panels. This ensures that side grain will be facing out on the edges versus edge grain, which yields a bit better glue joint. Yes, I’m aware that the grain direction for the inner and outer sides will be running in opposite directions, but with pieces this small, coupled with the fact that the wood has been sitting around for over a year drying out even more, I’m not terribly concerned.
The glue-up would be in multiple stages. With that in mind, I waited to cut everything out until I actually needed the parts. I started with the inner sides and the long sides. I cut them to size over at the table saw using the rip fence and my new Infinity Tools cross-cut sled.
I needed to make a shallow groove in the long side pieces to accept the bottom panel. I opted to swap out my crosscut blade for my flat bottom blade to avoid any unevenness in the grooves. The depth of the grooves was only 1/8” since my material was just over 1/4”. The spacing of the groove was 1/4” from the bottom of each long side. Since my bottom panels were slightly thicker than 1/8”, I had to sneak up on the final width. Many careful runs through the saw and I had a perfect fit in all four pieces.
Time for the first glue-up. Nothing too fancy or elegant here as you can see. With the first sub-assembly clamped up, I left them to dry overnight before continuing.

I think I need a few more clamps.
The next assembly called for the outer sides to be glued to the sides of the box. Before doing that, however, I made sure to sand the sides of the boxes completely flat to ensure a good glue bond. With that out of the way, I used some scrap plywood and hardboard to prop the boxes up, giving me the desired reveal on the final boxes. Again, I left them clamped up overnight and came back the following morning.

Juuuuuussstt the right amount of clamps on this one.
I should mention that before I glued anything together, I took the time to sand all of the pieces up to 180-grit. I paid careful attention to all of the edges and corners since these were boxes for two young children. Now that the boxes are essentially done, I can work on the lids next.
I had already cut these to size while cutting the parts for the first sub-assembly. I made sure the tops fit during the first mock-up. There needed to be a couple of small strips attached to the top to ensure that it wouldn’t slide off the box when moved around. I simply used a few pieces of scrap cedar and rounded the edges prior to gluing them to the tops. I checked the fit and it was good to go.

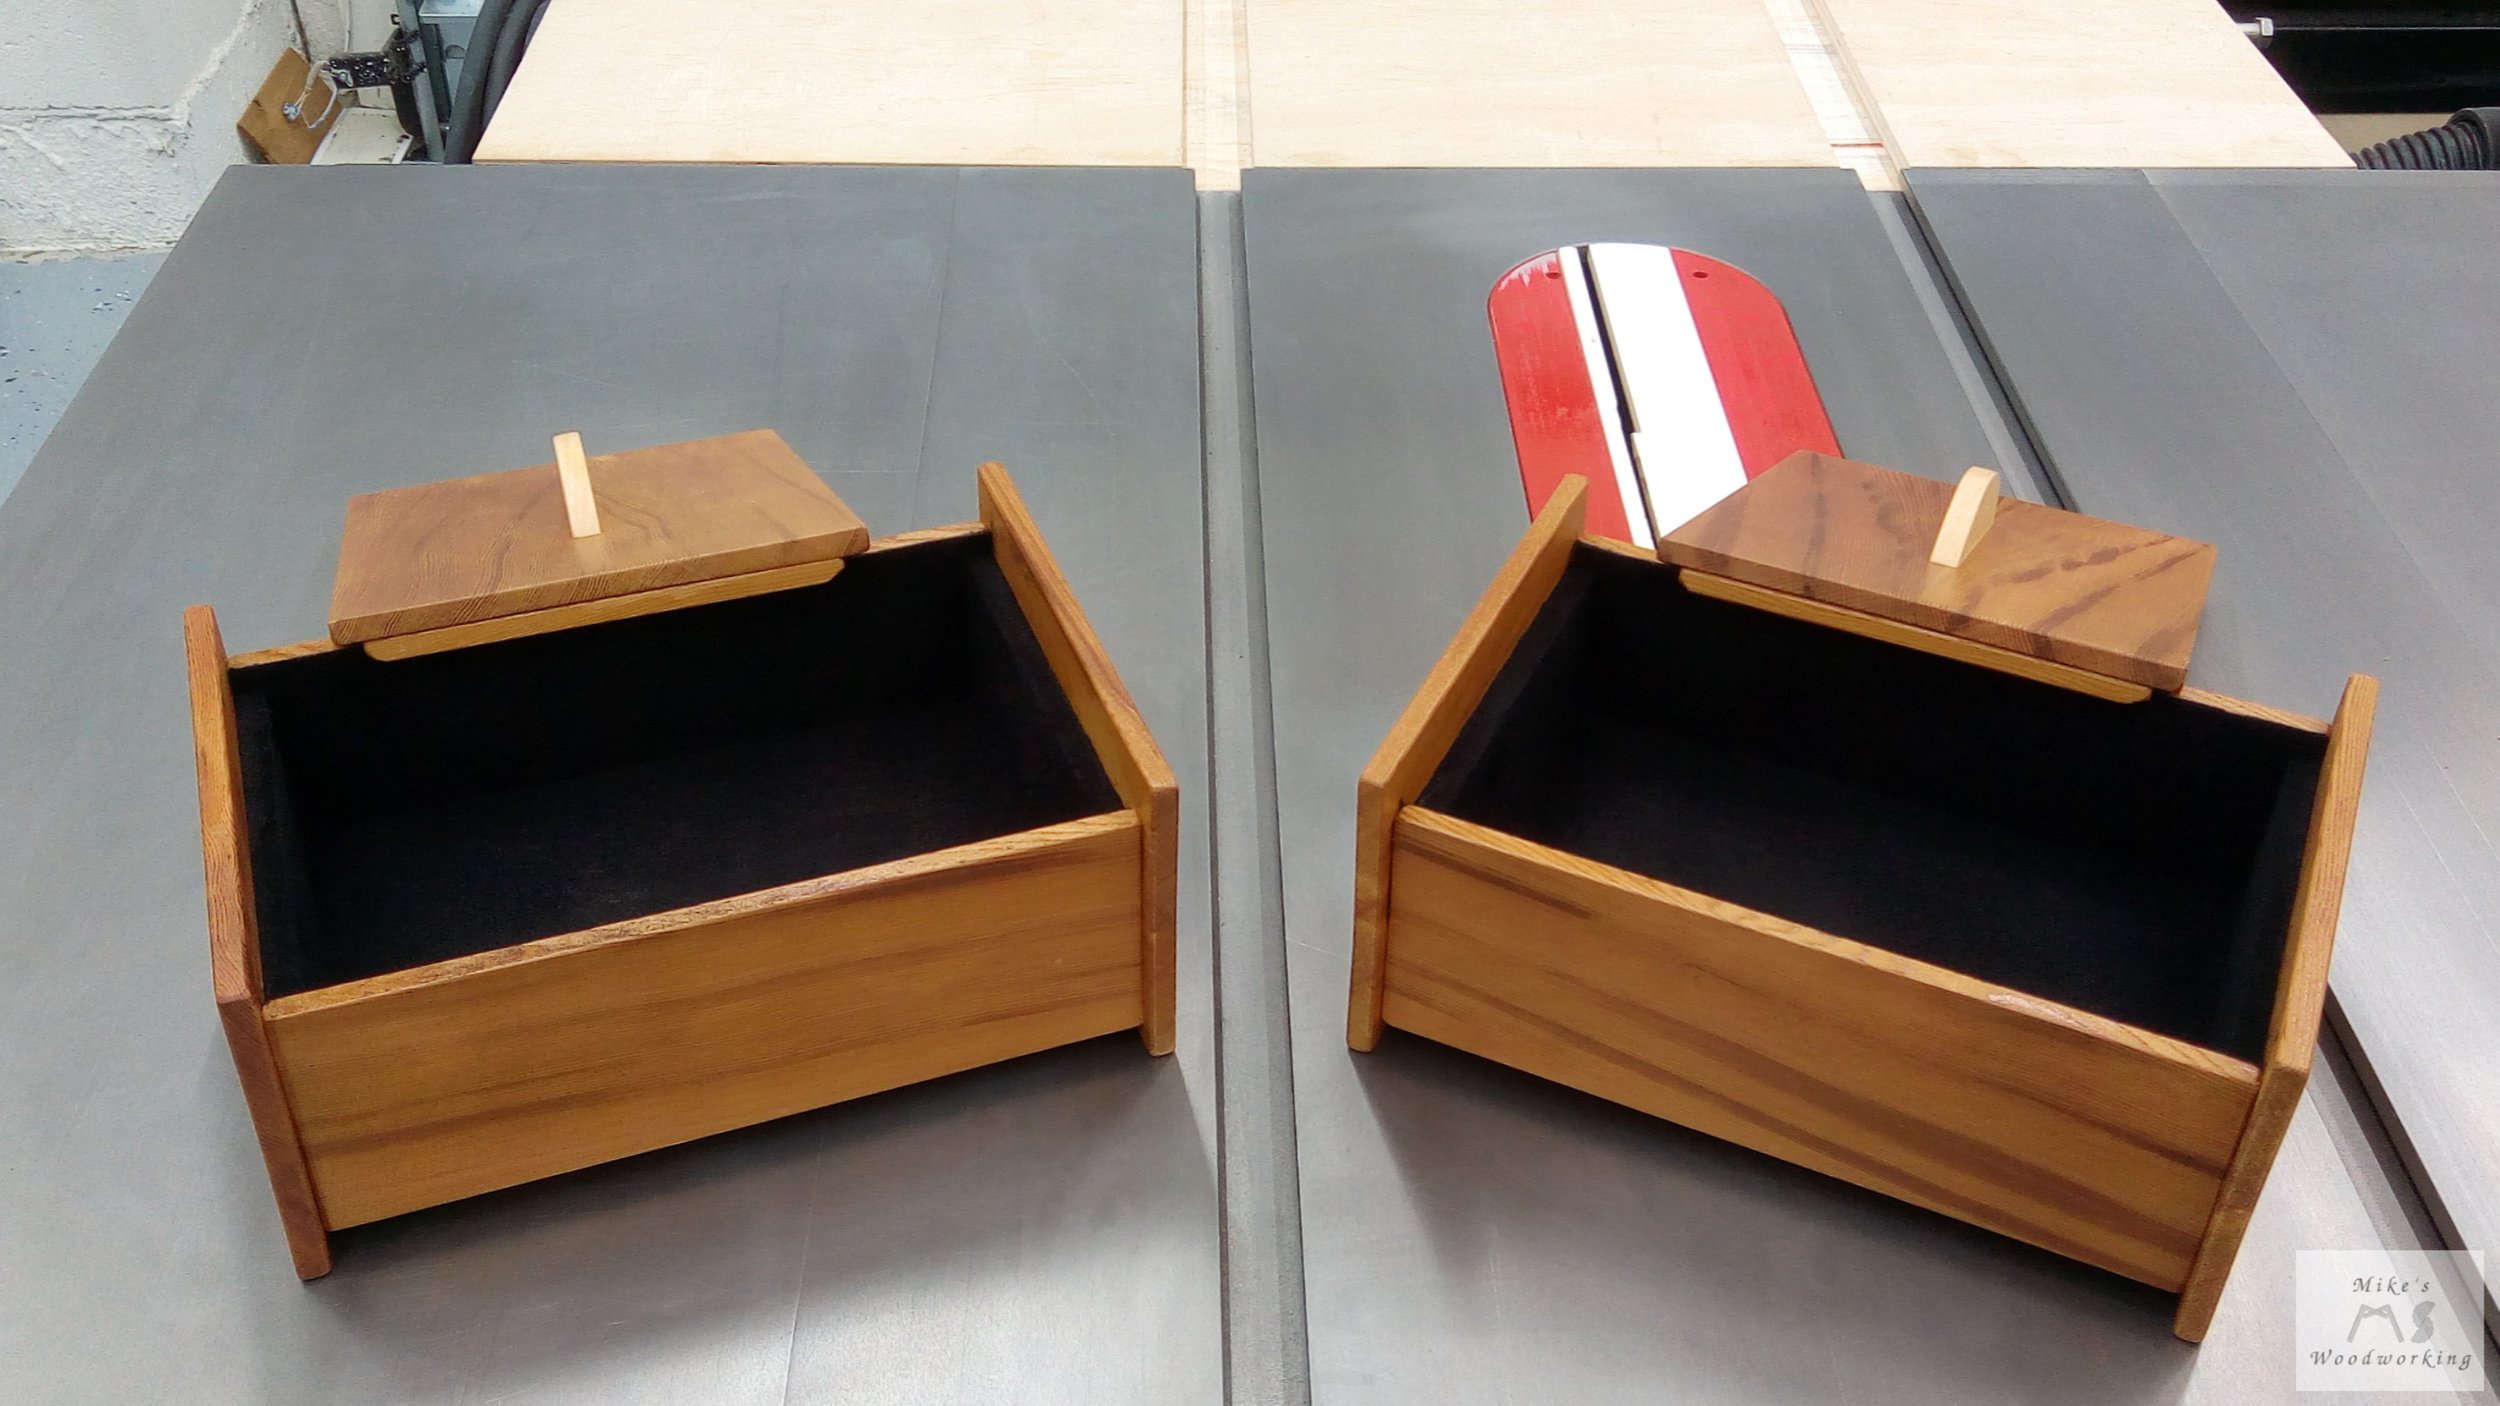
Here are the two finished boxes, minus their lids.
I still needed to cut and attach the handles for the boxes. I wanted to use a contrasting wood and I opted to go with basswood. I laid out two semi-circles using a pint-sized paint can and cut the pieces out with the band saw. I smoothed the edges on the oscillating belt sander.
To attach the handles, I marked the centers on the tops and drilled two pilot holes over at the drill press. On the insides of the lids, I drilled a small countersink for the screw heads. I needed to drill pilot holes in the handles, and a hand screw clamp would have been ideal for this, but I don’t have any. Instead, I tried using one of my quik-grip clamps and that worked out perfectly. I didn’t use any glue to attach the handles, only the two screws.
With the handles attached to the tops, I went ahead and applied three coats of spray lacquer to the boxes and lids. I left the lacquer to cure overnight and the following day I buffed everything with some crumpled-up kraft paper. This brought out a nice smooth finish.


There was one final touch I needed to make. Like the Dice Tower, I wanted to apply flocking to the insides of both boxes. Since these could be used for jewelry by the girls, I wanted the insides to be smooth and soft like a traditional jewelry box. Applying the flocking was much the same as with the Dice Tower. I taped off the parts not to be flocked, applied the flocking adhesive, and then the fibers.

The final touch was to add a couple of vinyl stickers on the fronts to personalize the boxes for each girl (that way no mistaking which one belongs to which girl). I must admit that Lisa cut the vinyl letters with our new Cricut Joy. I originally planned on burning the letters into the wood, but I completely forgot to do it before I applied the lacquer. I think the vinyl letters came out great anyway.

The two Sunrise Boxes are now complete. This marks five of the seven presents done.
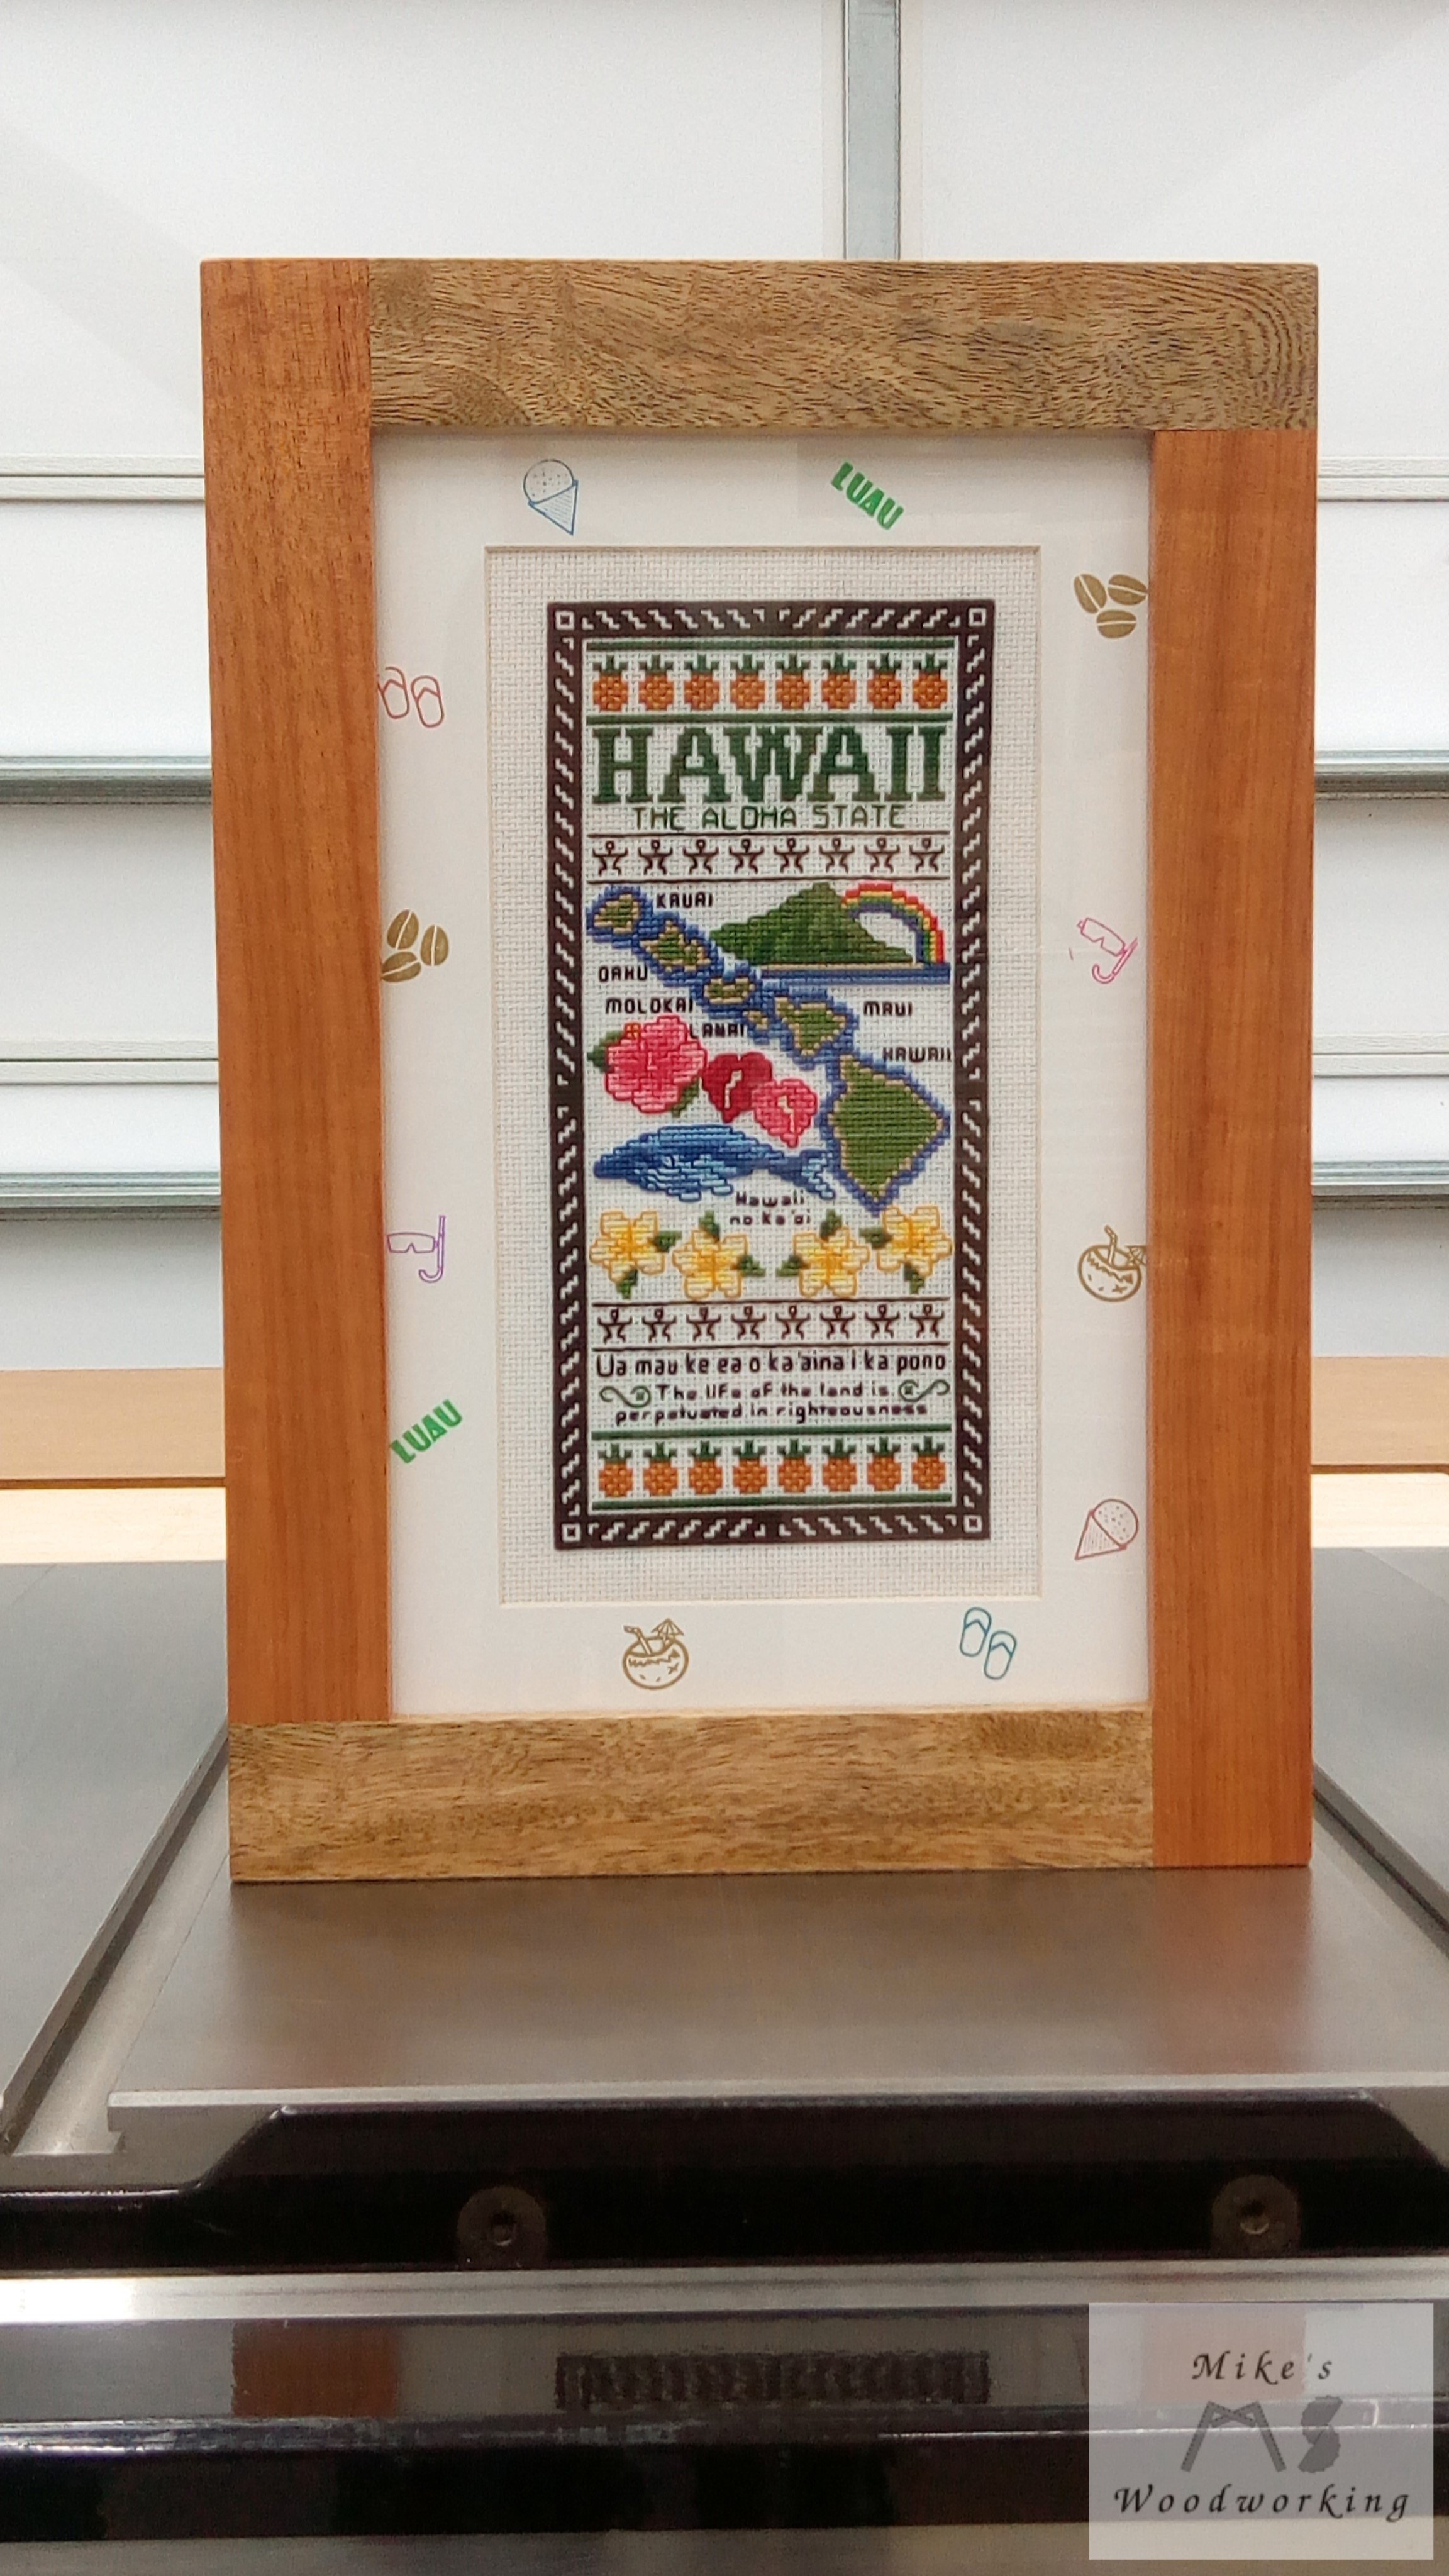
Hawaii
My friend Shanti grew up in Hawaii. I wanted to make something that would take her back there when she couldn’t actually make the trip. I asked Lisa to find a cross stitch project that was Hawaii-based and she found a very nice one. It wasn’t terribly big, but it would due. Along with all of the imagery on the cross stitch pattern, I wanted to include a couple of other things. Lisa suggested putting a mat around the pattern and using some stamps to mark the things I’d want to add (really, where would I be without Lisa for some of this stuff).
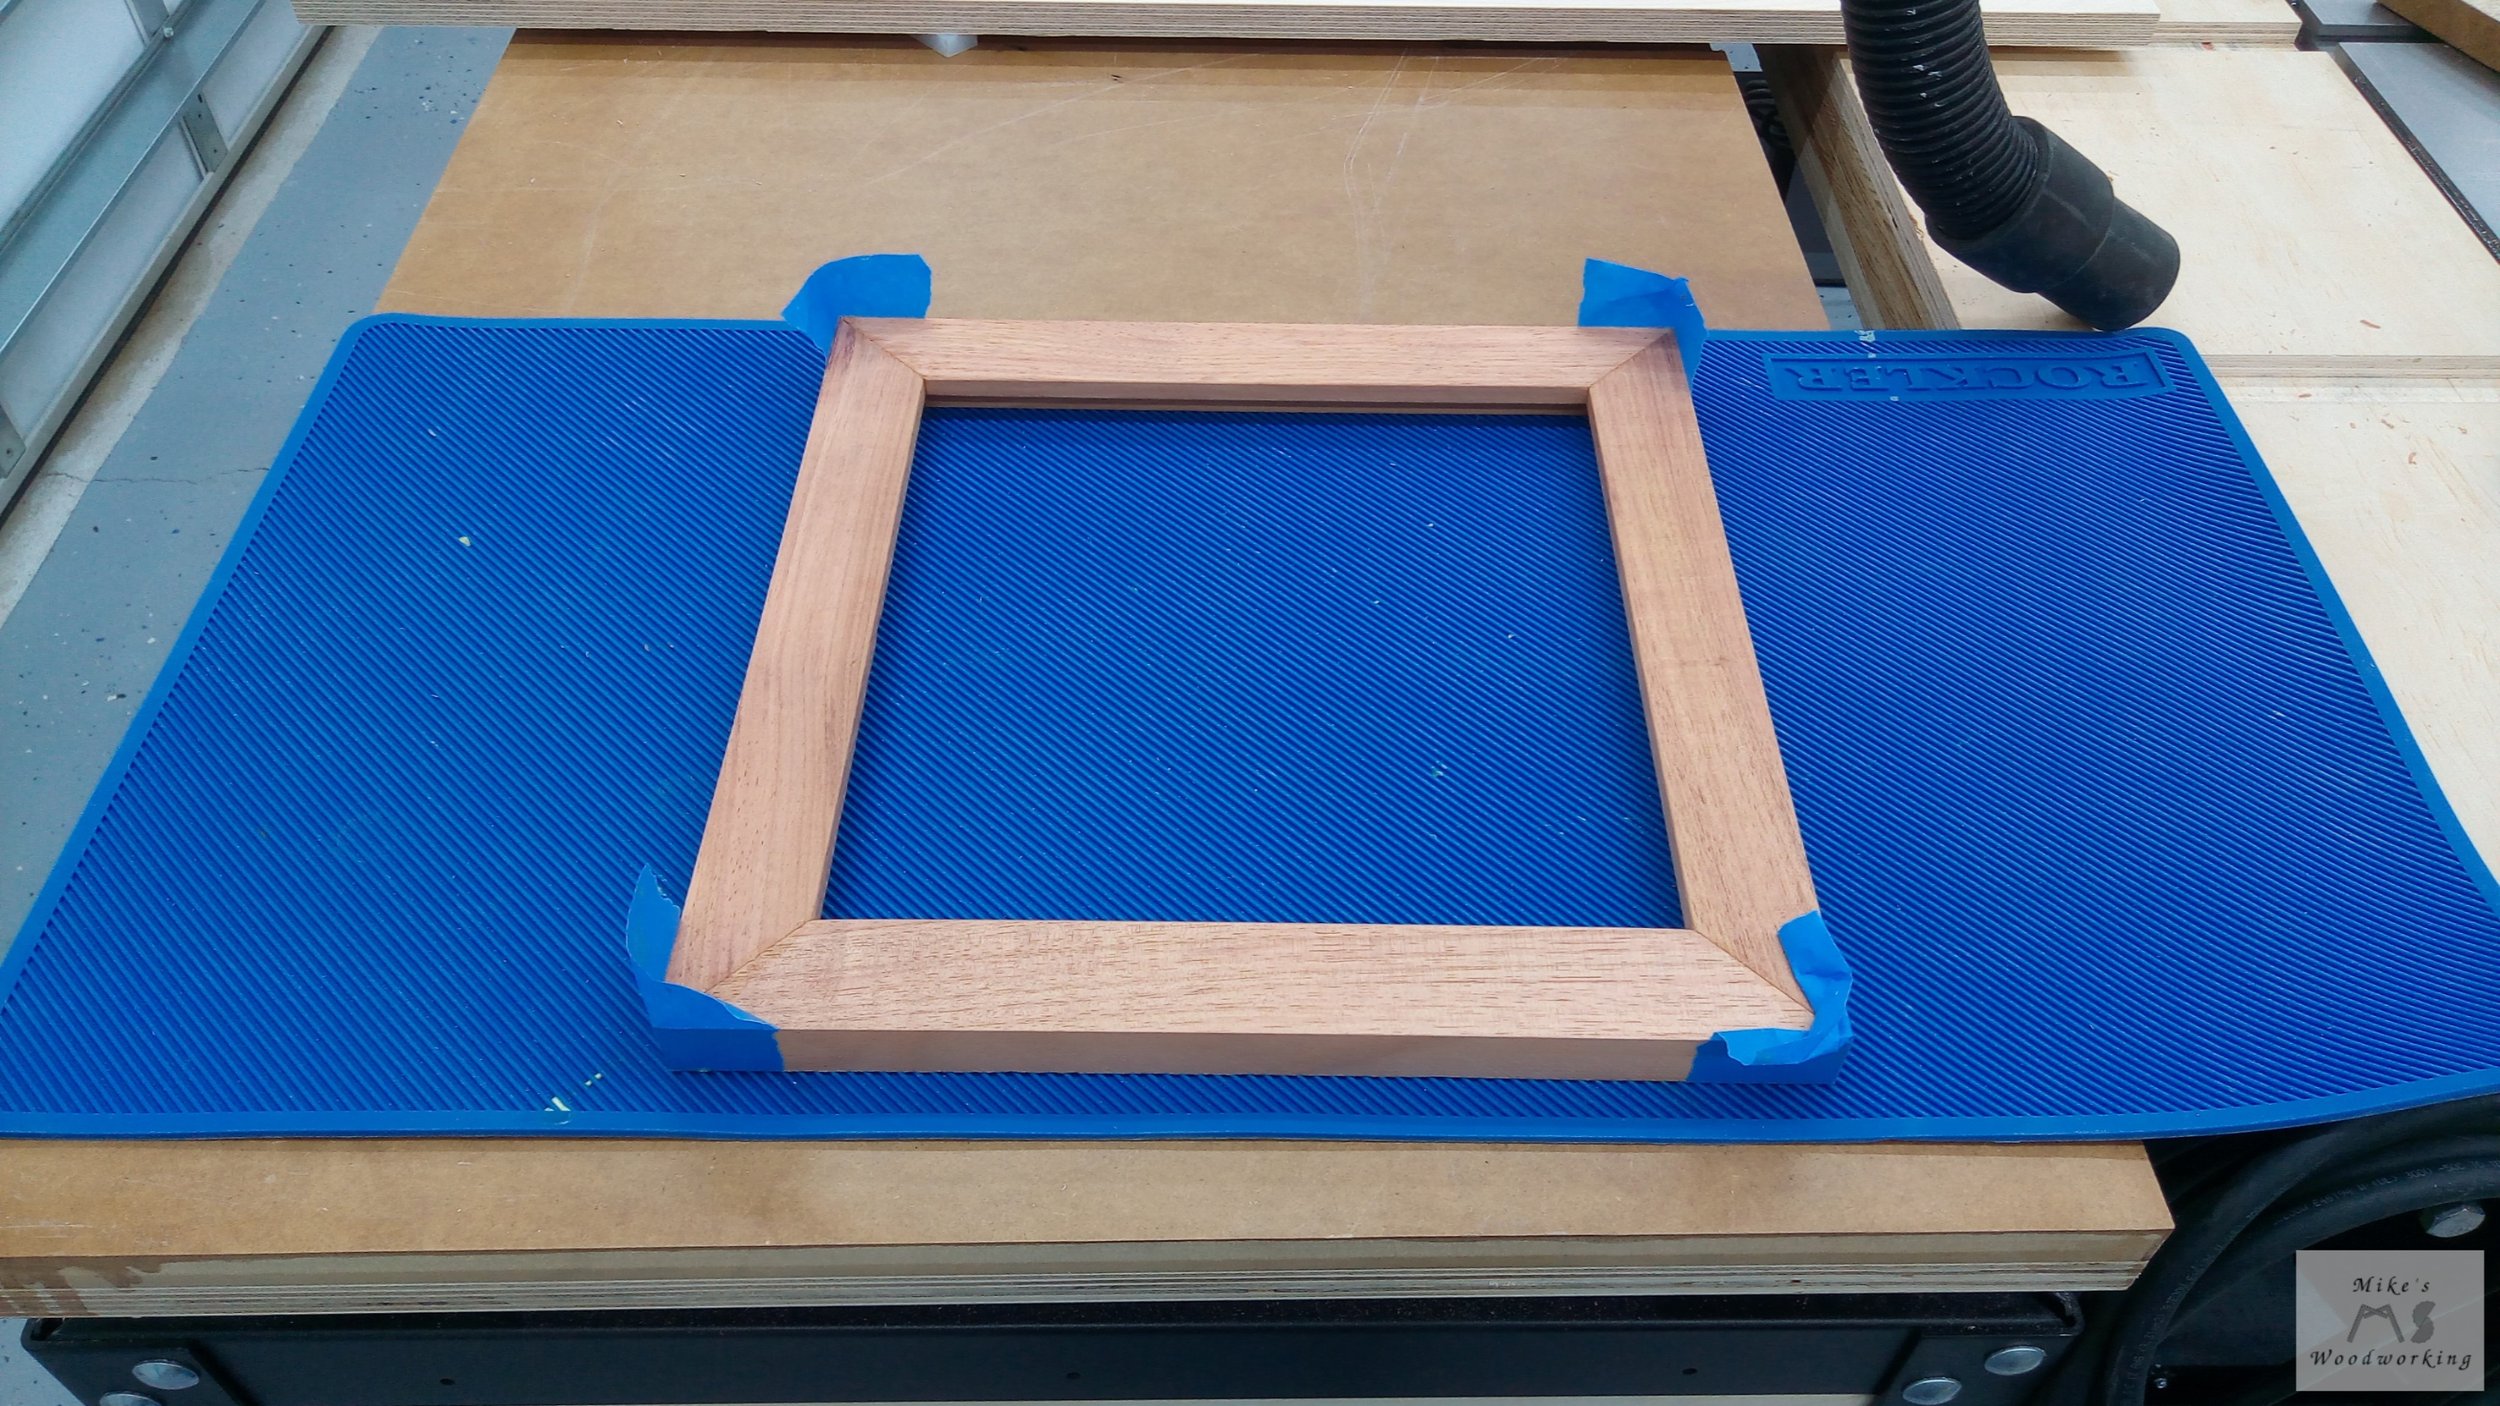
To really bring home the Hawaii vibe of the project, I thought it only fitting to make the frame for the cross stitch out of woods typically found around the islands of Hawaii. I wanted to use two different species that would make a nice contrast. I settled on koa and mango.
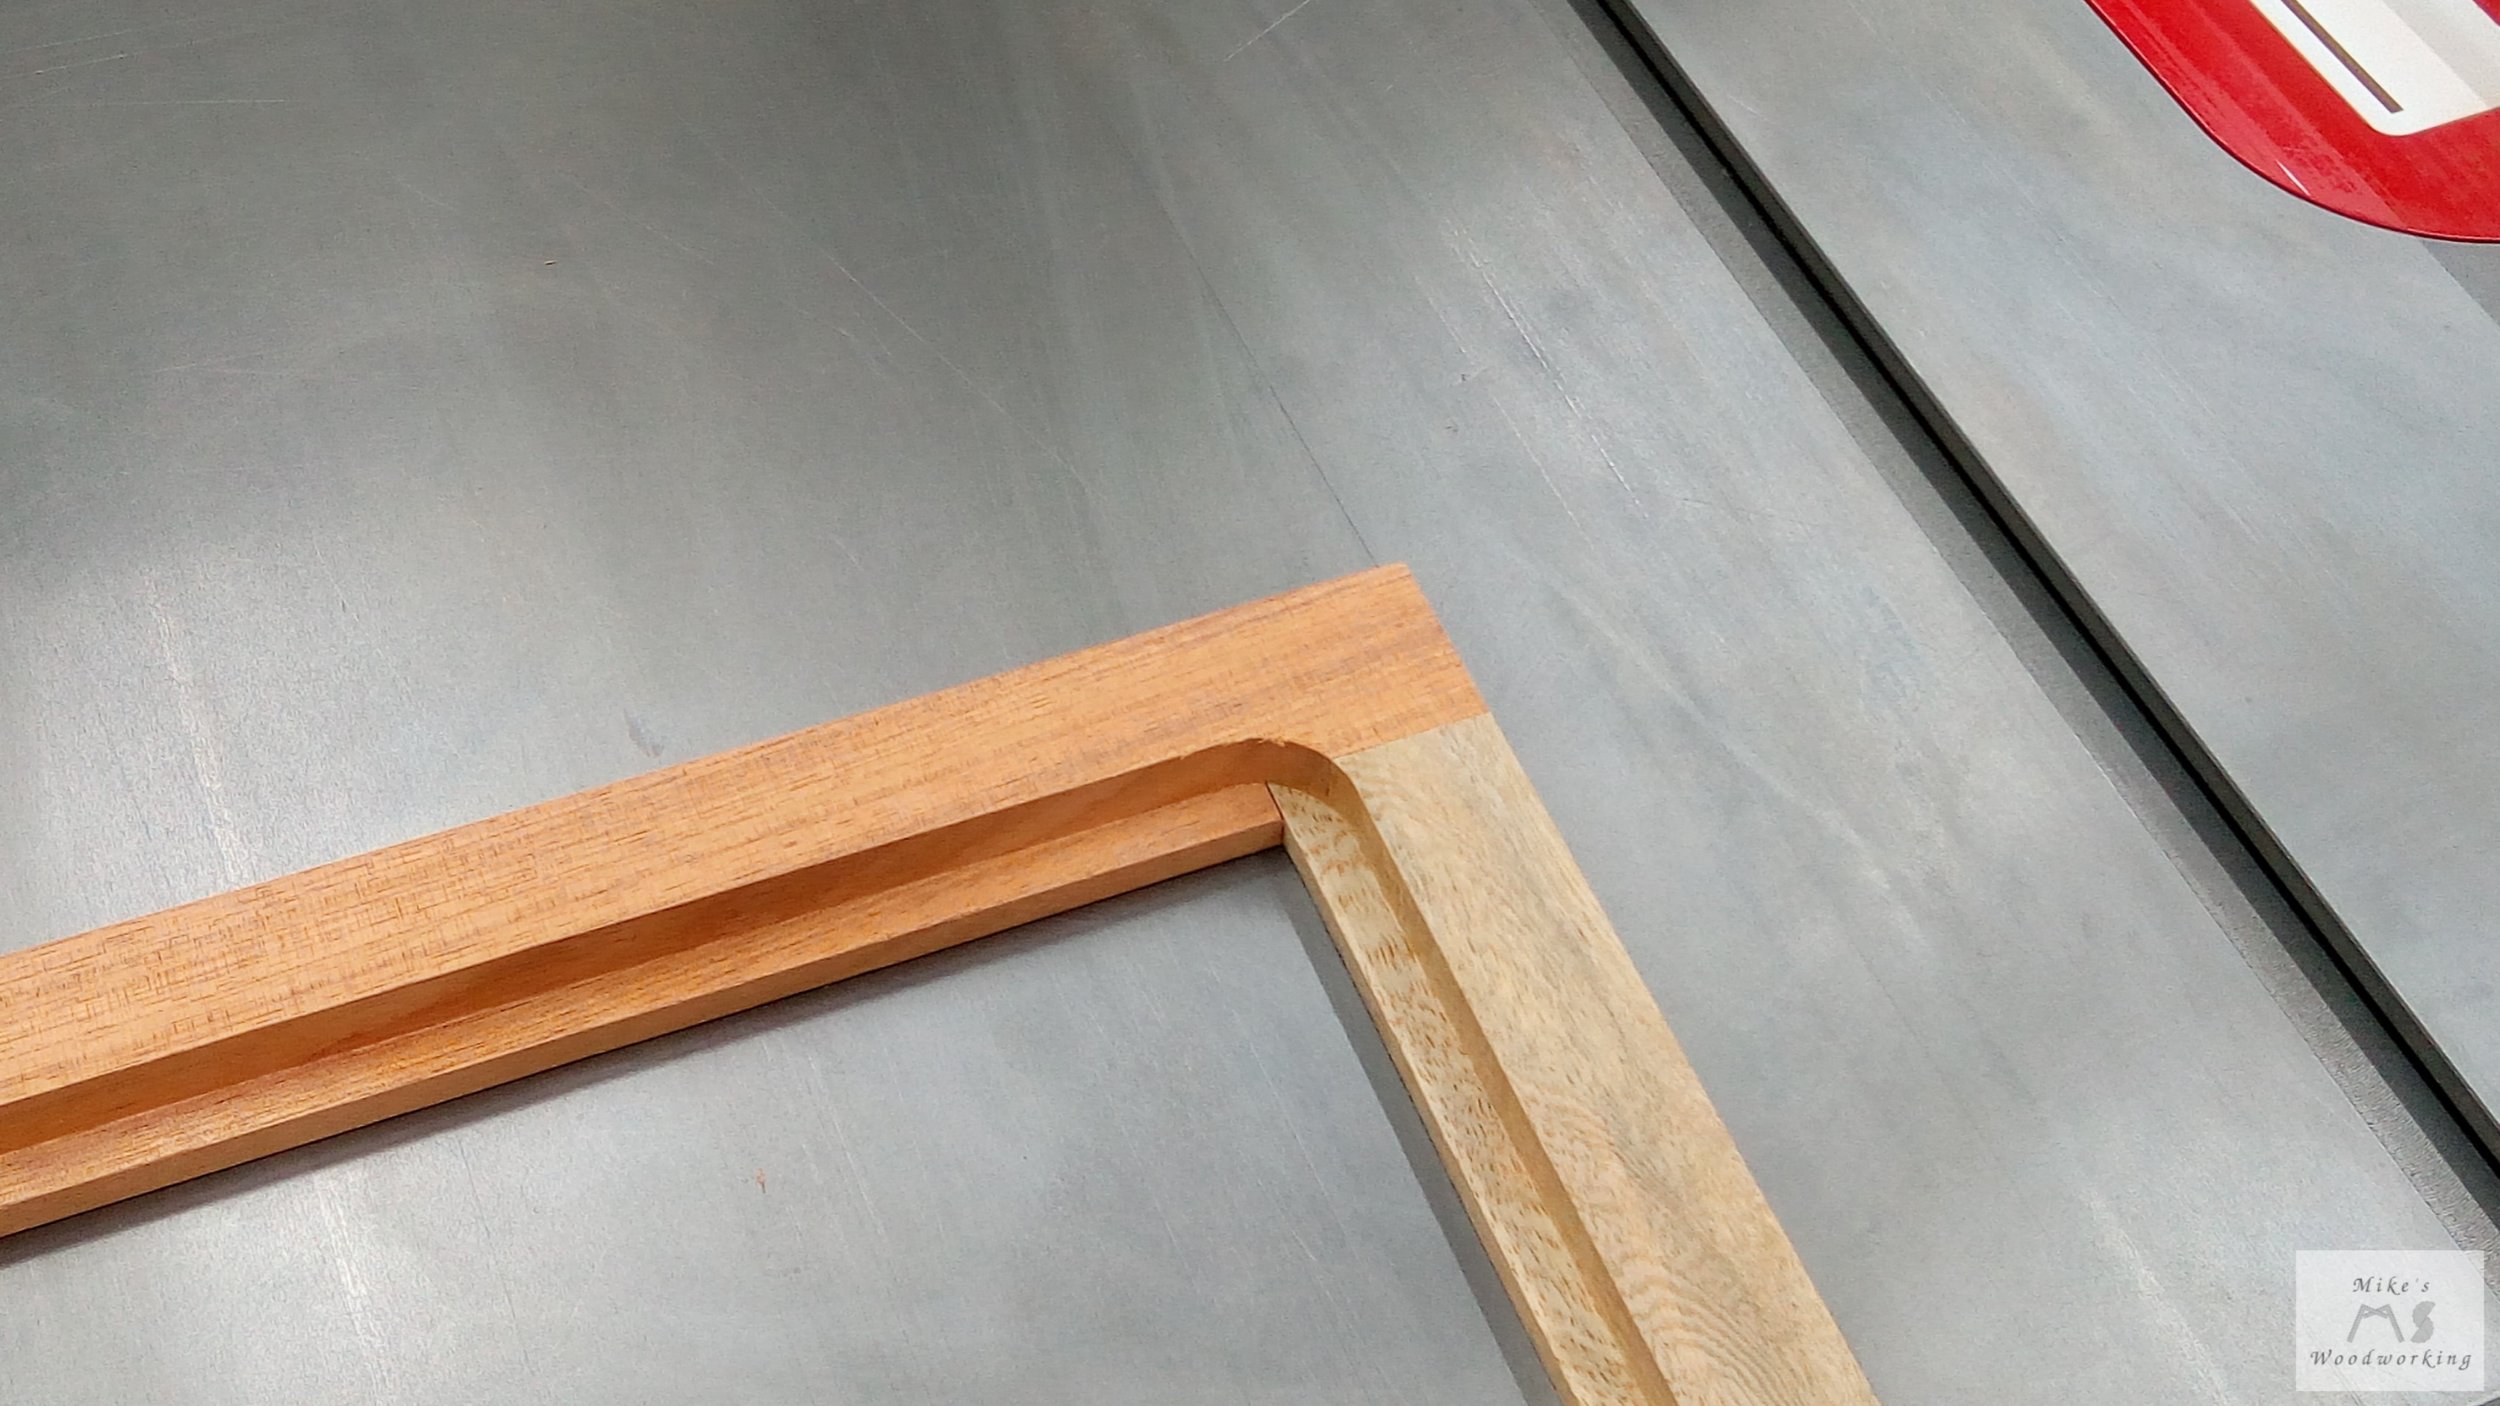
The construction of the frame needed to be something simple, so I went with half-laps again, like I did on the Geeks-R-Us frame from last year. I wanted the frame to have a bit different look than just the standard half-laps. I opted to make each side of the frame kind of offset. The picture below shows this better than I can describe it.

Excuse the coloring of the lighter “mango” pieces. I didn’t have that as an option in Sketchup.
The execution of this build was relatively simple. My biggest sticking point was waiting for the wood to dry. Knowing well in advance what materials I wanted to use for this project, I should have bought the wood MUCH earlier than September. The pieces of koa I received absolutely maxed out my moisture meter at 32% (who knows how much worse they were). The mango was a bit better, but still in the 20’s.
All of the pieces I bought were 8Q stock, so I figured the best way to try and dry everything faster was to resaw them. The mango piece had a bit of stress in the wood after cutting it so it bowed a little bit. The koa was pretty much dead flat and was very easy to resaw.
I sticker-stacked all of the wood on my workbench and I set up a fan to blow air across all of the wood 24/7. I also made sure to have my dehumidifier running all of the time as well. The workshop/garage is pretty well insulated so I didn’t have to worry about big fluctuations in temperature or humidity. By the time November came around, the mango was under 10% and most of the koa was in the 10%-12% range, so I really dodged a bullet there.
With everything dried enough to work, I set about cutting the four pieces I needed. All were 1-1/2” wide and were planed down to a little more than 3/4” thick. I cut everything to proper length on my new Infinity Crosscut sled. I’m so glad I switched to this new sled from my old one (SOOO much lighter).
Now that the pieces were cut to final dimensions, I needed to cut the half-laps. I used my digital calipers to measure all of the pieces and they were all within a couple of thousandths, so I split the difference in the numbers and divided that by two. I used that to set the height on my flat-bottom blade at the table saw. With the height locked in, it was just a matter of making multiple passes utilizing my Harvey miter gauge. After cutting two half-laps I fit the pieces together and they were near perfect. Because of the look I wanted, I was careful to flip each piece over when cutting the half-laps on the opposite end of each piece.
With all of the half-laps cut, I fit all of the pieces together to see how they looked, and which sides I would have as the show faces.
You might be able to see that I cut the half-laps just a shade too far in on all of the pieces, leaving a slight overhang on all sides. That’s easy enough to take care of with my block plane and some sanding.
Next up was to glue the pieces together. Glue-ups are ALWAYS stressful for me, even on the simplest projects. This was no different. I used most of the f-style clamps I had to get everything to fit together. Despite my careful checking, I still wound up with a slight gap in a couple of spots.
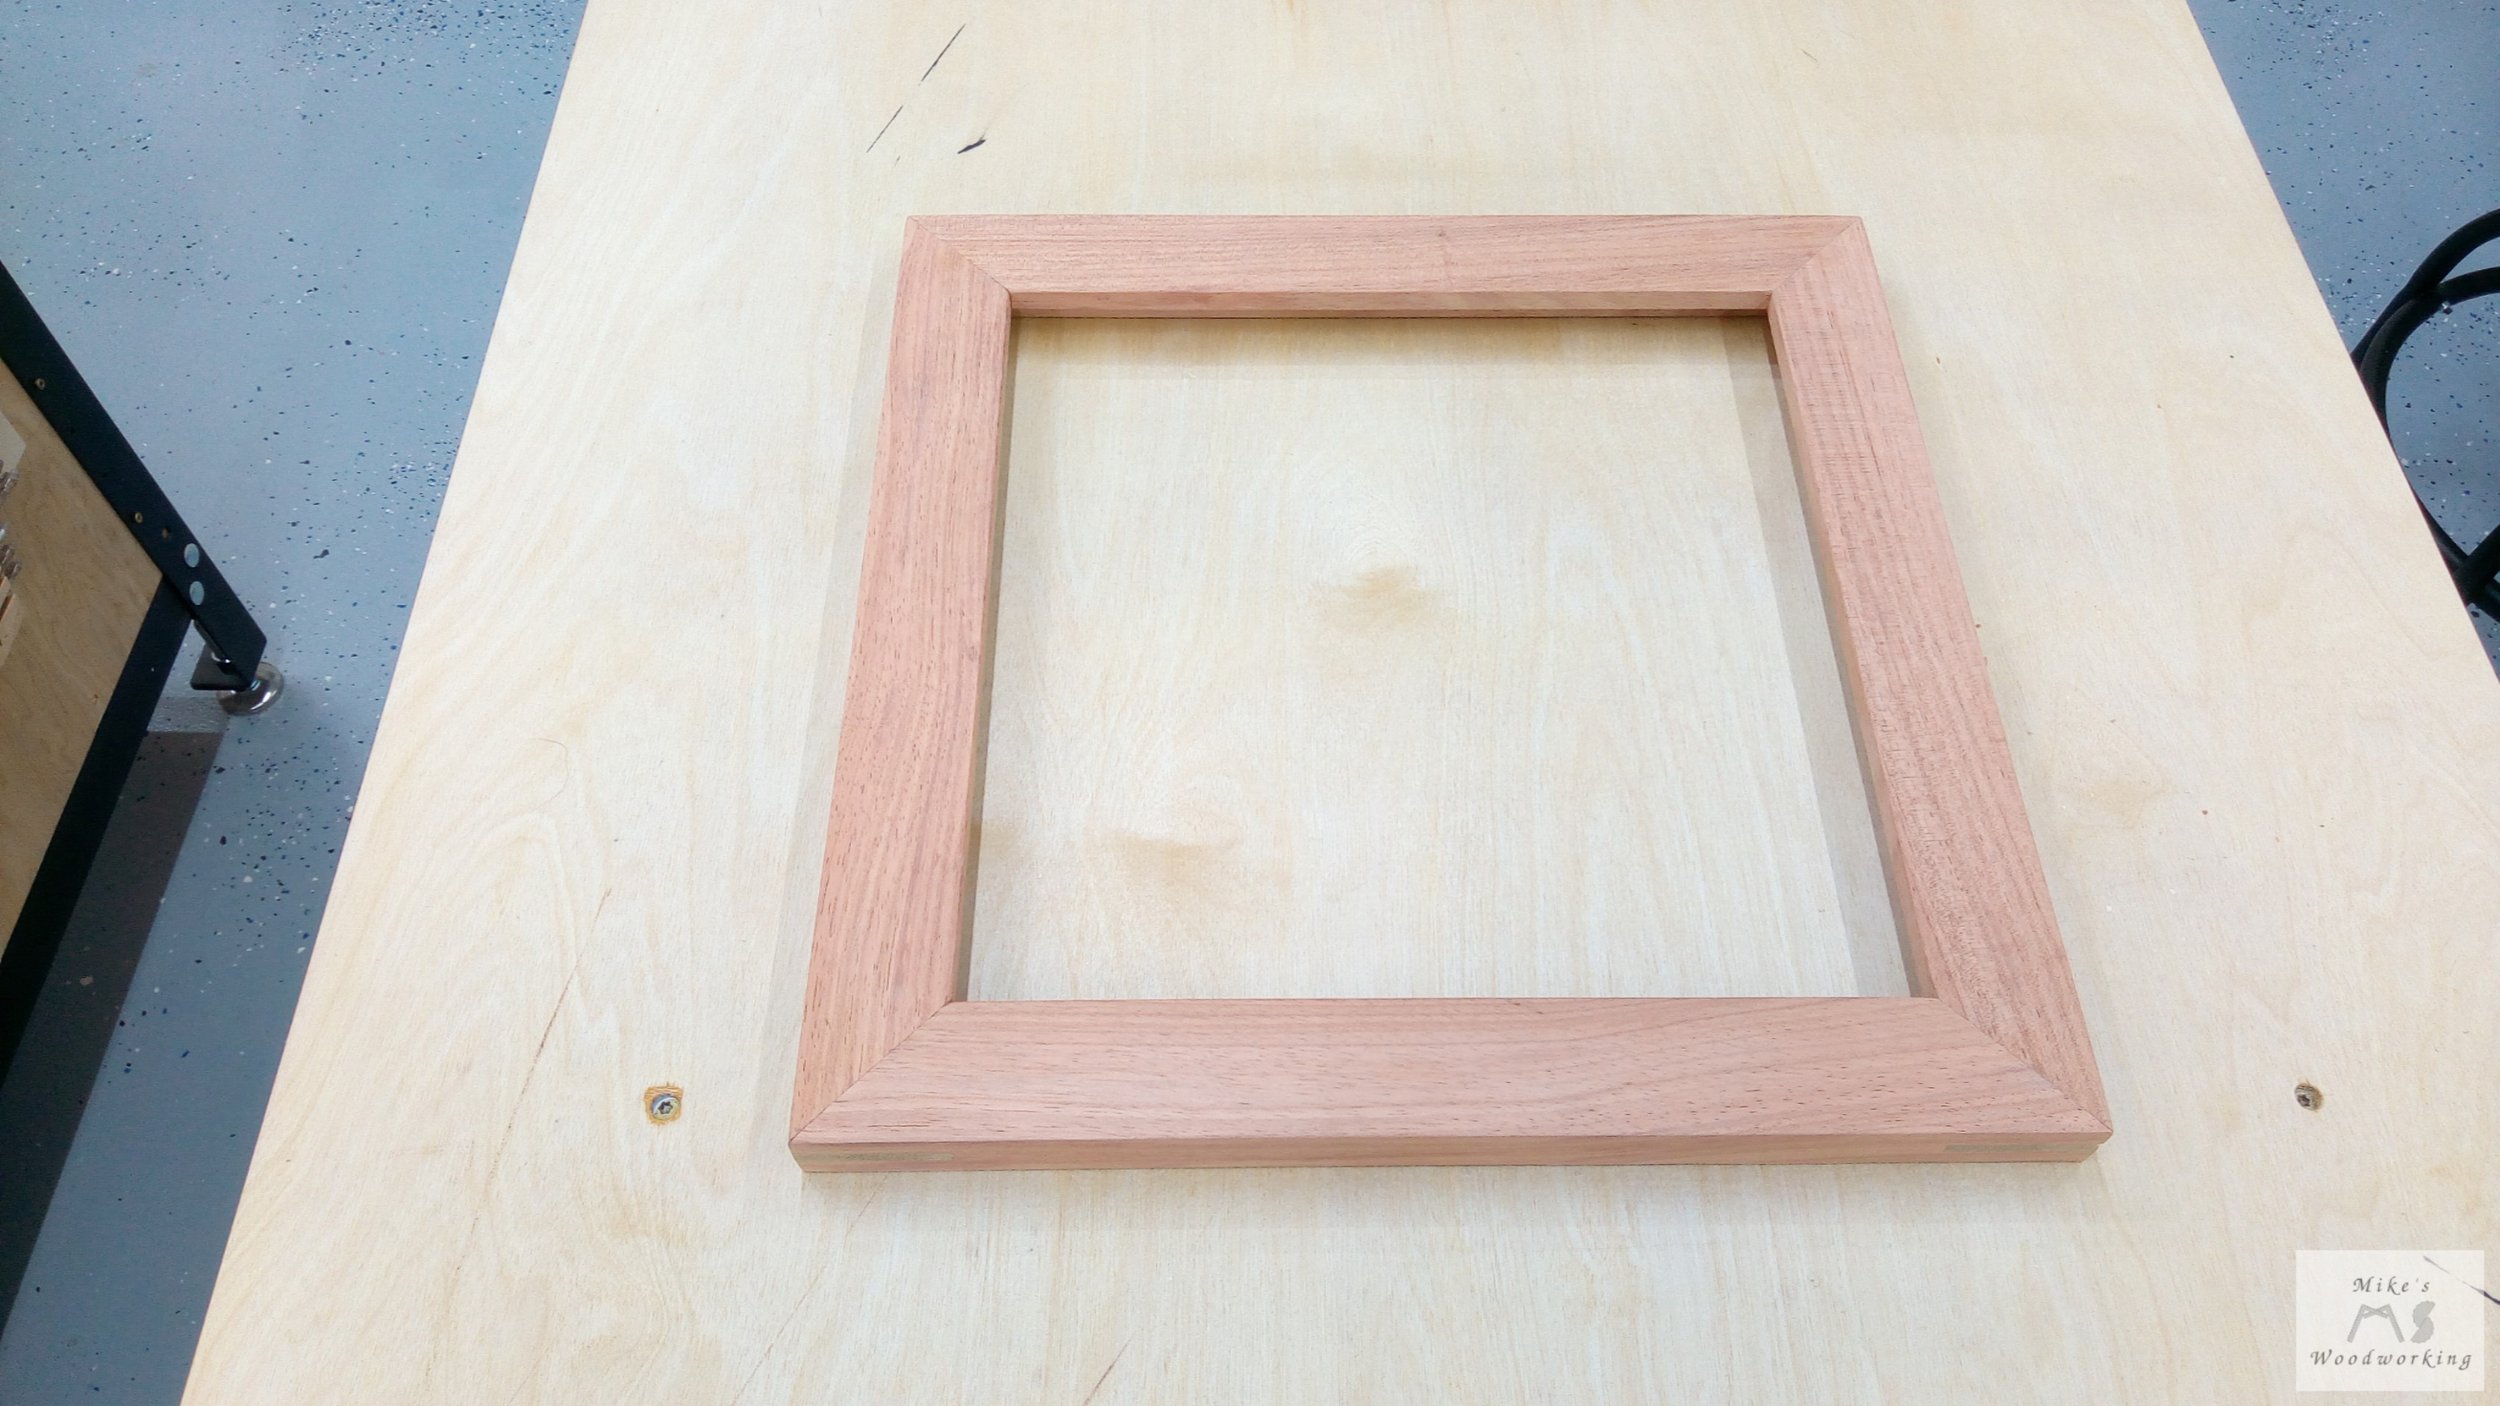
After waiting a day for the glue to dry, I removed the clamps and proceeded to sand all of the faces flat. There wasn’t too much variation on the front and the back, but I had some work to do on the edges. I clamped the frame in my moxon vise and first used my block plane to knock down most of the overhanging material. I then used 80, 120, and 180-grit sandpaper to smooth out all four edges. I’ll say one thing, the end grain of that mango is WAY harder than the koa.
The frame, at this point is more or less done. That last thing to do is cut the groove on the back of the frame over at the router table with my rabbeting bit. The rabbeting bit I have is adjustable with different sized bearings, but since I only seem to use it on picture frames, I never have to change out the bearing. I cut the rabbet in two passes, taking 1/4” with each pass. After the final pass the depth of the rabbet was 1/2”.
I still don’t have a good set of sharp chisels, so these rounded corners are still going to be a thing in my shop.
With the frame more or less completed, I needed to cut the acrylic and plywood back to size. This was simple enough at the table saw. I went with 1/8” plywood for the back this time around, since I actually was able to find some. I cut the acrylic to size first, and left the rip fence at the same settings for each side when cutting the plywood backer. This allowed me to have both pieces wind up identical. I simply rounded the corners off at the oscillating belt sander.
The final piece to cut to size was the mat. Lisa found these cool stamps that fit the theme of the Hawaii cross stitch and we could apply the stamps to the mat and surround the picture. I broke out my Logan Artist Elite 450-1 mat cutter to cut the mat. It took me a few minutes of going through the manual again to figure out what to do, but it didn’t take me long to get back into a groove.
I carefully made my cuts and the mat was perfect. I took some sharp scissors and cut the corners round just like the acrylic and plywood. With all three pieces sized, I placed them inside the frame and the fit was great. All that was left to do was sand the plywood and apply my brand. I forgot to do that for both the Dice Tower AND the Sunrise Boxes, and I had no place to add it on the Die-Abolical Puzzles. This time I made sure to lay my branding iron out on my workbench to remind myself to use it.
I’m almost done at this point. All I have to do now is apply three coats of spray lacquer and buff out the finish with some kraft paper after the finish has time to cure. This produced a silky smooth finish, and the grain in that mango really came to life.
The last bit of work was up to Lisa. She cut the cross stitch to size, removed the protective plastic from the acrylic, applied some stamps to the mat, and sandwiched everything together. It all came out great and we couldn’t be happier. The final step was for me to install the points in the back of the frame to hold everything in place. That was easy enough with my Logan point driver. Only one final gift to make…the Risa Bee.
Anyone who’s been to the North Shore on Oahu will understand the snow cones…Matsumoto Shave Ice FTW.
Risa Bee
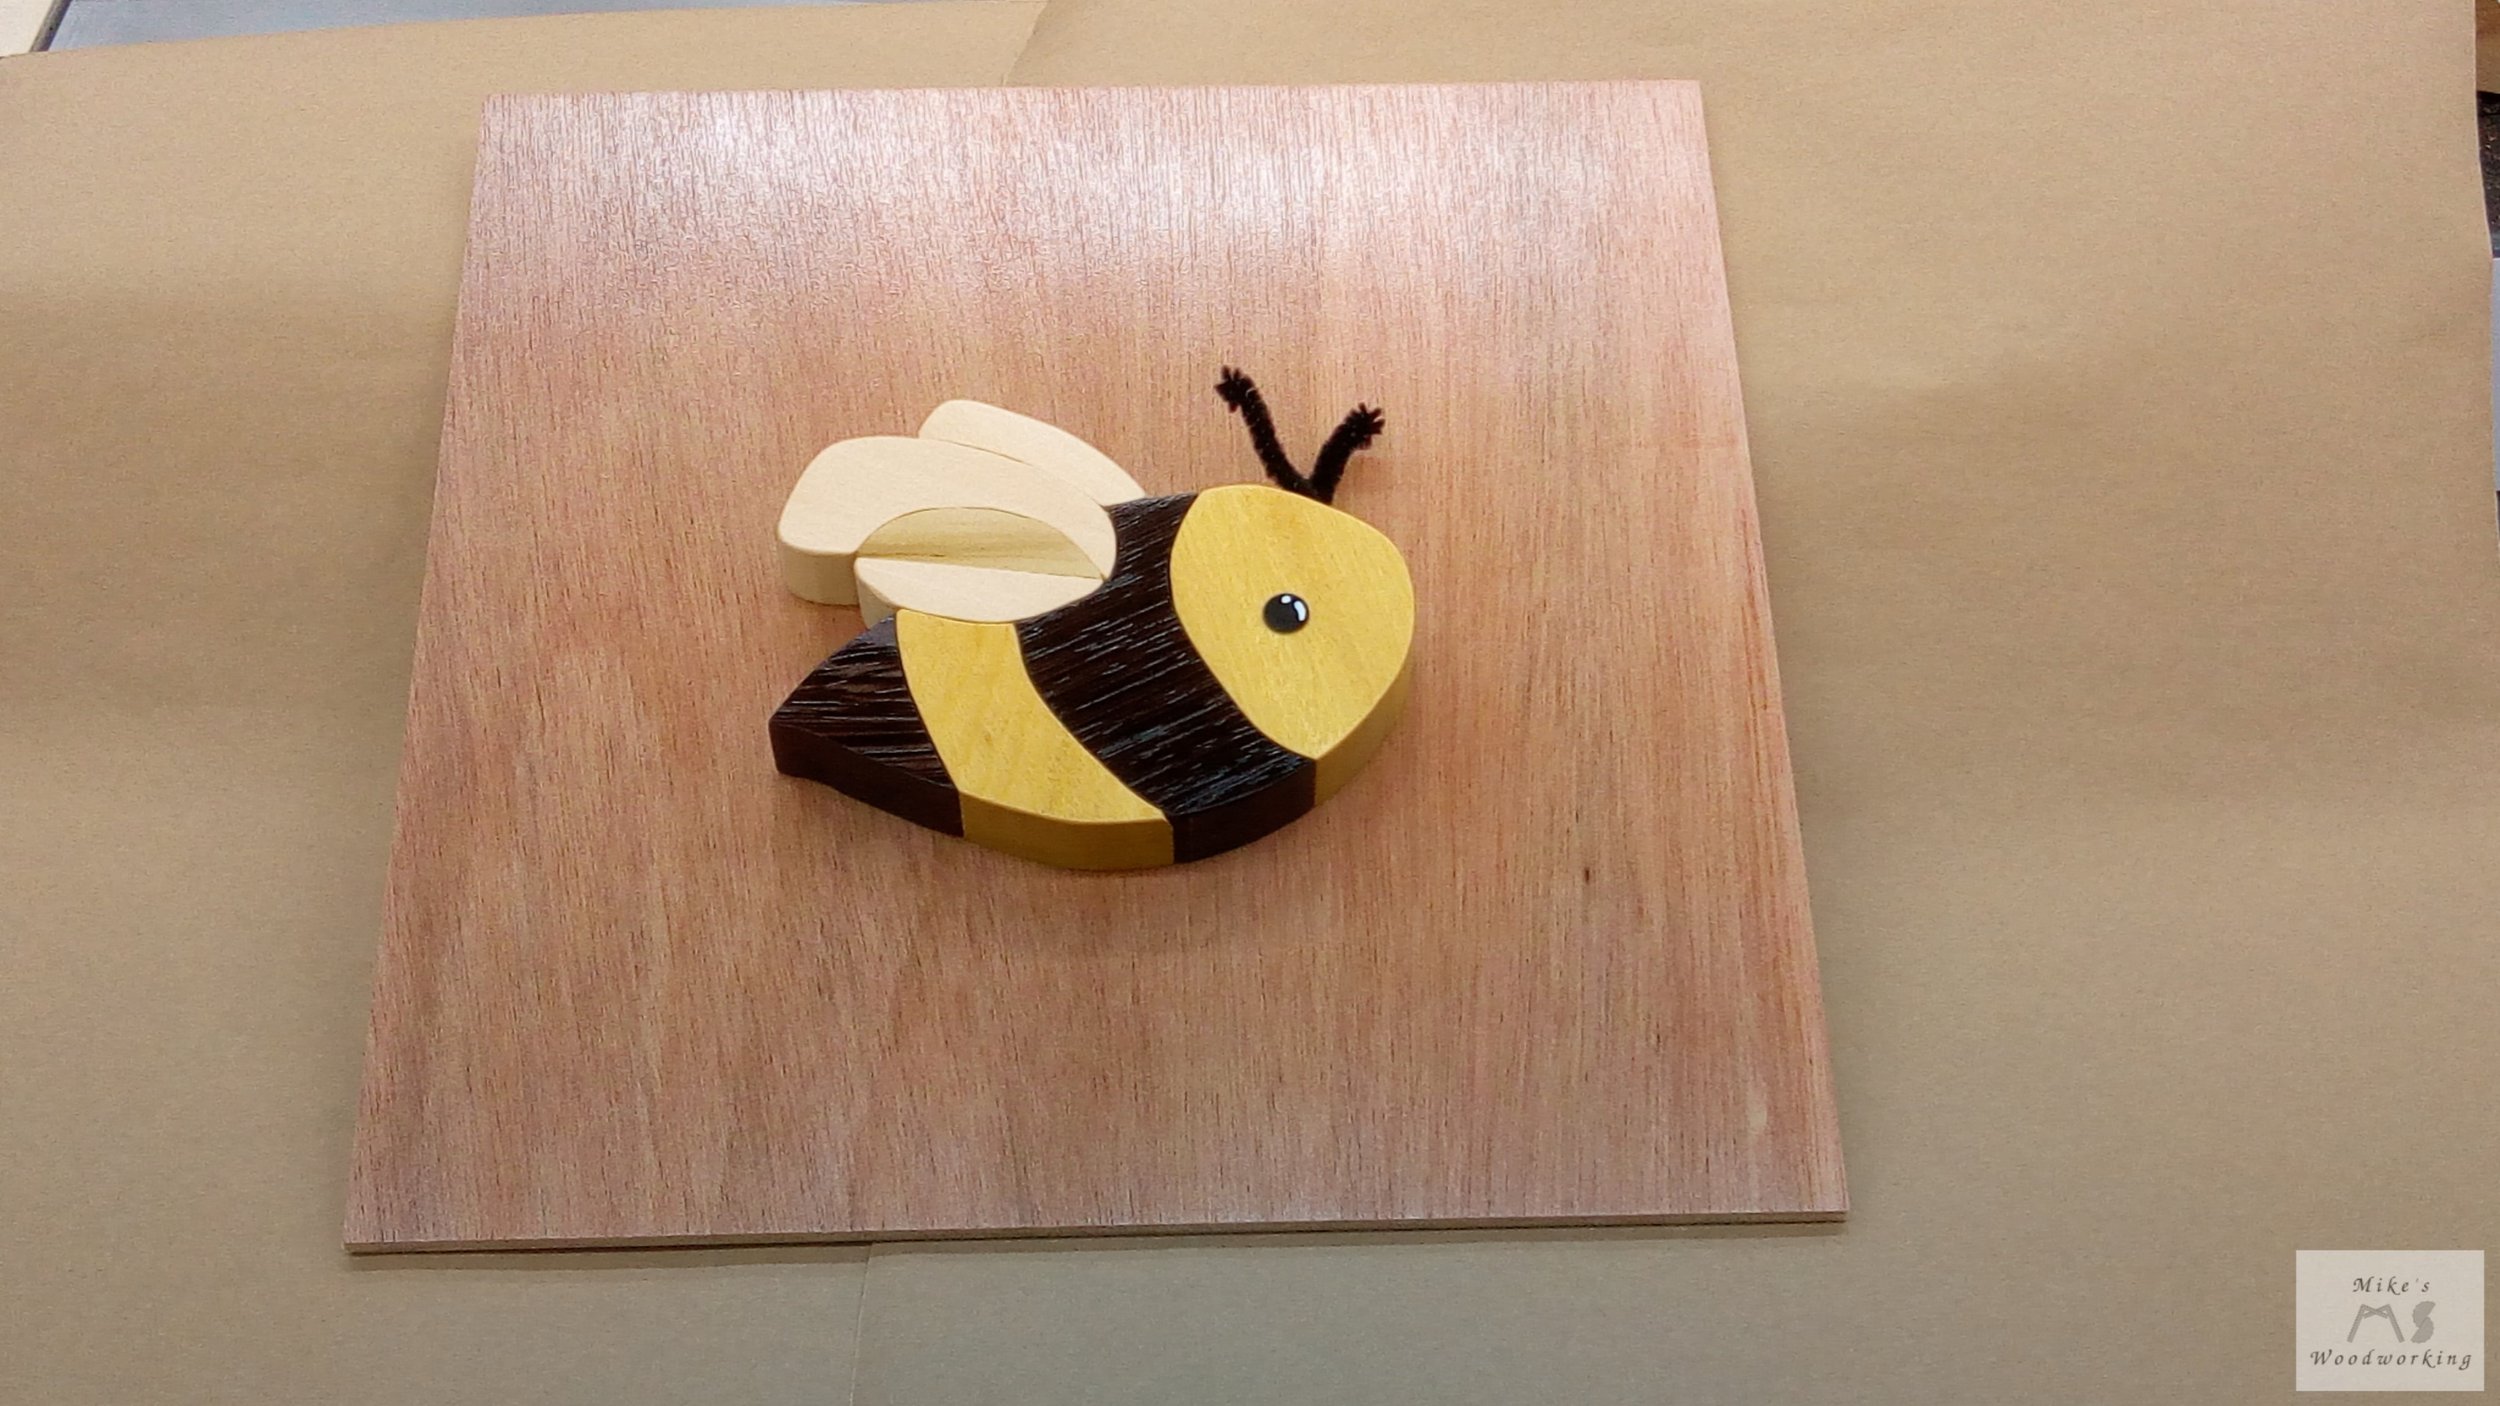
I wanted to make something special for my friend Risa, but I was never sure what. It then dawned on me that a perfect project would be to replicate one of the stickers she made (based on one of her own drawings), and make my interpretation out of wood. I chose to go with this:

For my interpretation, I was going to use wood species that were as similar as possible to the colors of the drawing. For the yellow and black sections (minus the eye and antennae), I could use yellow heart and wenge (respectively). The wings I wasn’t so sure about. I thought about possibly using acrylic, but the thickness wouldn’t be right. Instead, for the three lighter-shaded pieces I would use basswood, and for the remaining darker piece I would use a piece of poplar with a slight green tone to the grain. In addition, I wanted to add a few words around the bee to describe Risa herself.

I’d forgotten how smooth of a finish the helical cutterhead on my planer could make.
As for the size of the finished piece as a whole, I printed the image on a piece of paper in landscape mode and I liked that size. The background surrounding the above picture is about 7” square. While a couple of the pieces might be a little small and harder to handle, I didn’t like the idea of making the bee too much bigger.
Once the bee is completed, my plan is to attach it to a thin plywood back and have that inside a frame. The choice of wood for the frame would be the same materials from the Hawaii frame (koa and mango). The only different this time is the bee frame would be a traditional mitered frame with splines to strengthen the corners, versus a half-lap design.
I started by printing off a couple of copies of the sticker and gluing those to some scrap 3/4” MDF I had leftover from the Rockler Workshop projects. Over at the band saw I roughly cut out the main body of the bee on one piece, and I cut the wings out of the other. I was making this up as I went, and this seemed like the best option.
With the bee now in two pieces, I proceeded to cut each of the individual pieces out. Once that was done, I sanded the rough band saw marks out with my oscillating belt/drum sander. Everything was still fitting pretty well, although I could tell getting the wings in place with a minimum of gaps was likely going to be a problem.
I next traced the templates I had onto their corresponding pieces of wood and roughly cut those out at the band saw as well. Pencil lines were tough to see on the wenge, so I had to mark one of the lines with some chalk so I wouldn’t cut in the wrong place.

Next up was the arduous task of sanding all of the pieces down to the lines and finessing all of them until they fit, or at least as well as I could manage. I first thought about using the router table with a pattern bit, but some of these pieces are just too small (plus there are some tight curves with which to contend). The poplar and basswood were very easy sanding. The yellow heart was a bit harder, but not too bad. That wenge, though, was absolutely terrible. It is just SO hard. I wish I had some lower grit drums as it would have made sanding those two pieces down a bit easier. Eventually, I was able to get all four main pieces worked and they went together with very minimal gaps.

When I went to fit the wings into the opening at the top of the bee, I was having a hard time getting things to fit properly. No matter what I tried I couldn’t eliminate what I thought was a sizeable gap. I wound up remaking the larger wenge piece and marked it with the wing pieces so that it would be easier to get a better fit.

I realized at this point that I have the grain going in opposite directions. It shouldn’t make too much difference with pieces this small.
Here you can see there is a bit of a gap between the meeting point of the three wings pieces and the larger wenge piece. I wasn’t too thrilled with that outcome. I probably could fill the gap with some shop-made putty (sawdust and wood glue), but I wanted that to be a last resort.
I had another idea. I could take the body and use IT as a template for the three nested wing pieces. I could simply cut out one piece of basswood in the shape of the three pieces, cut that into three pieces, and finesse the fit from there.
Well, that was the plan. I tried this a couple of times and I couldn’t get things to fit quite right. It finally dawned on me that I was neglecting to account for the kerf of the band saw blade. Also, I was using the now slightly smaller basswood middle wing piece as the template for the poplar piece. This, obviously, would not work.
Instead, I made a rough cutout of the poplar piece and finessed that down to make a much better fit. I did the same with the basswood pieces as well, and I really liked the results.

You can clearly see the amount of gap between the wings and the main body is much more akin to the body pieces and the gaps there. At this point, I’m calling it good. I don’t think I will even bother filling the gaps. They are small enough to not distract from the main piece itself. Plus, this is MY take on Risa’s design, and I like the way it looks. The hard part is now complete. Next up I needed to cut a backer piece and make a frame.
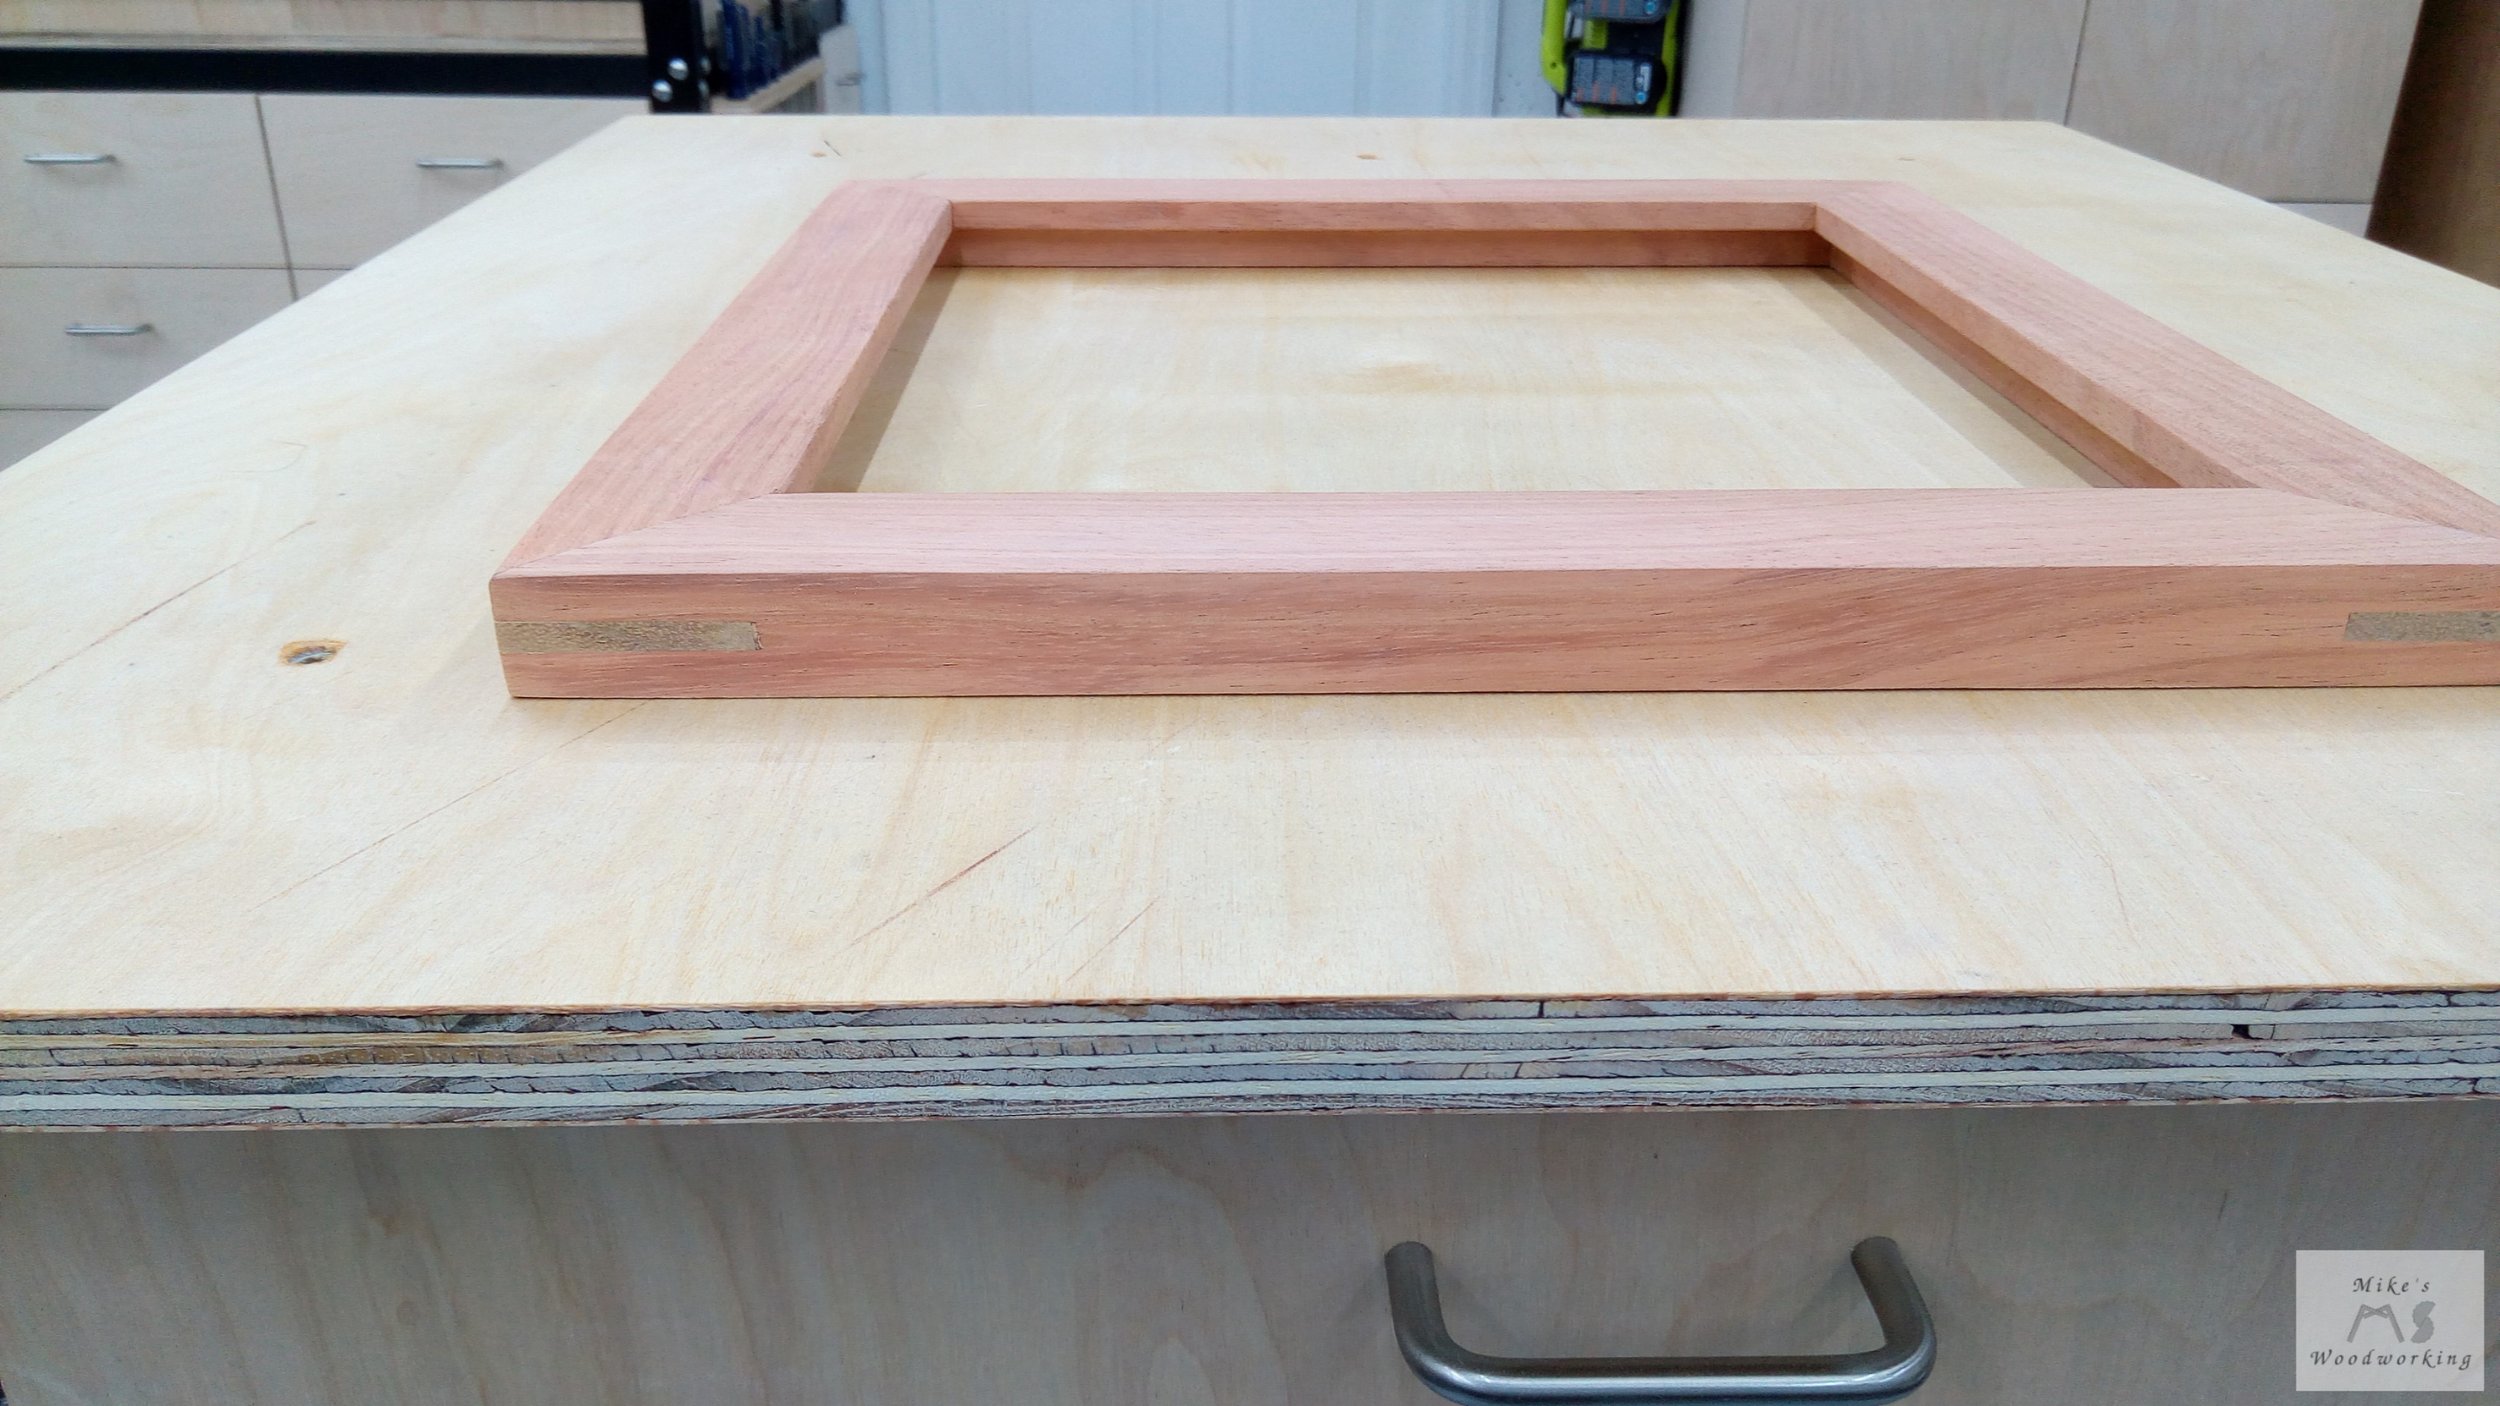
Given the size of the bee, I opted to go with a panel that was 10” x 10”. I would need to add 3/4” to each measurement to allow for the rabbet in the frame. As for the frame itself, it would be a traditional mitered frame made from koa with mango splines for added accent and strength.
I made my picture frame sled all the way back in February, but I never actually tried it out at the time (A LOT of personal stuff was happening back then). I figured this would be the perfect time to give it a shot. I cut some scrap plywood to rough size and cut a 3/8” W x 1/2” D rabbet in all of them at the router table. I set up the sled on the table saw and made sure to use my Izzy Swan Infeed Table for added support. The sled is a bit awkward and wants to tip when pulled back too far.
Here you can see the infeed table in action holding the picture frame sled up.
I made my cuts at 10” on the sled and I taped up the frame to check the fit of the backer. Well, there’s a reason you do these types of tests on scraps, because the frame wound up too small. The mistake was entirely my own. I took the measurement of the opening of the frame, but I needed to account for the 3/8” rabbet on both sides as well, meaning I needed to make my cuts at 10-3/4”. I set up the sled at that mark, made my cuts, and the frame came out perfect.
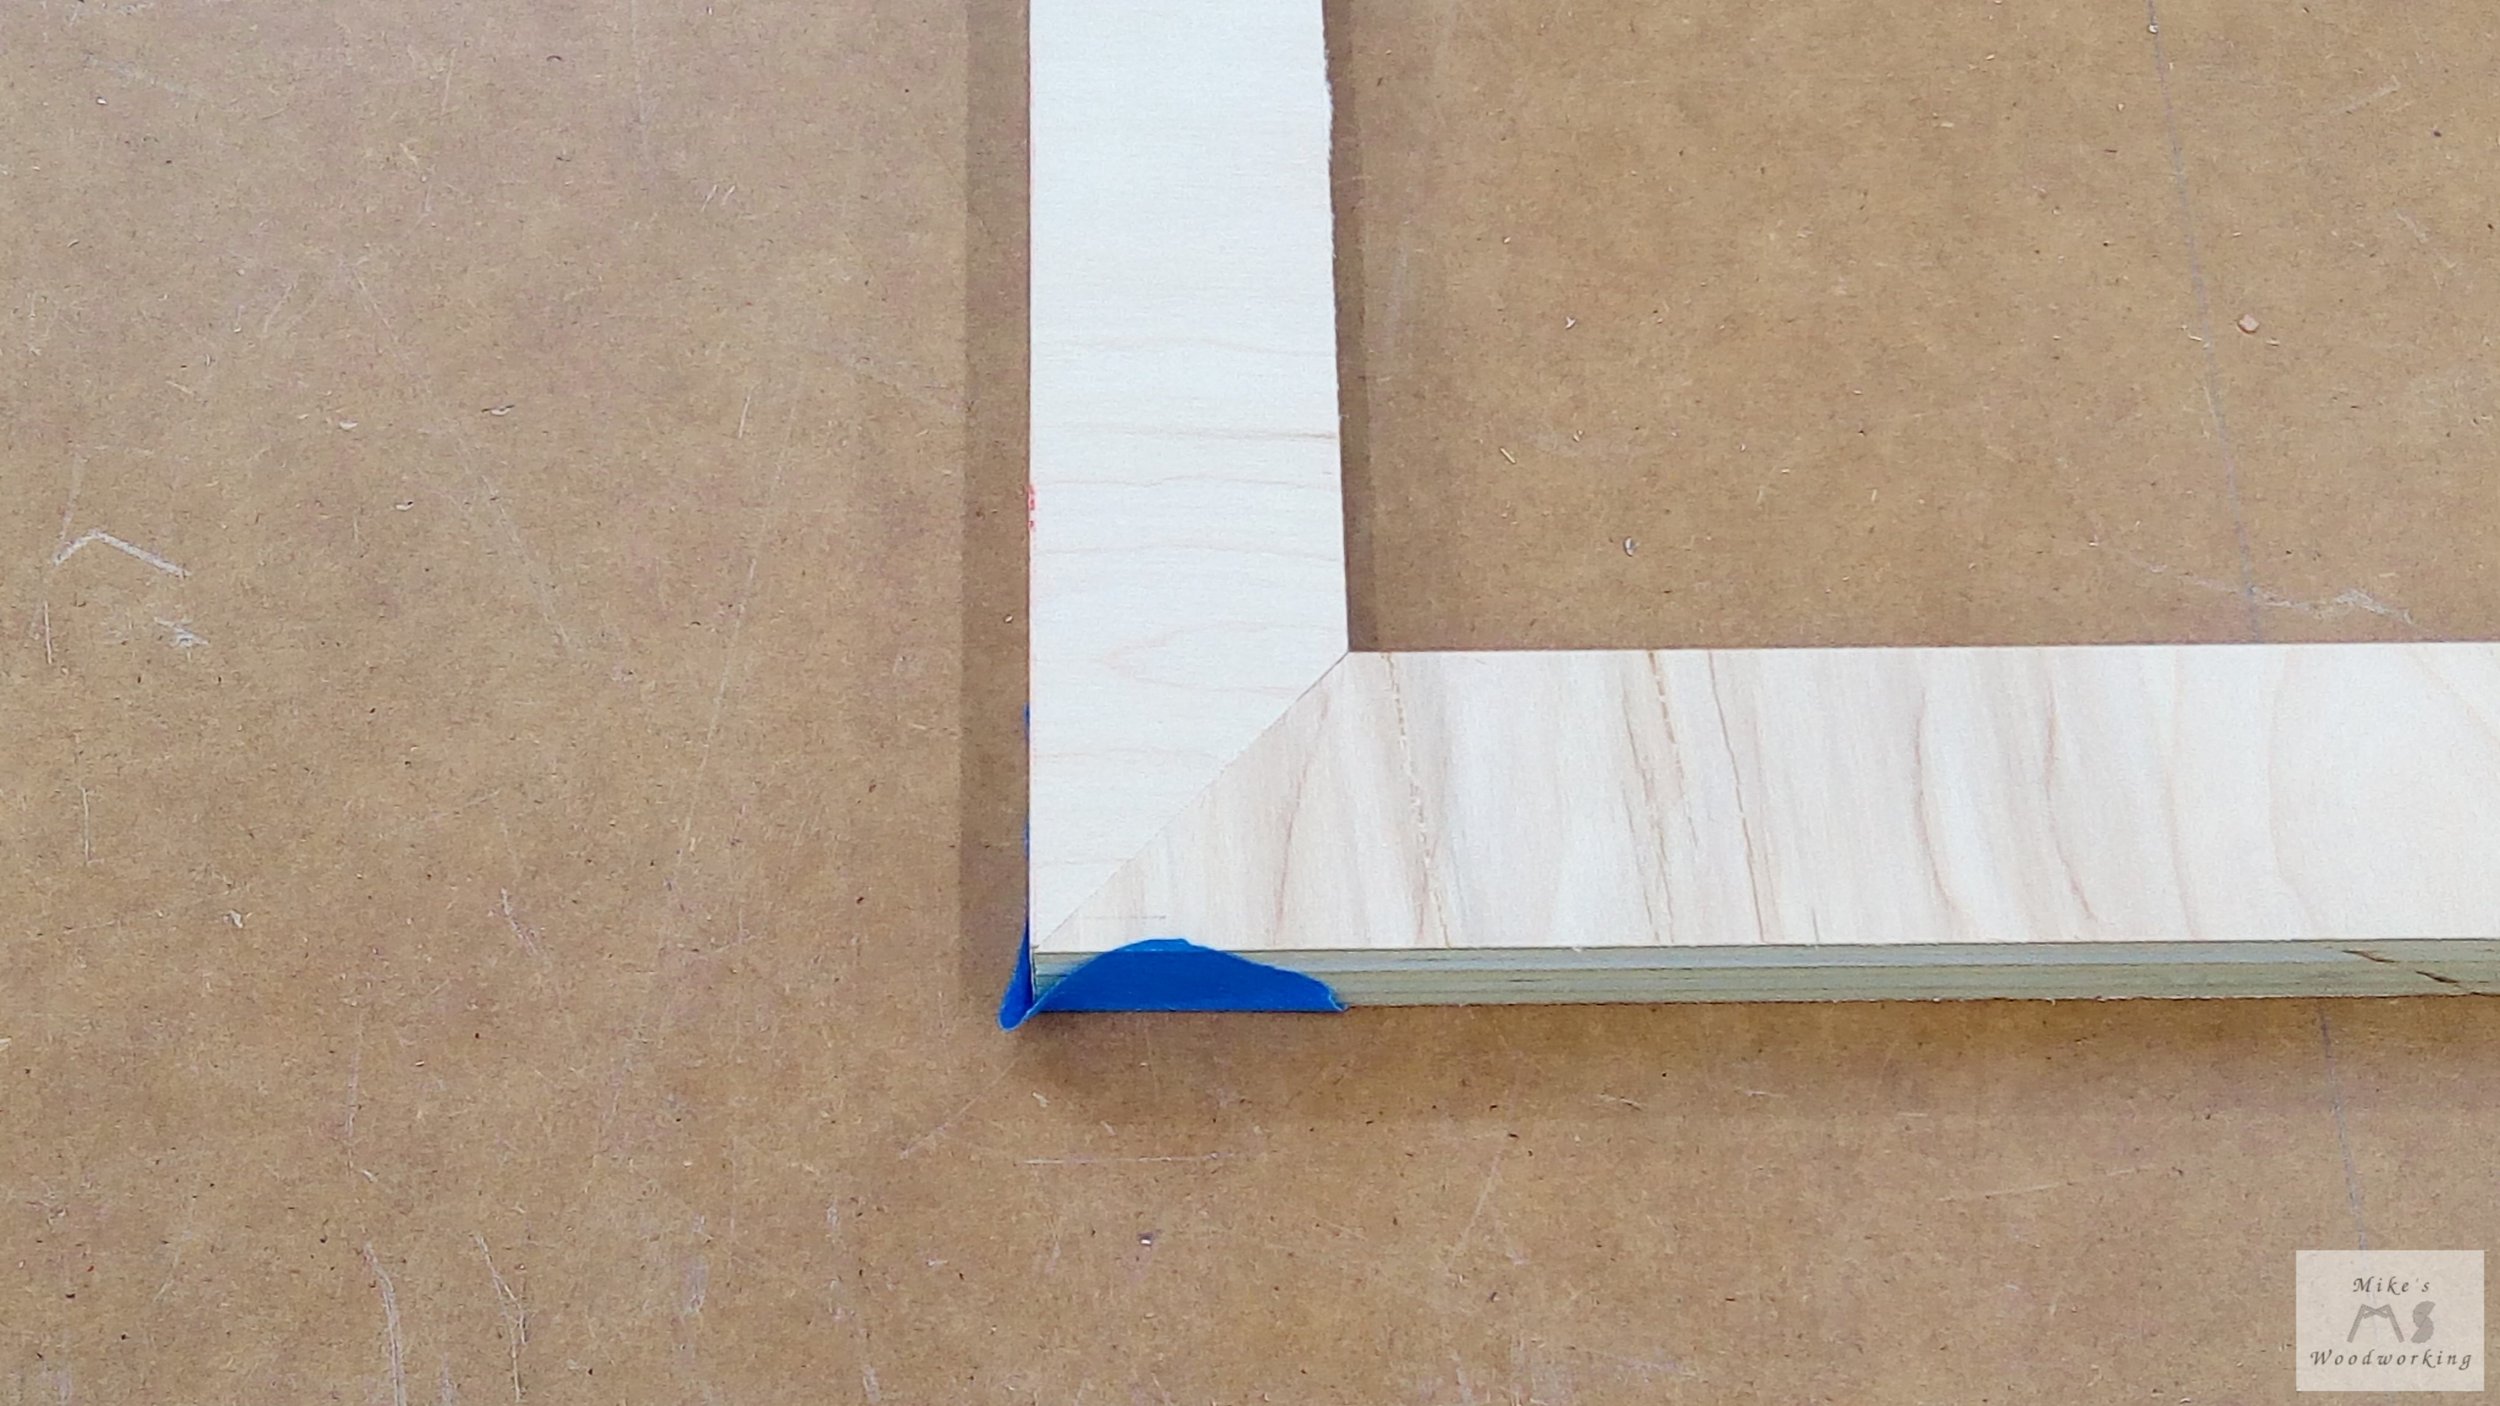
Here you can see the corner came out absolutely perfect. I couldn’t be happier.
The test was a success, so now was time to cut the real frame. I milled up more koa and cut it to 1-1/2” W just like with the Hawaii frame. I ran the pieces through the router table to make the rabbet, just like the test run, making sure to go in two passes. I still wound up with a tiny bit of tear-out on one of the pieces, but there wasn’t anything I could do as it was in the middle of the piece. If it was at the end, I could have just not used that part. Oh well, it’ll be fine.
I was careful with each cut using the sled. I might add another clamp on the sled to hold the work in place while making the cuts as I wasn’t sure enough with my grip (not to mention my grip is likely to get worse as the years and my MS progress). I took my time and made all of my cuts and taped up the frame to check all of the joints. Again, just like the test frame, it came out perfect. I never got this kind of accuracy using the Incra sled. I “clamped” the frame (blue painter’s tape FTW) and set it aside until the next morning.
Come the following morning, it was time to remove the tape and sand the entire frame. All of the seams were nearly close to flush, so I didn’t have much work to do. I went through 80, 120, and 180-grit on the entire frame and I was finished in maybe 20 minutes. I used my random orbit sander on the front and back of the frame, but I used sanding blocks on the edges. I’ve tried using the ROS on the edges in the past and wound up rounding them off and not liking the results (live and learn).
With the frame sanding completed, I wanted to add some splines in the corners of the frame to give it a bit more strength, as well as give it an added bit of contrast. I went with more of the mango wood for this. I busted out my old spline-cutting jig and ran the frame through the saw. I made sure to use my flat bottom blade and I tried my best to line up the blade in the center of the frame.
I made all four cuts and I wasn’t satisfied with just the one kerf width of the cut. I flipped the frame over on the jig, leaving the fence in the same spot, and ran the frame through the saw again. This made the slot a bit wider, and it also guaranteed the slot was centered on the frame.
I resawed a piece of mango wood from the piece I’d used earlier for the Hawaii frame, and I took my time to sand it down to the right thickness to ensure a good fit in the grooves. I glued the splines in place and clamped all four corners to ensure a good bond. I left the frame, once again, to sit overnight.
The next morning I removed the clamps and cut the over-sized splines over at the band saw. I made sure not to go too close at the band saw in case my hands jerked on me in the middle of the cuts (can’t afford to screw this up now). I clamped the frame in my moxon vise and used my block plane to remove most of the remaining spline. Once I was close enough to the frame, I went at it again with the same sandpaper grits as before, to make for a nice smooth finish. Since I got a bit of glue on the front of the frame as well, I gave it another bit of sanding as well.
The contrast was not quite was I was envisioning, but the splines aren’t the focal point of the project. They will still serve to strengthen the corners of the frame nonetheless.
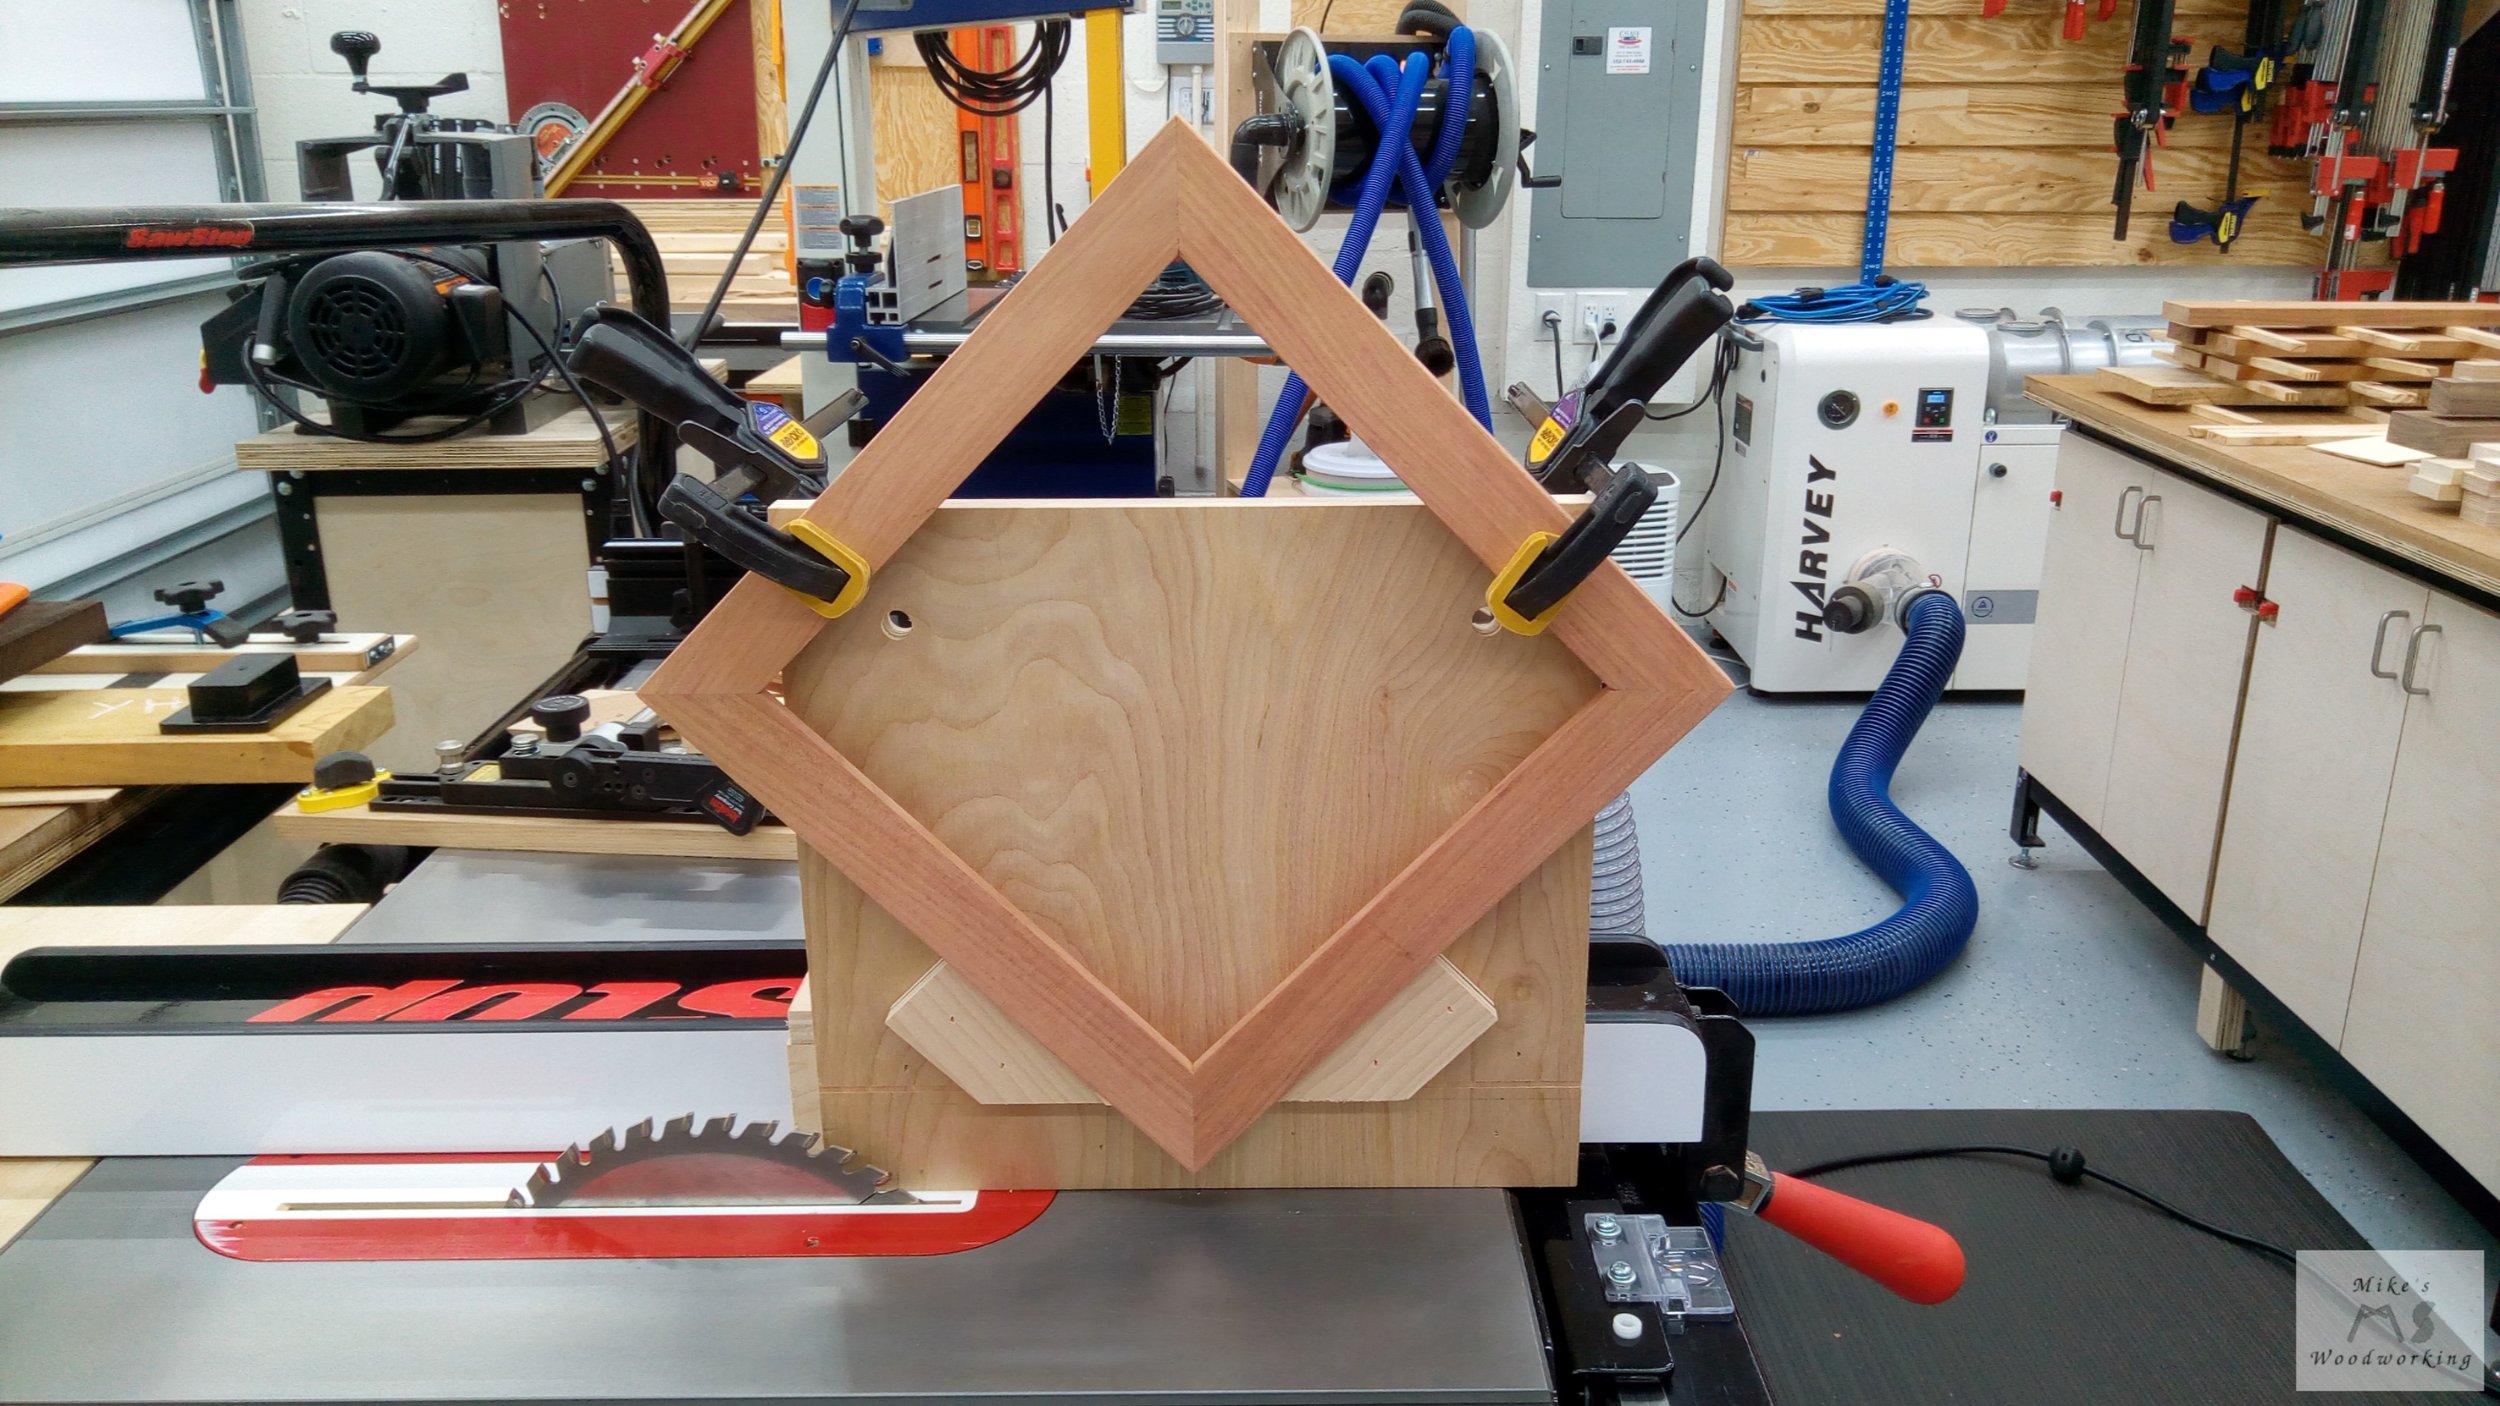
The frame was now complete, and I could focus my attention on the bee once again. I thought about attaching each of the pieces of the bee to the back one at a time, but that was going to be very tedious and the chance for error was too great. Instead, I decided to just use a few drops of super glue to hold the pieces together. After the glue cured overnight, the pieces were solidly stuck together and I could then glue the entire piece to the backer in one shot. This allowed me to place it in exactly the right spot.
I used as little glue as I could, making sure not to get any near the edges of the bee assembly (I DID NOT want glue squeezing out everywhere. To hold the bee in place, I went with the tried and true method of stacking something heavy on top of it until the glue dried.
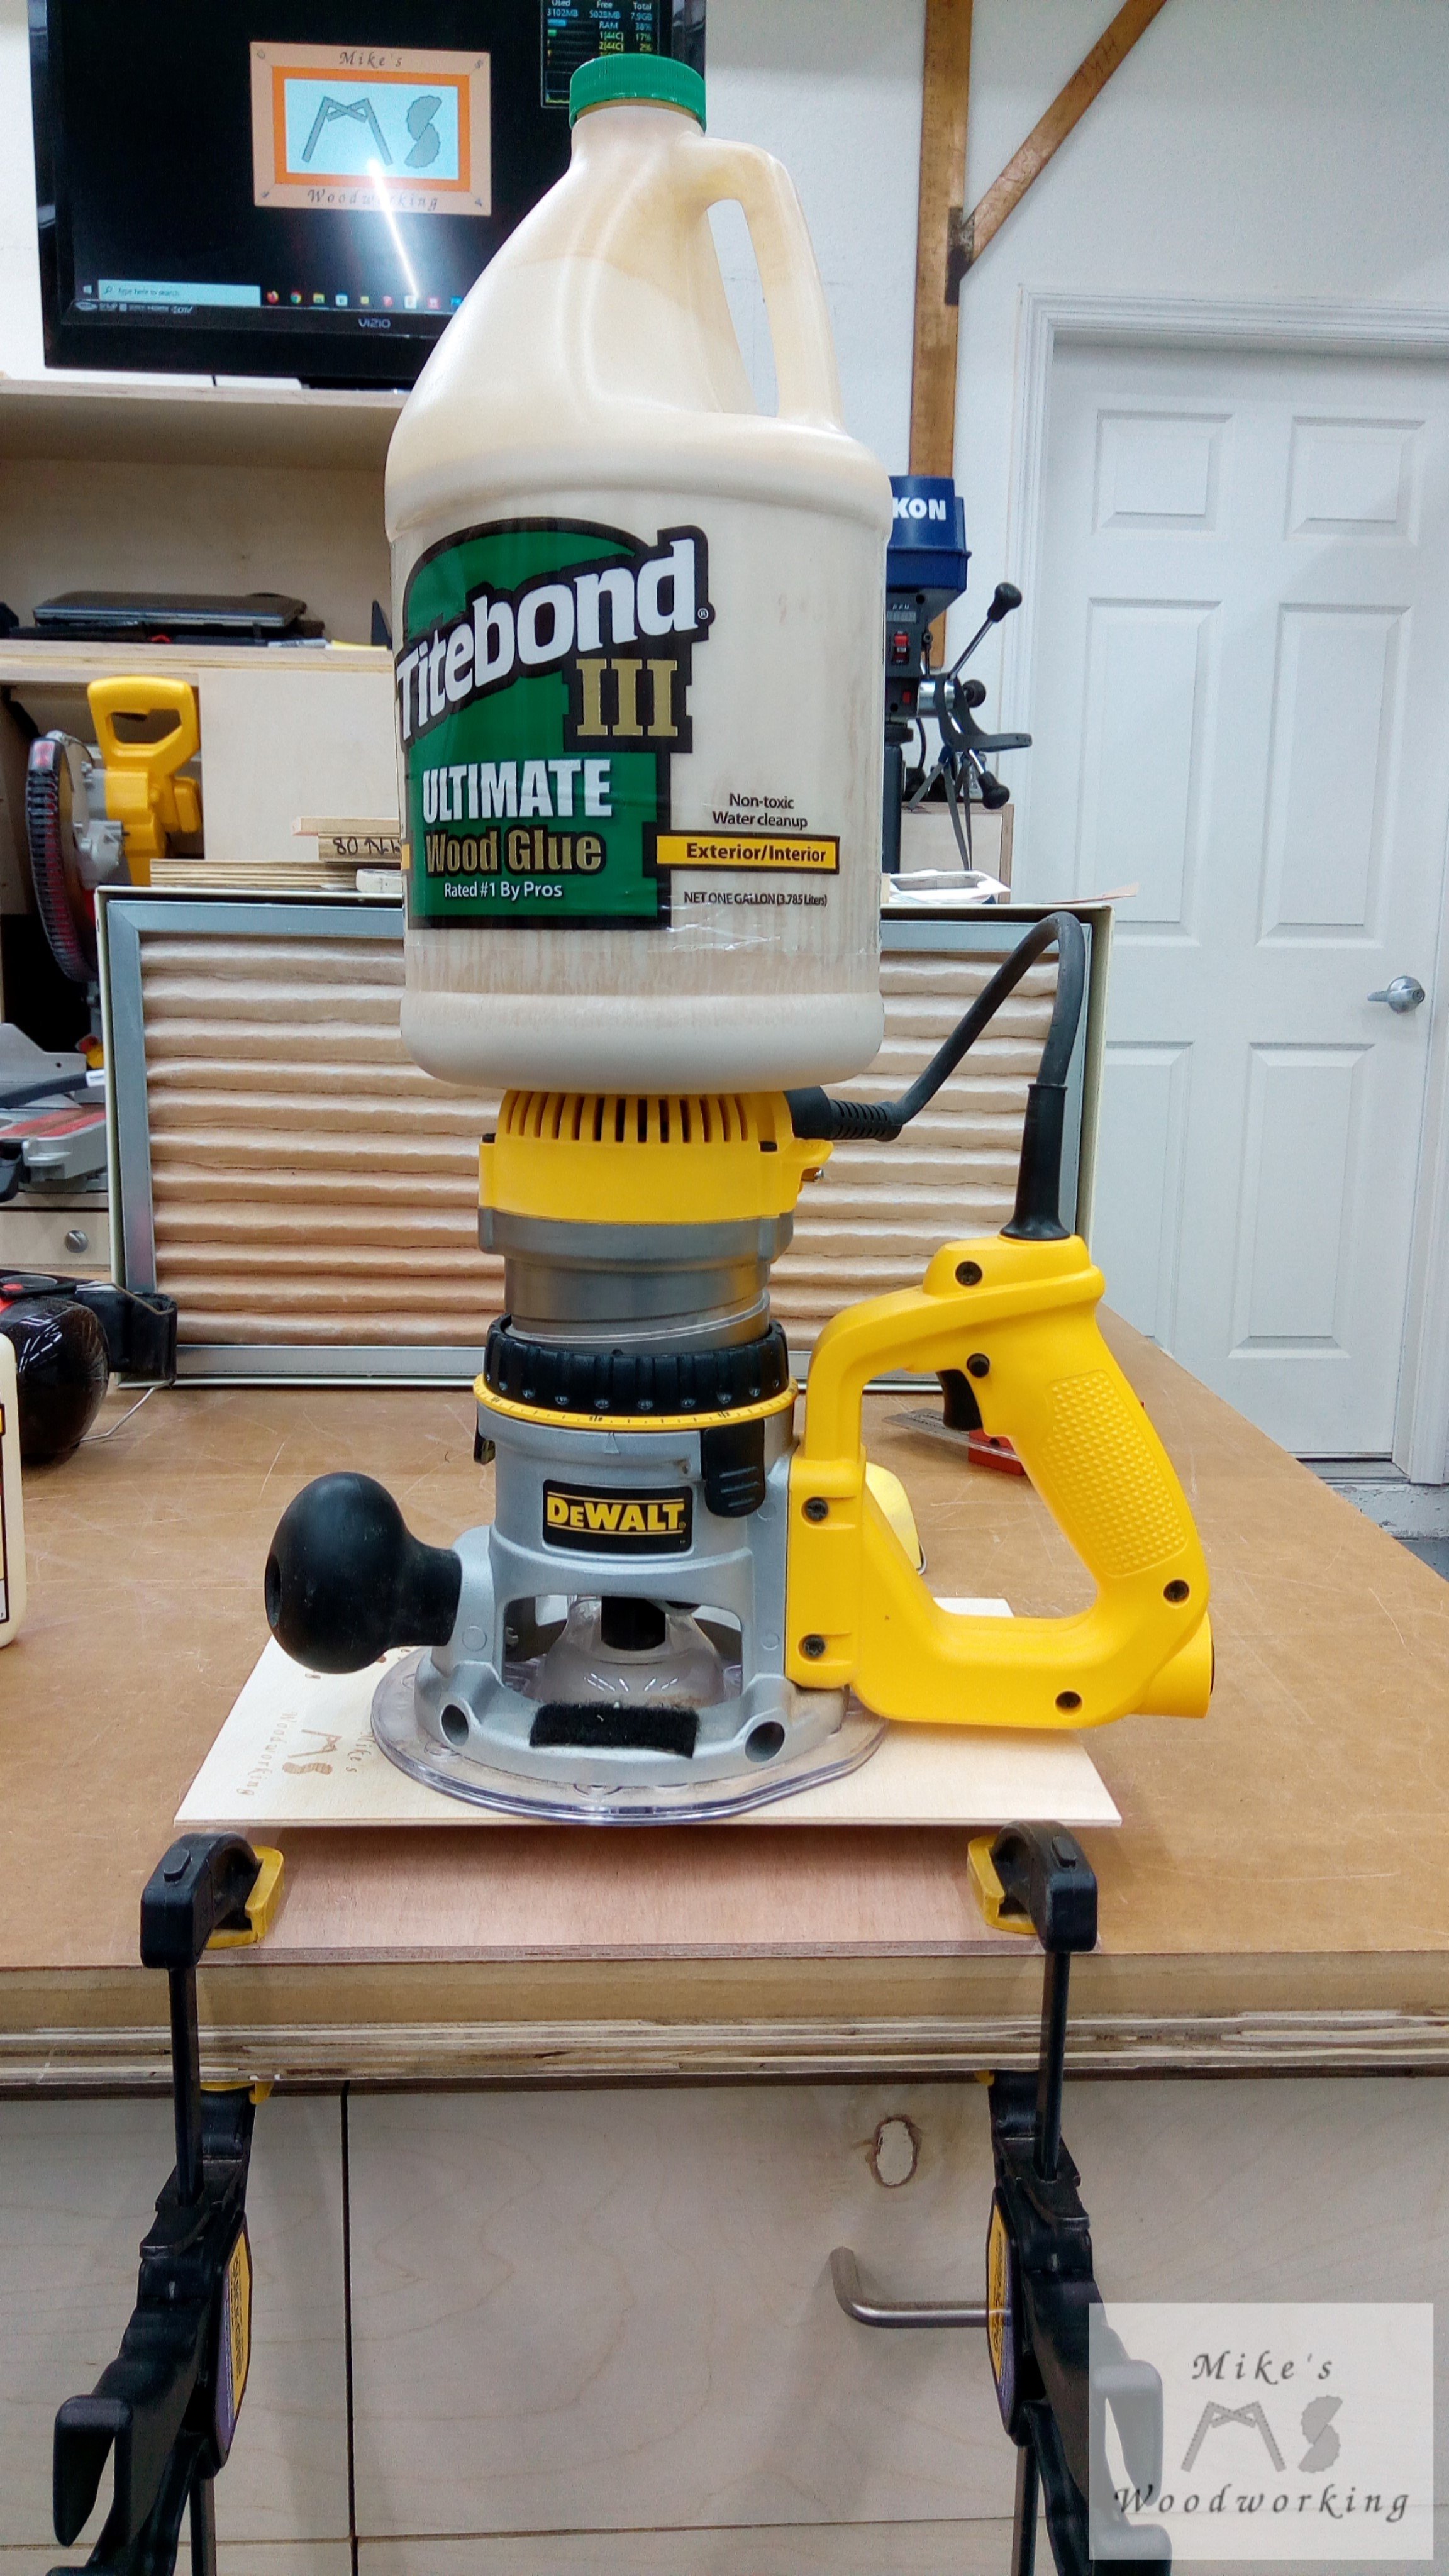
I used another piece of plywood, sitting on top of the bee, to spread out the load from the router and glue jug. CLAMP CHAMP!!!
After letting the glue dry overnight, I removed my “clamps” and the bee was solidly in place. With everything done, I could now focus on applying the spray lacquer finish. Before applying any spray lacquer, I always wipe down my pieces with mineral spirits. This removes any fine dust still remaining, but also will show any spots I might have missed while sanding, which is exactly what happened in this case. There was a small spot of dried glue I missed on the front of the frame. I went over it again with 180-grit and wiped it again with mineral spirits…no more spot.
I let the mineral spirits dry and then applied three coats of Minwax clear gloss spray lacquer. I did the frame first and then I proceeded to finish the bee and backer. Nothing out of the ordinary during this step (thankfully). I must say, once I started spraying the finish on that wenge and yellow heart, my eyes just lit up. I was absolutely THRILLED with how they both looked. The body of the bee looked just like the one in Risa’s drawing.
The eye and the antennae would not be made of wood as that would be near impossible for me to accomplish. Instead, I’m going to use a single googly eye, cut the “pupil” out, and use some paint to mark the small white areas. Lisa actually came up with a great idea on how to make the two antenna. I could take two small pieces of black chenille pipe cleaners and insert them into a couple of small holes…brilliant!!!
The lacquer was allowed to cure overnight and the following morning I buffed it out with more kraft paper. Words can’t describe how happy I was with the way it looked. Next I could glue on the small eye and insert the two antennae. For the eye, I used just a touch of white paint to make it look like the picture. The tiniest dab of super glue was used on the back (again, minimal squeeze out desired) and it was carefully dropped and pressed into place with a large pair of tweezers.
For the antennae, just prior to gluing the bee together, I drilled a couple of small holes into the top of the larger yellow heart piece. These would be for holding the chenille pipe cleaners. I drilled the holes a good 1” deep. After inserting them, the pipe cleaners held with little chance of them falling out. They can be easily removed by tugging a bit, but they aren’t likely to fall out on their own. Here is what my creation looks like when compared to the original.
Again, I cannot be more thrilled with the results. All that is left is to apply the vinyl lettering, and that job was left up to Lisa.
The lettering wasn’t entirely all on Lisa. She still needed to know what kind of font I wanted for the header and the writing around the bee. I showed her a crude drawing I made in Inkscape showing my plans for the finished project. I’ll spare those readers my horribly attempted drawing. I wanted the header font to be a bit larger than the writing around the bee, and in a more standard font. The words around the bee I really wanted to be in some kind of script look.
Lisa found a few options in the software for our new Cricut Joy. After narrowing the choices down to a couple, I found the ones that I liked. We were going with black vinyl lettering just like on the Sunrise Box monograms. We found the size that worked best for the frame and Lisa printed everything out. The script lettering was unbelievably delicate.
We started to work on applying the lettering on our kitchen table, but there just wasn’t enough light. We wound up just using the workbench in my shop since I’ve got WAY better lighting out there. I, more or less, just stayed out of the way while Lisa was dealing with getting the letters onto the transfer tape. I marked where I wanted the lettering to go, and Lisa did the rest. I stayed out of the way until she needed me for anything (which was the oft necessary third hand).
After a stressful 30 minutes or more, we finally had the lettering in place. I think the results speak for themselves.

I am beyond ecstatic with how the finished piece looks. My only disappointment is that the splines don’t offer a lot of contrast around the frame, but they aren’t the main focus anyway so that’s just fine.
Final Overview
And with the completion of the Risa Bee, all seven Christmas presents are now finished. It’s taken me about two months to get all of these gifts done. I’m so glad that I started when I did, because I’m not sure I would have gotten done in time, given I need to mail off one gift and pack the others for our trip to Maryland for Christmas this year.

This was my boldest Christmas gift challenge thus far. I made five gifts last year, but four of them were the same thing and I batched them out all in one shot. There were two pairs of similar gifts this year, but they each had their own separate challenges. The frames were relatively pedestrian, but cutting out and shaping the bee was by far the most difficult part of any gift to date.
I’m hoping to give all but one of these to their intended recipients personally this year, something I could only have dreamed of this same time in 2020. I can’t wait to see the faces on everyone when they open their presents. I only wish I could see the look on Risa’s face when she sees the Risa Bee for the first time.