
Hall Bench
Lisa and I have been wanting a place to store our shoes, jackets and other personal items ever since we moved into our house as foyer coat closets are not a thing in Florida. It would be great to have everything at the ready whether we are entering or leaving the house. I came across a couple of different takes on a hall bench that piqued my interest. The Woodsmith Shop and James Hamilton from Stumpy Nubs Woodworking Journal both had a slightly different take on the hall bench.
The Woodsmith Shop version was made from poplar for the bulk of the carcass with barn boards for the back. The whole project was meant to be painted, but neither of us are big fans of painted wood furniture. Obviously, that can easily be changed by using a different species of wood. The overall design was nice with it having a locker area for taller items like full-sized umbrellas or items that you don’t want being out in the open, such as a purse. The three open spaces on the bottom have wire baskets for holding multiple pairs of shoes, and the cleat on the back would have coat hooks for hanging jackets and my caps.
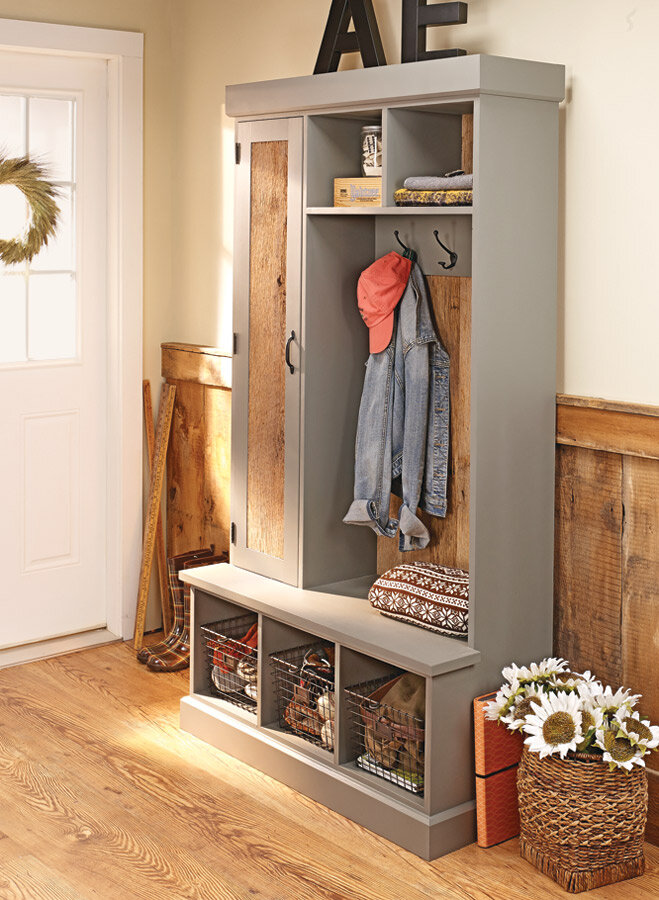
The Woodsmith Shop hall bench
James Hamilton’s hall bench had similar overall dimensions, but with its curved side panels it had a bit more of an elegant look to it. There was one more cubby on the bottom for storing shoes, and there were two drawers above them for holding more items (perfect for keys, wallets, etc.). The one drawback was the height of the bench seat itself. With Lisa being so short (under five feet), it would not be comfortable for her to use when taking her shoes on and off. This hall bench simply would not work for us.
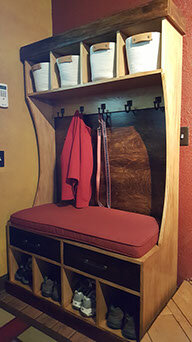
Stumpy Nubs hall bench
Symmetry...It’s Just Our Thing
With both of these designs in mind, I set off to start drawing things up in Sketchup. I first made an exact duplicate of the one in the Woodsmith plans to see if there was anything else I could do with it. I really liked the idea of the small locker portion for hanging keys and other valuables out of site. We don’t use full-sized umbrellas, so that really wasn’t that big of a thing with us. The more we thought about it, the locker wasn’t really a necessity, so it was removed. I could easily put a small shelf and/or some hooks on the side of the hall bench that is out of view of the front door to keep valuables “hidden”.


Next came the cubbies on the bottom for storing the shoes. Wire baskets are a good concept, but I’d be afraid that they would scratch the hell out of the bottom of the cubbies after a while from the constant sliding in and out. I think drawers would be a better solution, plus that would keep the shoes out of sight and look much neater. I needed at least one deeper drawer for the boots I wear while doing yard work. This led to the symmetrical design that you see below. There would be two sets of smaller drawers on either side of the one deep drawer.


Everything was starting to come together. The main carcass of the hall bench would be made from white oak, to match a lot of the furniture we already have throughout the house. The trim, coat hanger stretcher and drawer fronts would be made from walnut. With all of this in mind, I wasn’t sure HOW I wanted to make the hall bench. I really thought about just using plywood for the bulk of the build with solid wood used for the drawers, stretcher and trim. This would allow me to put this thing together fairly quickly. However, after a lot of waffling back and forth, I finally decided to just go for it and make the entire project out of solid wood. This was going to be my first all hardwood furniture project.
Novice Woodworkers REALLY Should Ask for Help at the Lumber Yard
I tried to lay out all of the pieces I would need ahead of time so that I could take those measurements with me when I went to the lumber yard to pick up materials. We drove down to Hardwood Lumber & Millwork in Lakeland to begin my first hardwood buying experience. We must have spent a good two hours going through the array of materials they had in stock. In the end, we had all of the materials needed for the hall bench and hopefully plenty leftover for future projects (I was SOOOO sure of myself). After getting back to the shop, we offloaded everything and I sticker-stacked everything so that all of the material could acclimate to the garage. I left everything for a few days and went to work on other things in the meanwhile.
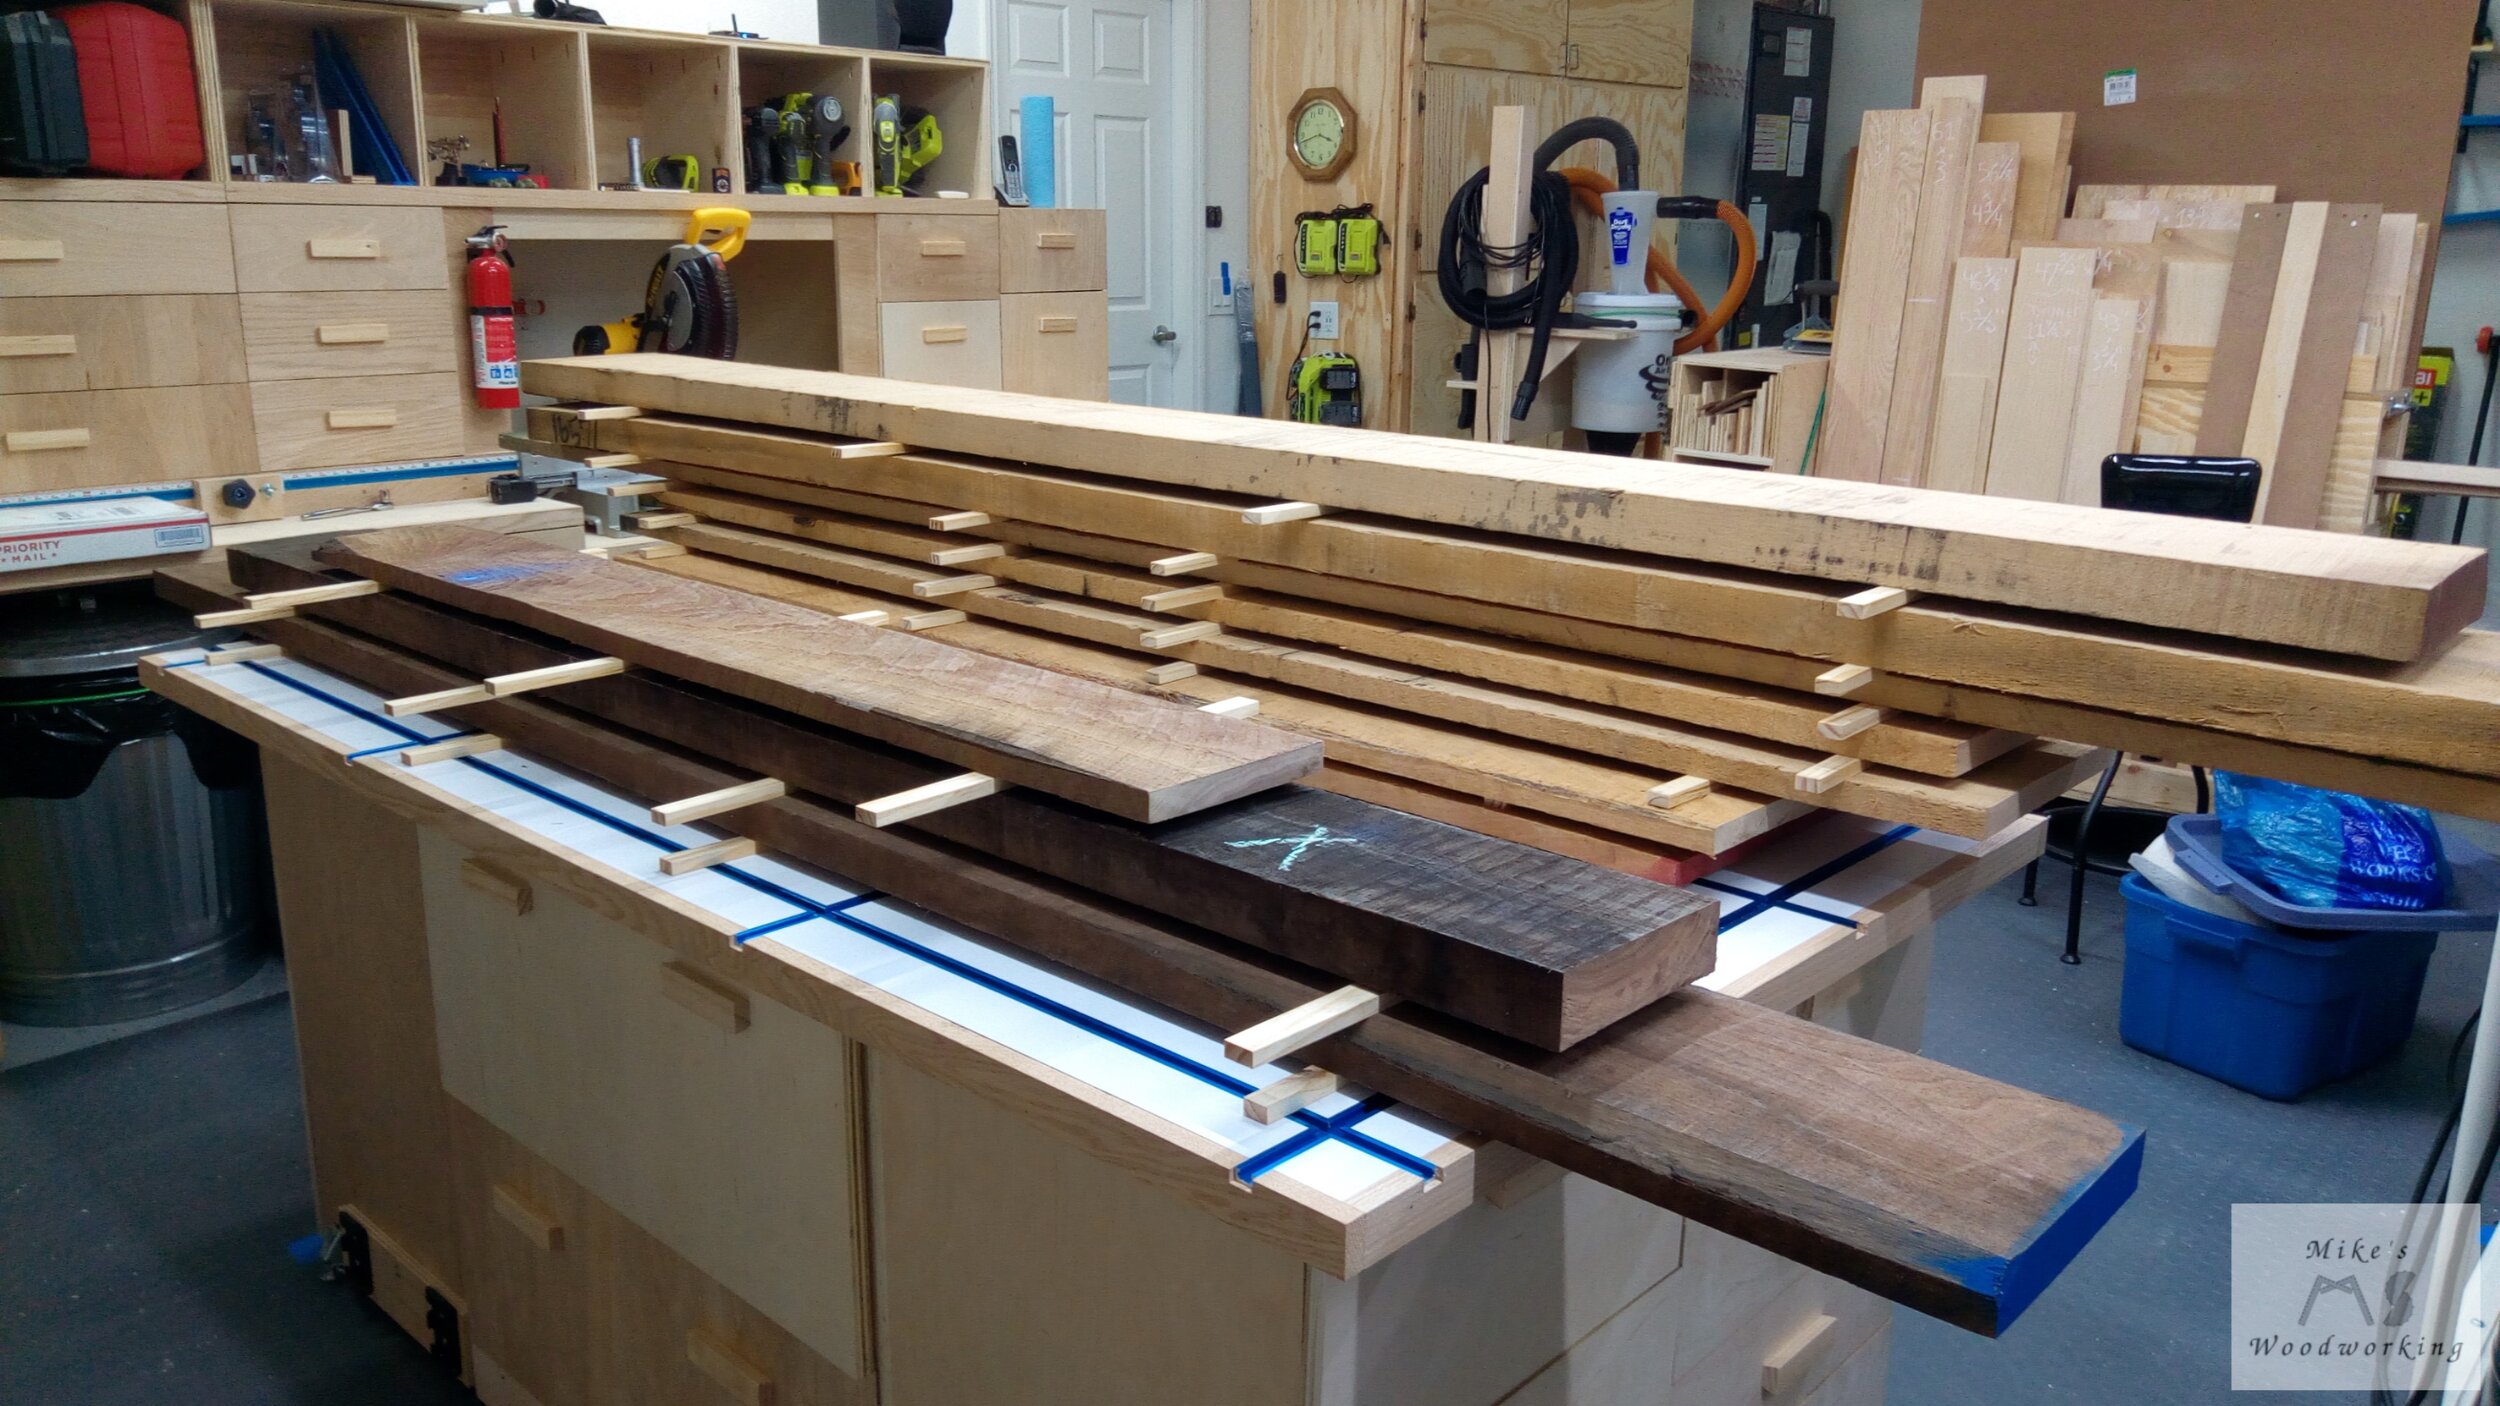
Once the materials were at a good relative moisture content compared to the shop, I began the process of dimensioning all of the rough lumber into stock of rough length, width and thickness. I wanted to leave the material a little thicker than final dimensions called for, just in case there was any more wood movement. This came into play with the walnut boards that were meant to be the drawer faces. They cupped a bit and I had just enough material leftover to joint and plane out the cup and still have the 1/2” thickness that I wanted.
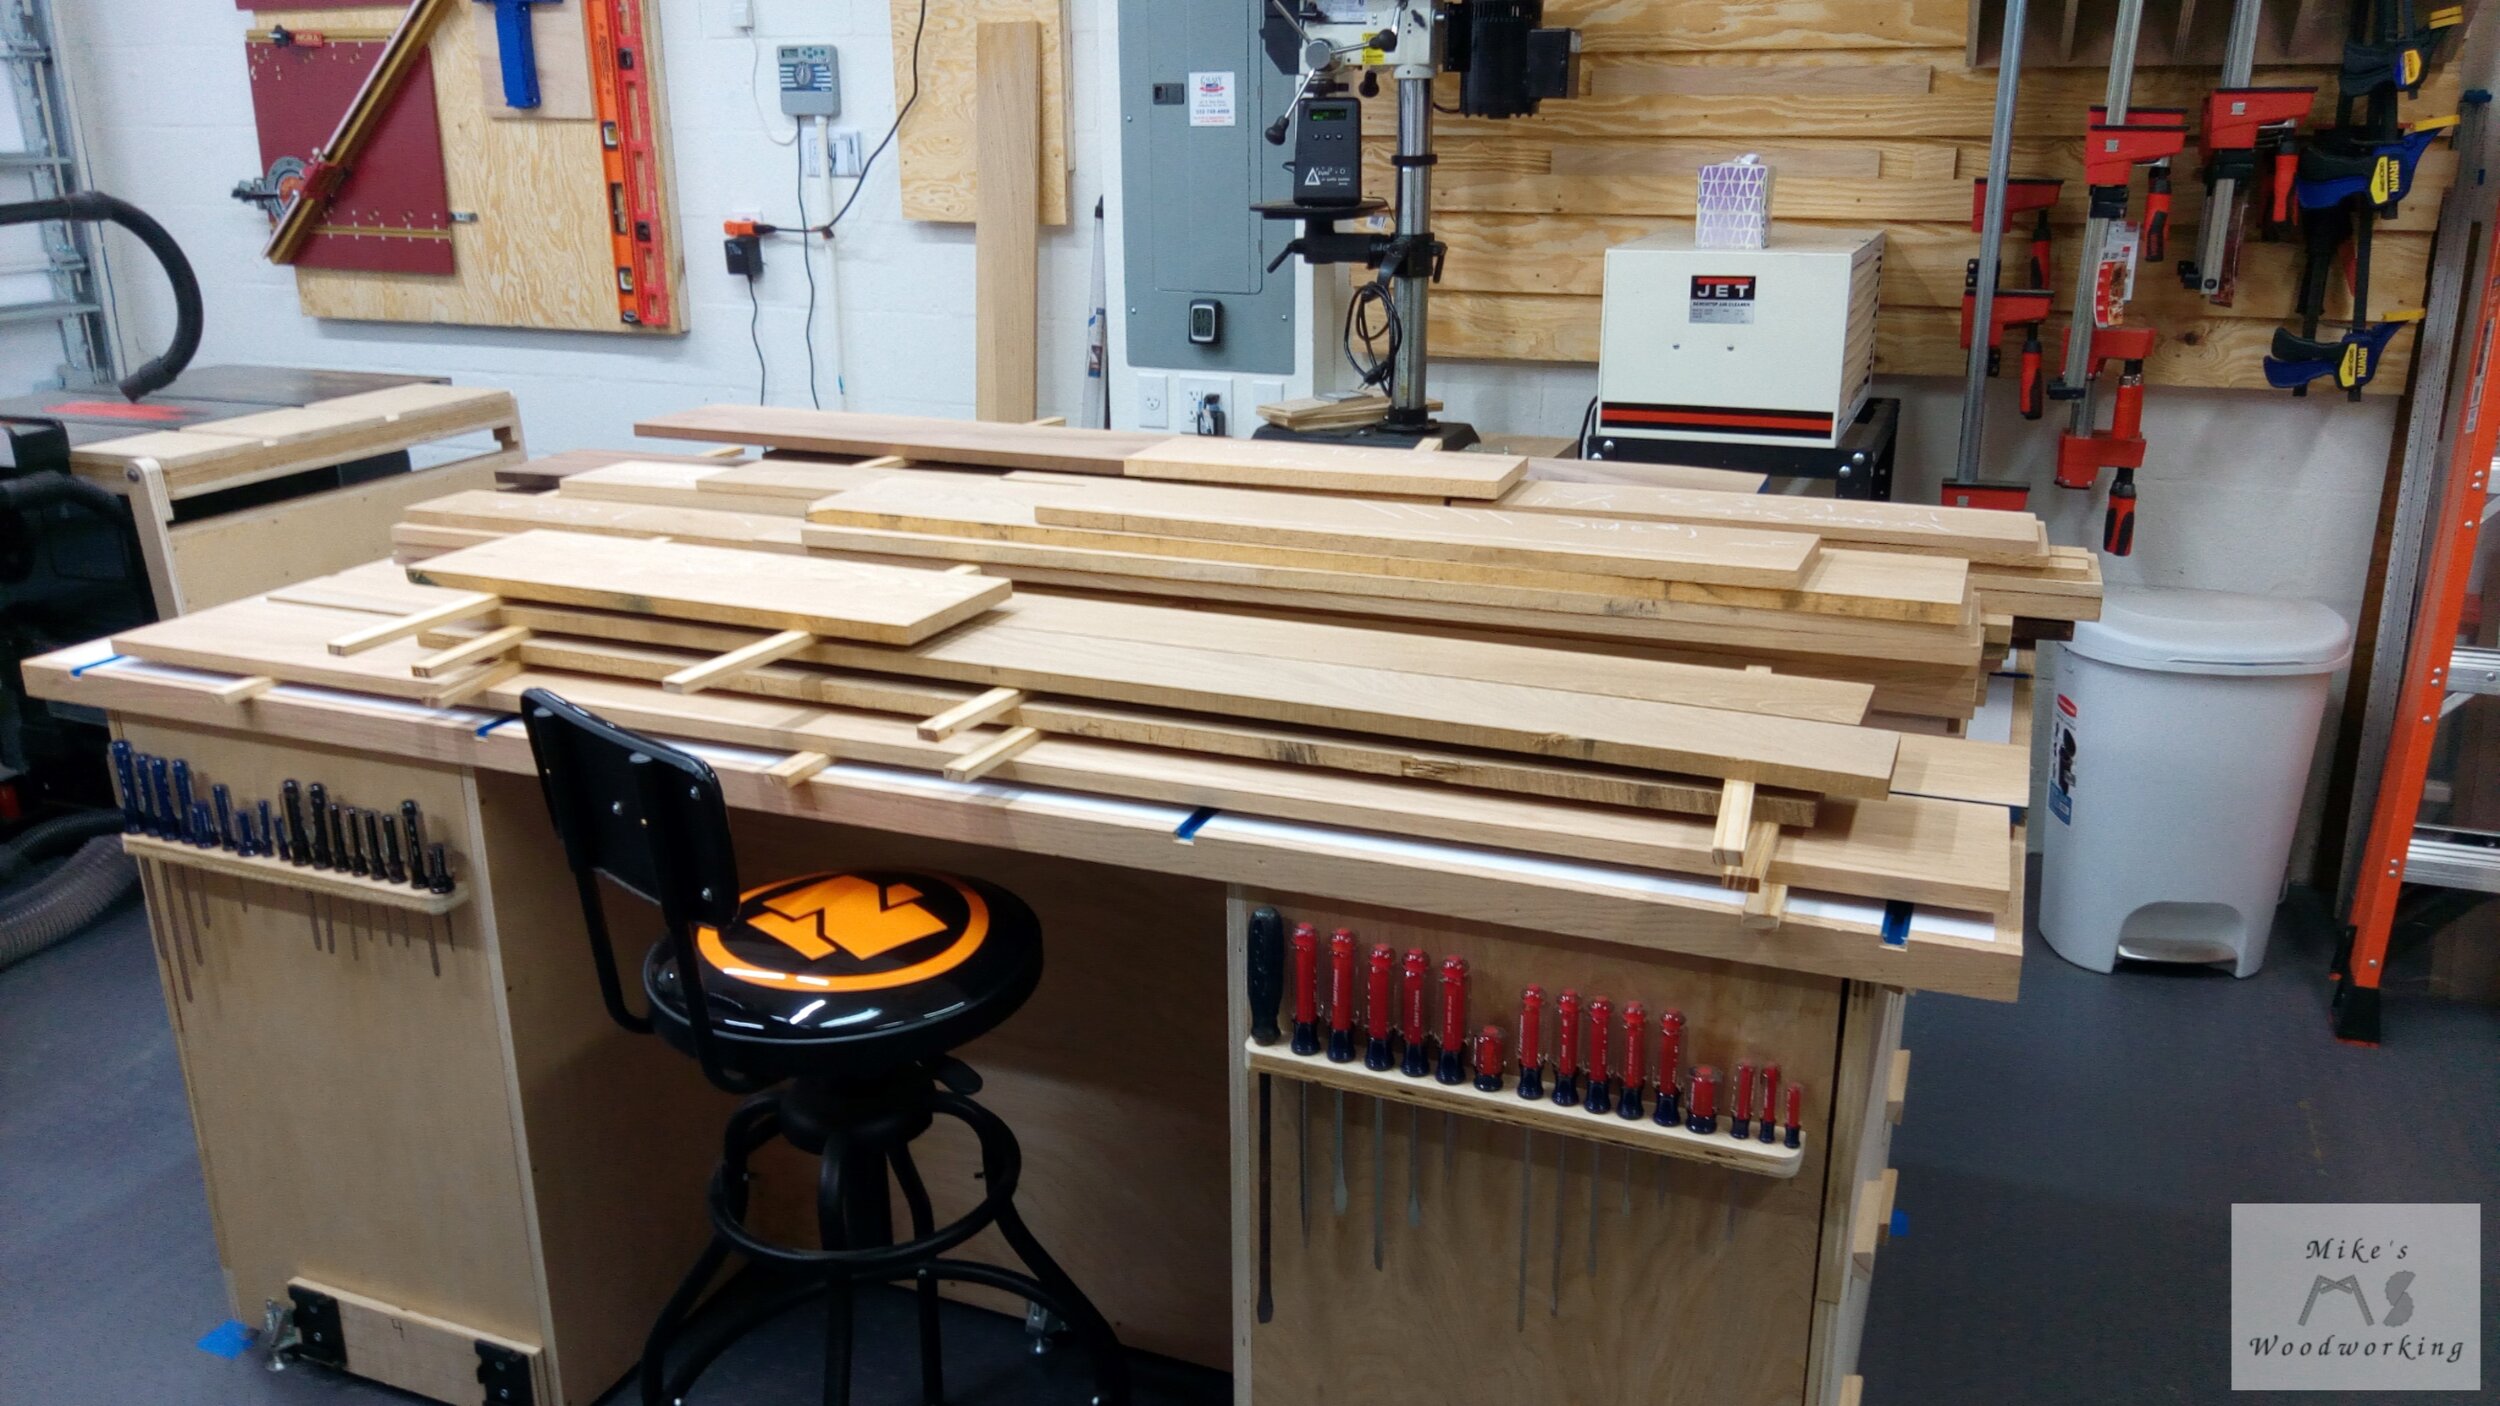
This was my first experience with breaking down rough-sawn lumber, and it was A LOT of work, especially doing it by myself. I really worked out my arms when running those huge 8Q walnut boards through the jointer and planer. It was all a good learning experience for me. I look forward to refining my skills as I do more projects.
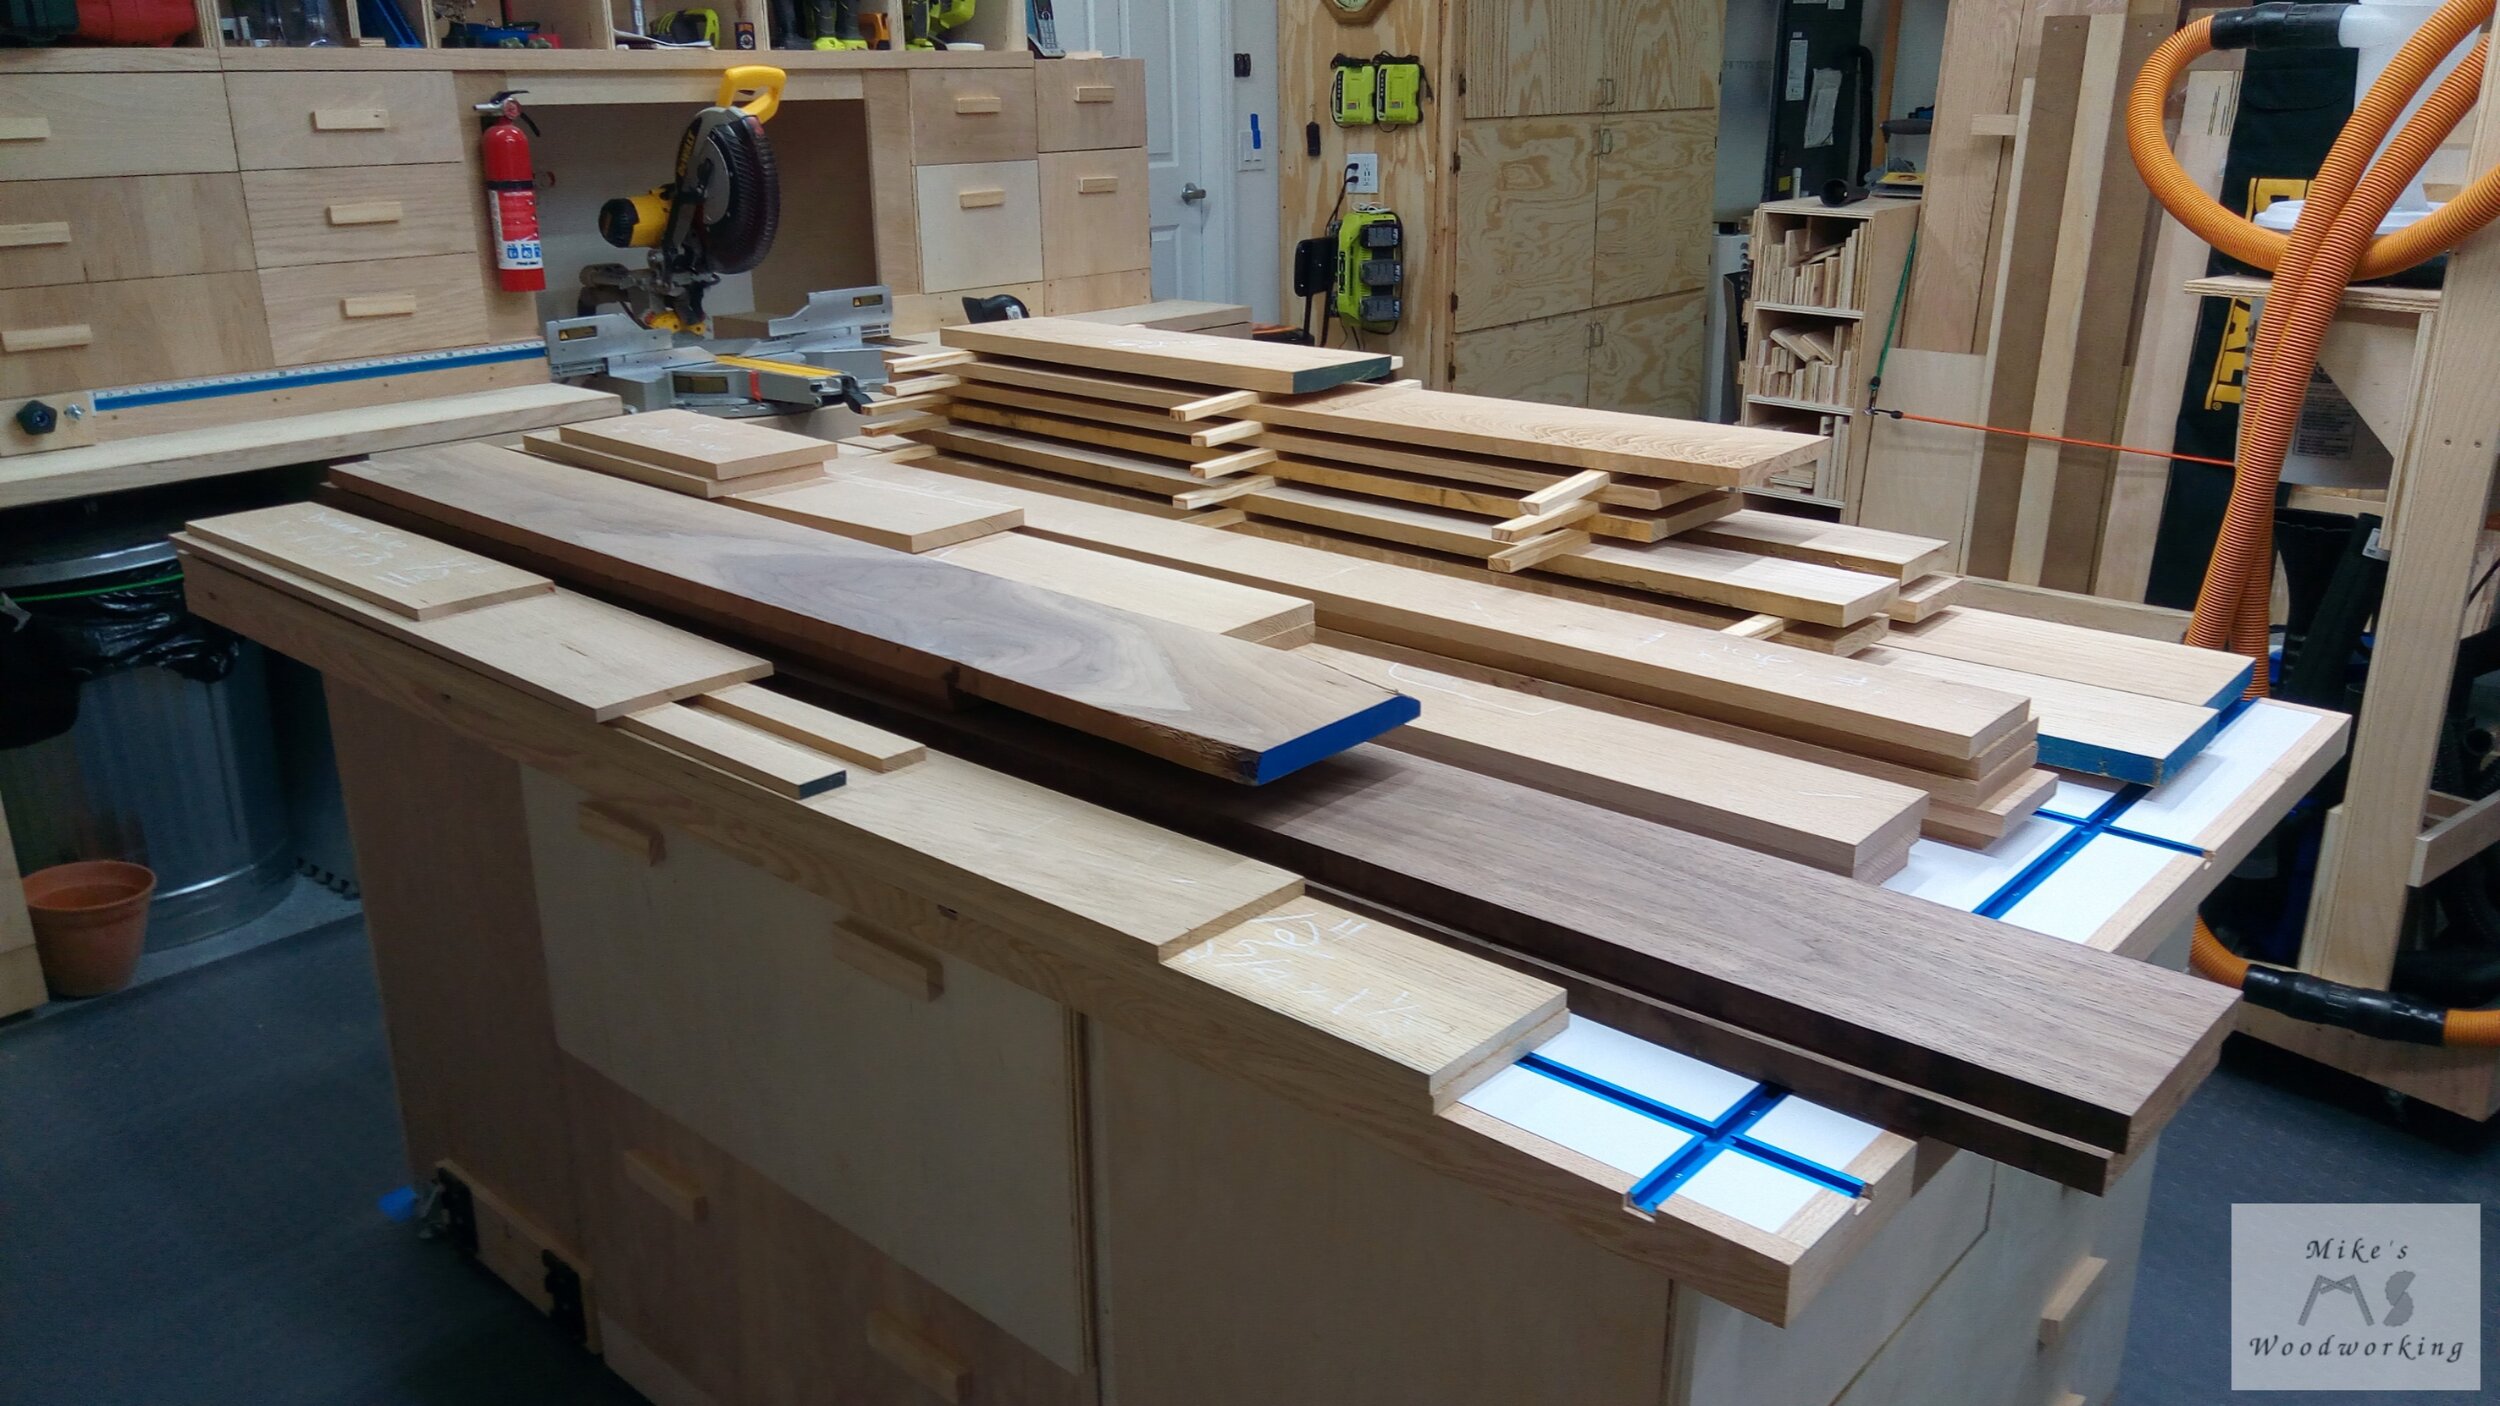
I finally got all of the materials broken down to final thickness and it was time to lay out the boards to make the nicest looking finished pieces. I had a couple of different panels already glued up that would become some of the dividers in the top and bottom section. I think I was starting to work on the boards for the top shelf panel next (I honestly can’t remember as this was almost a year ago at the time of this entry’s creation in August 2020).


My plan was to use biscuits to make the process of lining up the boards easier when it came time for the glue up. During a dry run I was noticing that some of the boards’ edges weren’t square, for whatever reason (likely error on my part). There was enough extra material to enable jointing the edges again, so I went about doing that.
Aaaaaaaaaaaaaand Pause
It is now August 2020 as of the writing of this article and I have not progressed past the above step. I suffered an accident in the workshop while working on this project and have abandoned the hall bench build indefinitely. I do plan on resuming this project again in the future, however I will likely be scrapping all of the work I’ve done up to this point and starting over. To be honest, this was a bit of an ambitious project to undertake given my skill level at the time of initial execution. Once I get a few more smaller projects under my belt, and get more experience in the workshop, I’ll revisit the hall bench project. It is still a much wanted and needed piece of furniture for our house and I want to complete it so that I can completely put this project in the rear view mirror once and for all.
***UPDATE: February 2023***
***UPDATE: February 2023*** It has been almost 3-1/2 years since my workshop accident at the jointer halted all work on the hall bench. I’ve made a full recovery from my injuries, and gained a healthy respect for that particular tool in the process. I’ve actually since sold my jointer as I no longer felt safe using it. Will I employ a jointer in my shop in the future…probably not. I’ve found other ways of squaring up lumber with my track saw, table saw and planer.
All of the panels I glued up for this project are still around. I have all of them in my new Lumber Cart 3.0, with the exception of one. Last year I cut one panel up in a couple of pieces to use for Christmas/birthday presents. One was the lighthouse I made for a friend last year, and the other will be part of a birthday present for my best friend Jill.
I’m hoping to get back into the hall bench in the very near future (within the next year or so) as we absolutely NEED this hall bench in our foyer. I actually need to make an addition to the hall bench to allow for visitors to store their shoes (and allow a little more seating).
While my hopes were to make the hall bench, save for the back panel, exclusively out of hardwood, my next attempt will likely include much more plywood, a la my office furniture. I’m still not extremely confident yet with making such a large piece exclusively out of hardwood material. We’ll see…once the time comes I may change my mind again.