
Picture Frames Galore
Lisa loves to do cross stitch. She’s been doing it since she was a kid. I remember one of the first ones she did while we were still dating. It was an awesome one with a wizard and a dragon that she made for her brother. I don’t remember how long it actually took her, but it was more in the realm of years rather than months. I wasn’t making frames for things back then, so she just sent away for a custom metal frame kit and gave it to him in that.
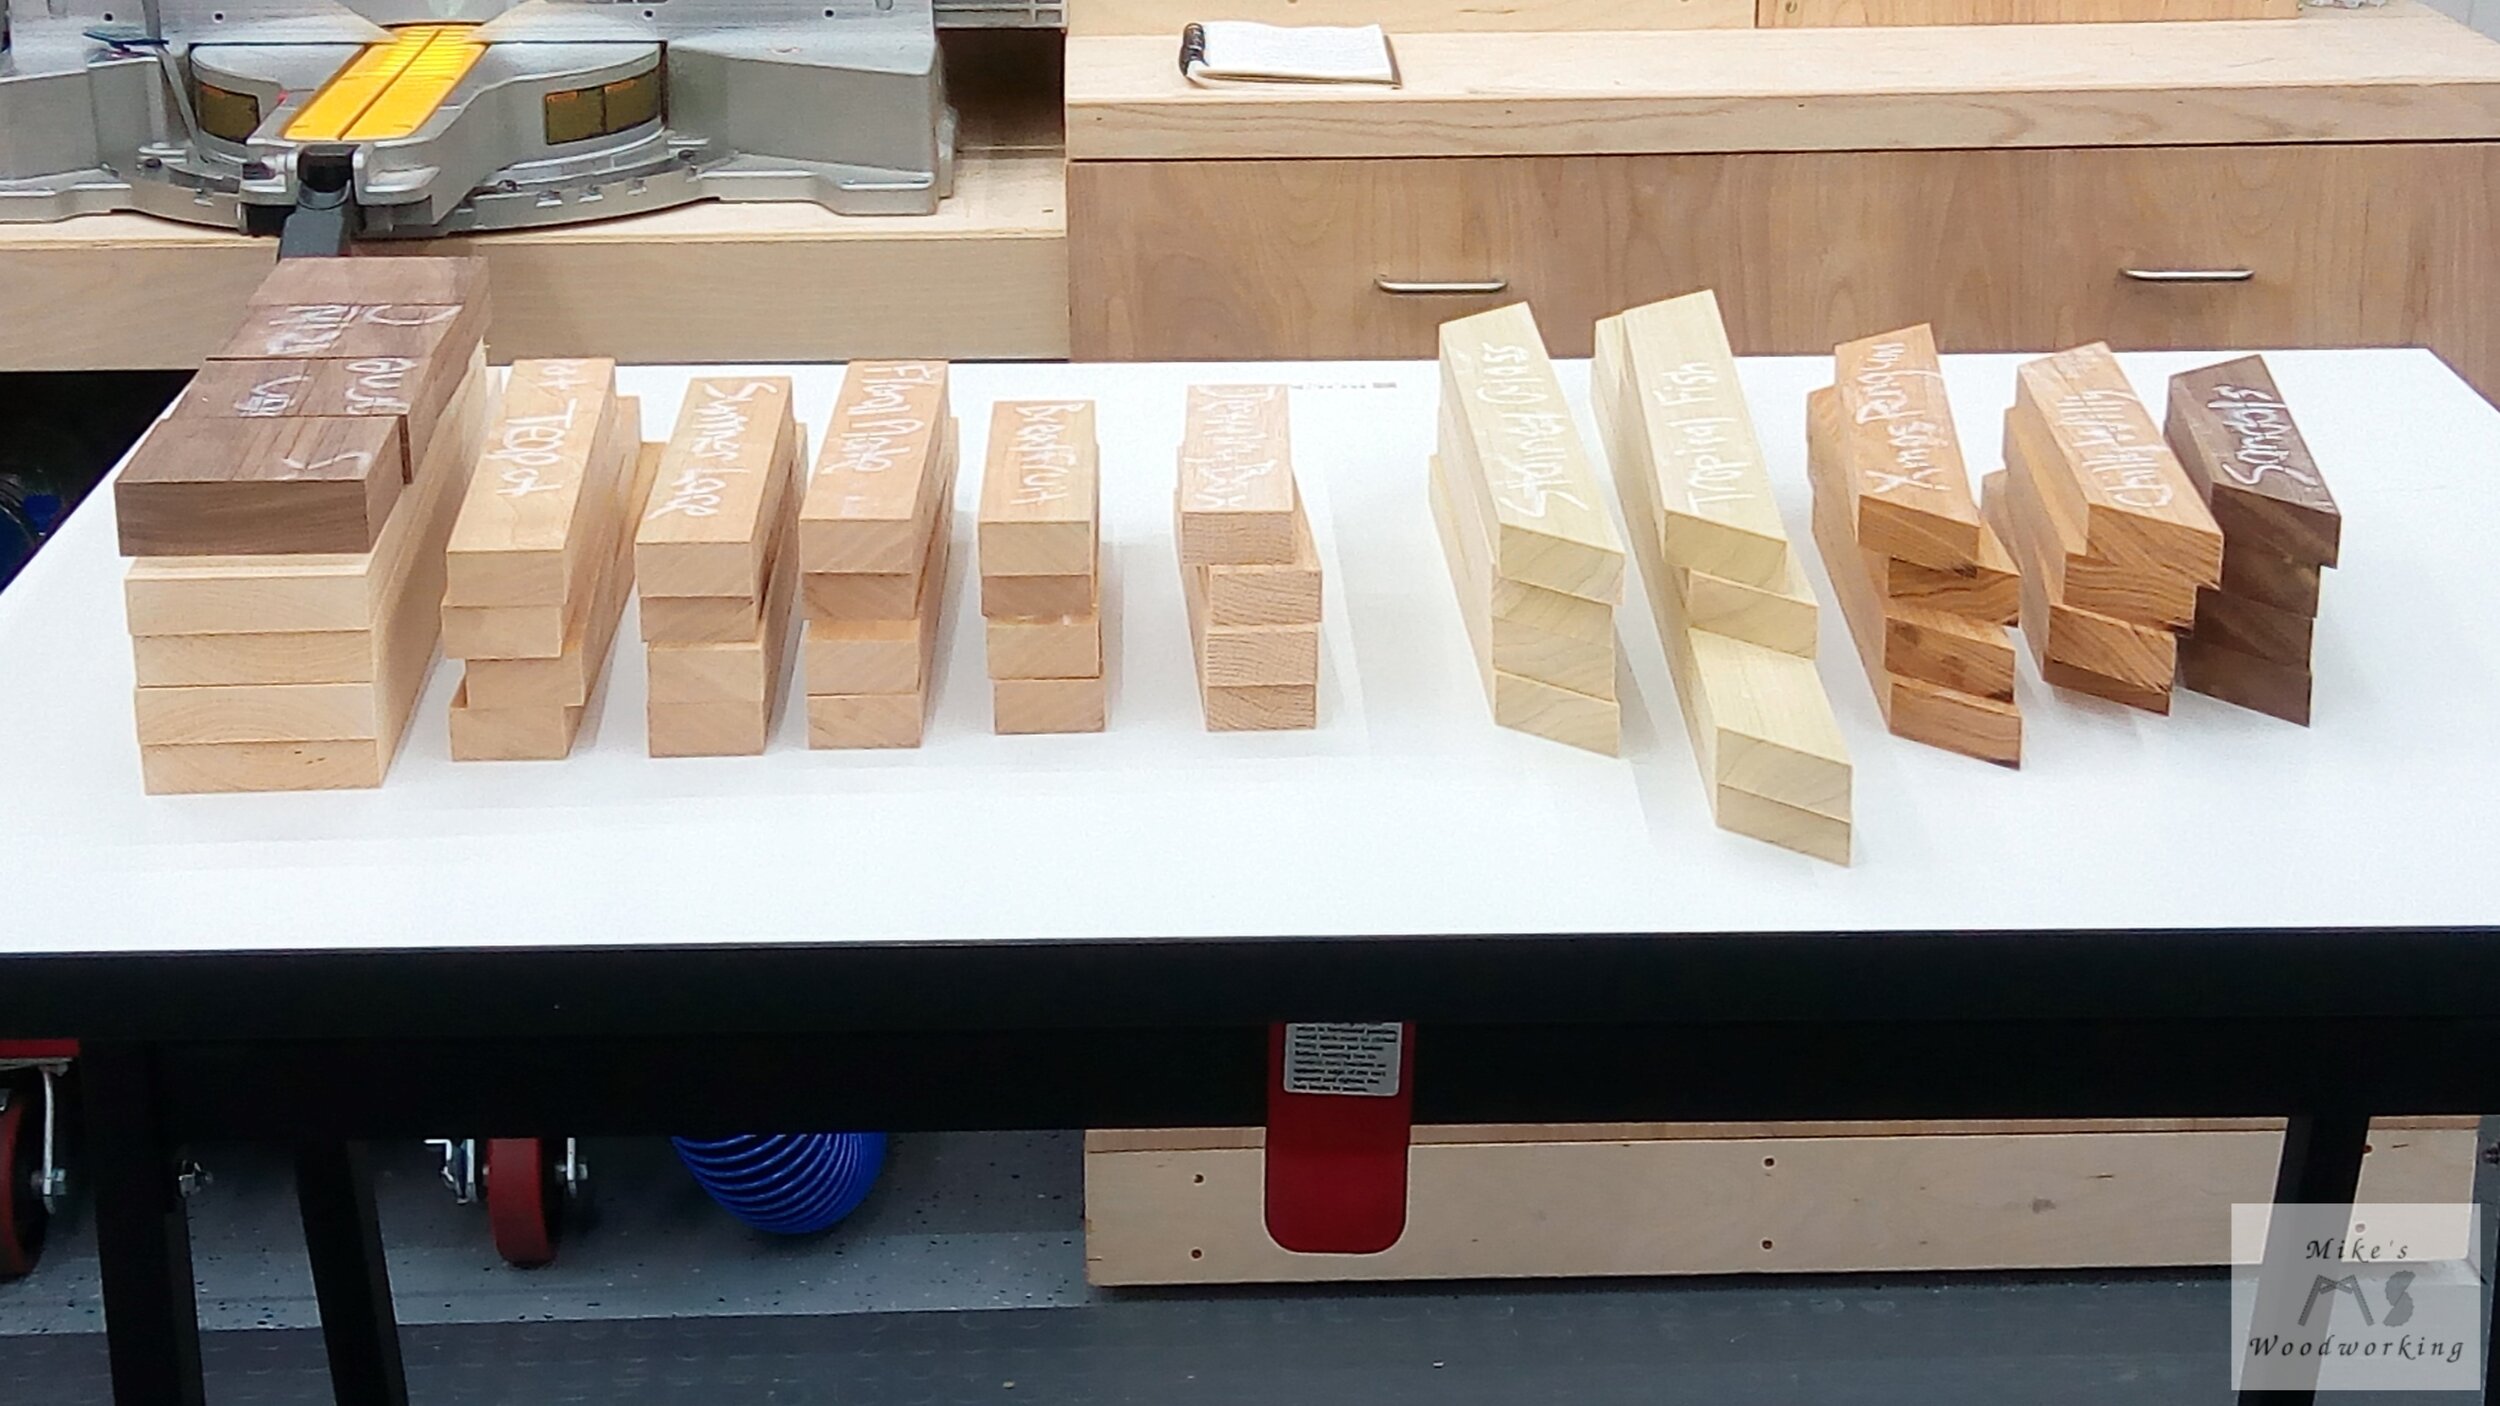
Fast forward to October 2019. I was well on my way in getting my shop going and I wanted to get a head start on putting together some frames for a bunch of projects Lisa already had done, including one that she gave to my mom that we now have. We headed down to Hardwood Lumber & Millwork with her completed projects, and started going through all of the choices they had to offer. Lisa ultimately opted for a bit of a variety in types of wood: curly cherry, hickory, basswood and poplar. My thoughts on what would look better or worse with her projects didn’t really factor in to her decisions, and for good reason. I’m a bit color blind so it’s hard for me to really offer any constructive input. No matter...if she was happy, I was happy.
There was no real time table on getting most of these frames done. I was already working on the hall bench project, so it would be a little while before I would get to the frames. It had already been a year or more since some of them were completed anyway, so another few months wouldn’t make much difference. There were two exceptions, and those were the cancer ribbon frames, but those are a different story.
Just two short weeks after getting the picture frame materials, I had an accident in the shop involving my jointer. This put an indefinite delay in the picture frame plans. Once I’d recovered, I had a couple of other projects I wanted to get done, that didn’t involve the jointer. These frames would have to wait a little longer. I did manage to get one other frame done in the meanwhile, the Air Force Seal frame, but that’s another story.
The Devil is in the Details
Fast forward to June 2020. I was finally feeling up to working with the jointer again, and I felt it was about time I tackled these picture frames. With the couple of added projects that came up since our trip to the lumber yard, there were a total of 11 frames to make. Now, to make things a lot easier on myself, I decided that I needed to have ALL of the particulars for each frame at the ready for when it was time to actually start cutting. I made up a spreadsheet with all of the details that I felt I would need in order to keep everything remotely understandable.
This spreadsheet was going to be my lifeline when tackling a project of this scope. With so many different frames, not a single one exactly the same as another, I need to keep track of the measurements for each frame and in a way that will enable me to make changes, if needed. Also, this would be my main tool in picture frame layout going forward, so this had to be perfect. Now this may not be the best way to go about things, but the sample below is how I lay out my frames:

In the above example spreadsheet I’ve made changes to the design of the Ribbon Quilt frame since the project began.
By factoring in all of the dimensions for every aspect of each frame, this ensures that I cannot make a mistake, provided I follow my spreadsheet to the letter. In addition, I made a Sketchup drawing of each frame with all of the dimensions as they were listed in the spreadsheet. This gave me a visual reference as well, should I need it.
Break It Down to Build You Up
With that gobbledygook out of the way, it’s time to start actually doing some woodworking. I started by getting all of the rough lumber that I had and laying out where all of the frame pieces were going to fit. I had the usual small defects and the stray knot to work around, but I got everything laid out. I broke down the rough material into smaller and more manageable pieces at the miter saw and then it was off to the band saw.
The piece of hickory I had for the two Christmas-themed frames was already S4S when I bought it, but I needed to resaw it to get all of the pieces I would need. This was my first time working with hickory and, man, that stuff is hard and tough. I REALLY needed to take my time at the band saw because that wood won’t let you force it through that blade. I eventually made my way to the end of the piece and took a break for a minute.
The only other pieces I needed to resaw were a small section of 6Q walnut and some 8Q basswood. Before I could resaw them, I needed to get two square faces to make as straight a cut as possible on the band saw. This would be only my second trip to the jointer since my accident. My previous one was for the Air Force Seal frame, but the amount of jointer work on that project was minimal. I was in for A LOT of jointing with all of these frames. Time to get to work.
I ran the walnut through the jointer, taking great care in my hands’ positioning, and I got two square edges. The same was true with the basswood. I ran the walnut through the band saw and it was smooth sailing all the way. The basswood, one of the lightest woods I’d ever worked with was like cutting balsa with an X-ACTO knife (well, not quite THAT easy, but it’s a simile...work with me here).
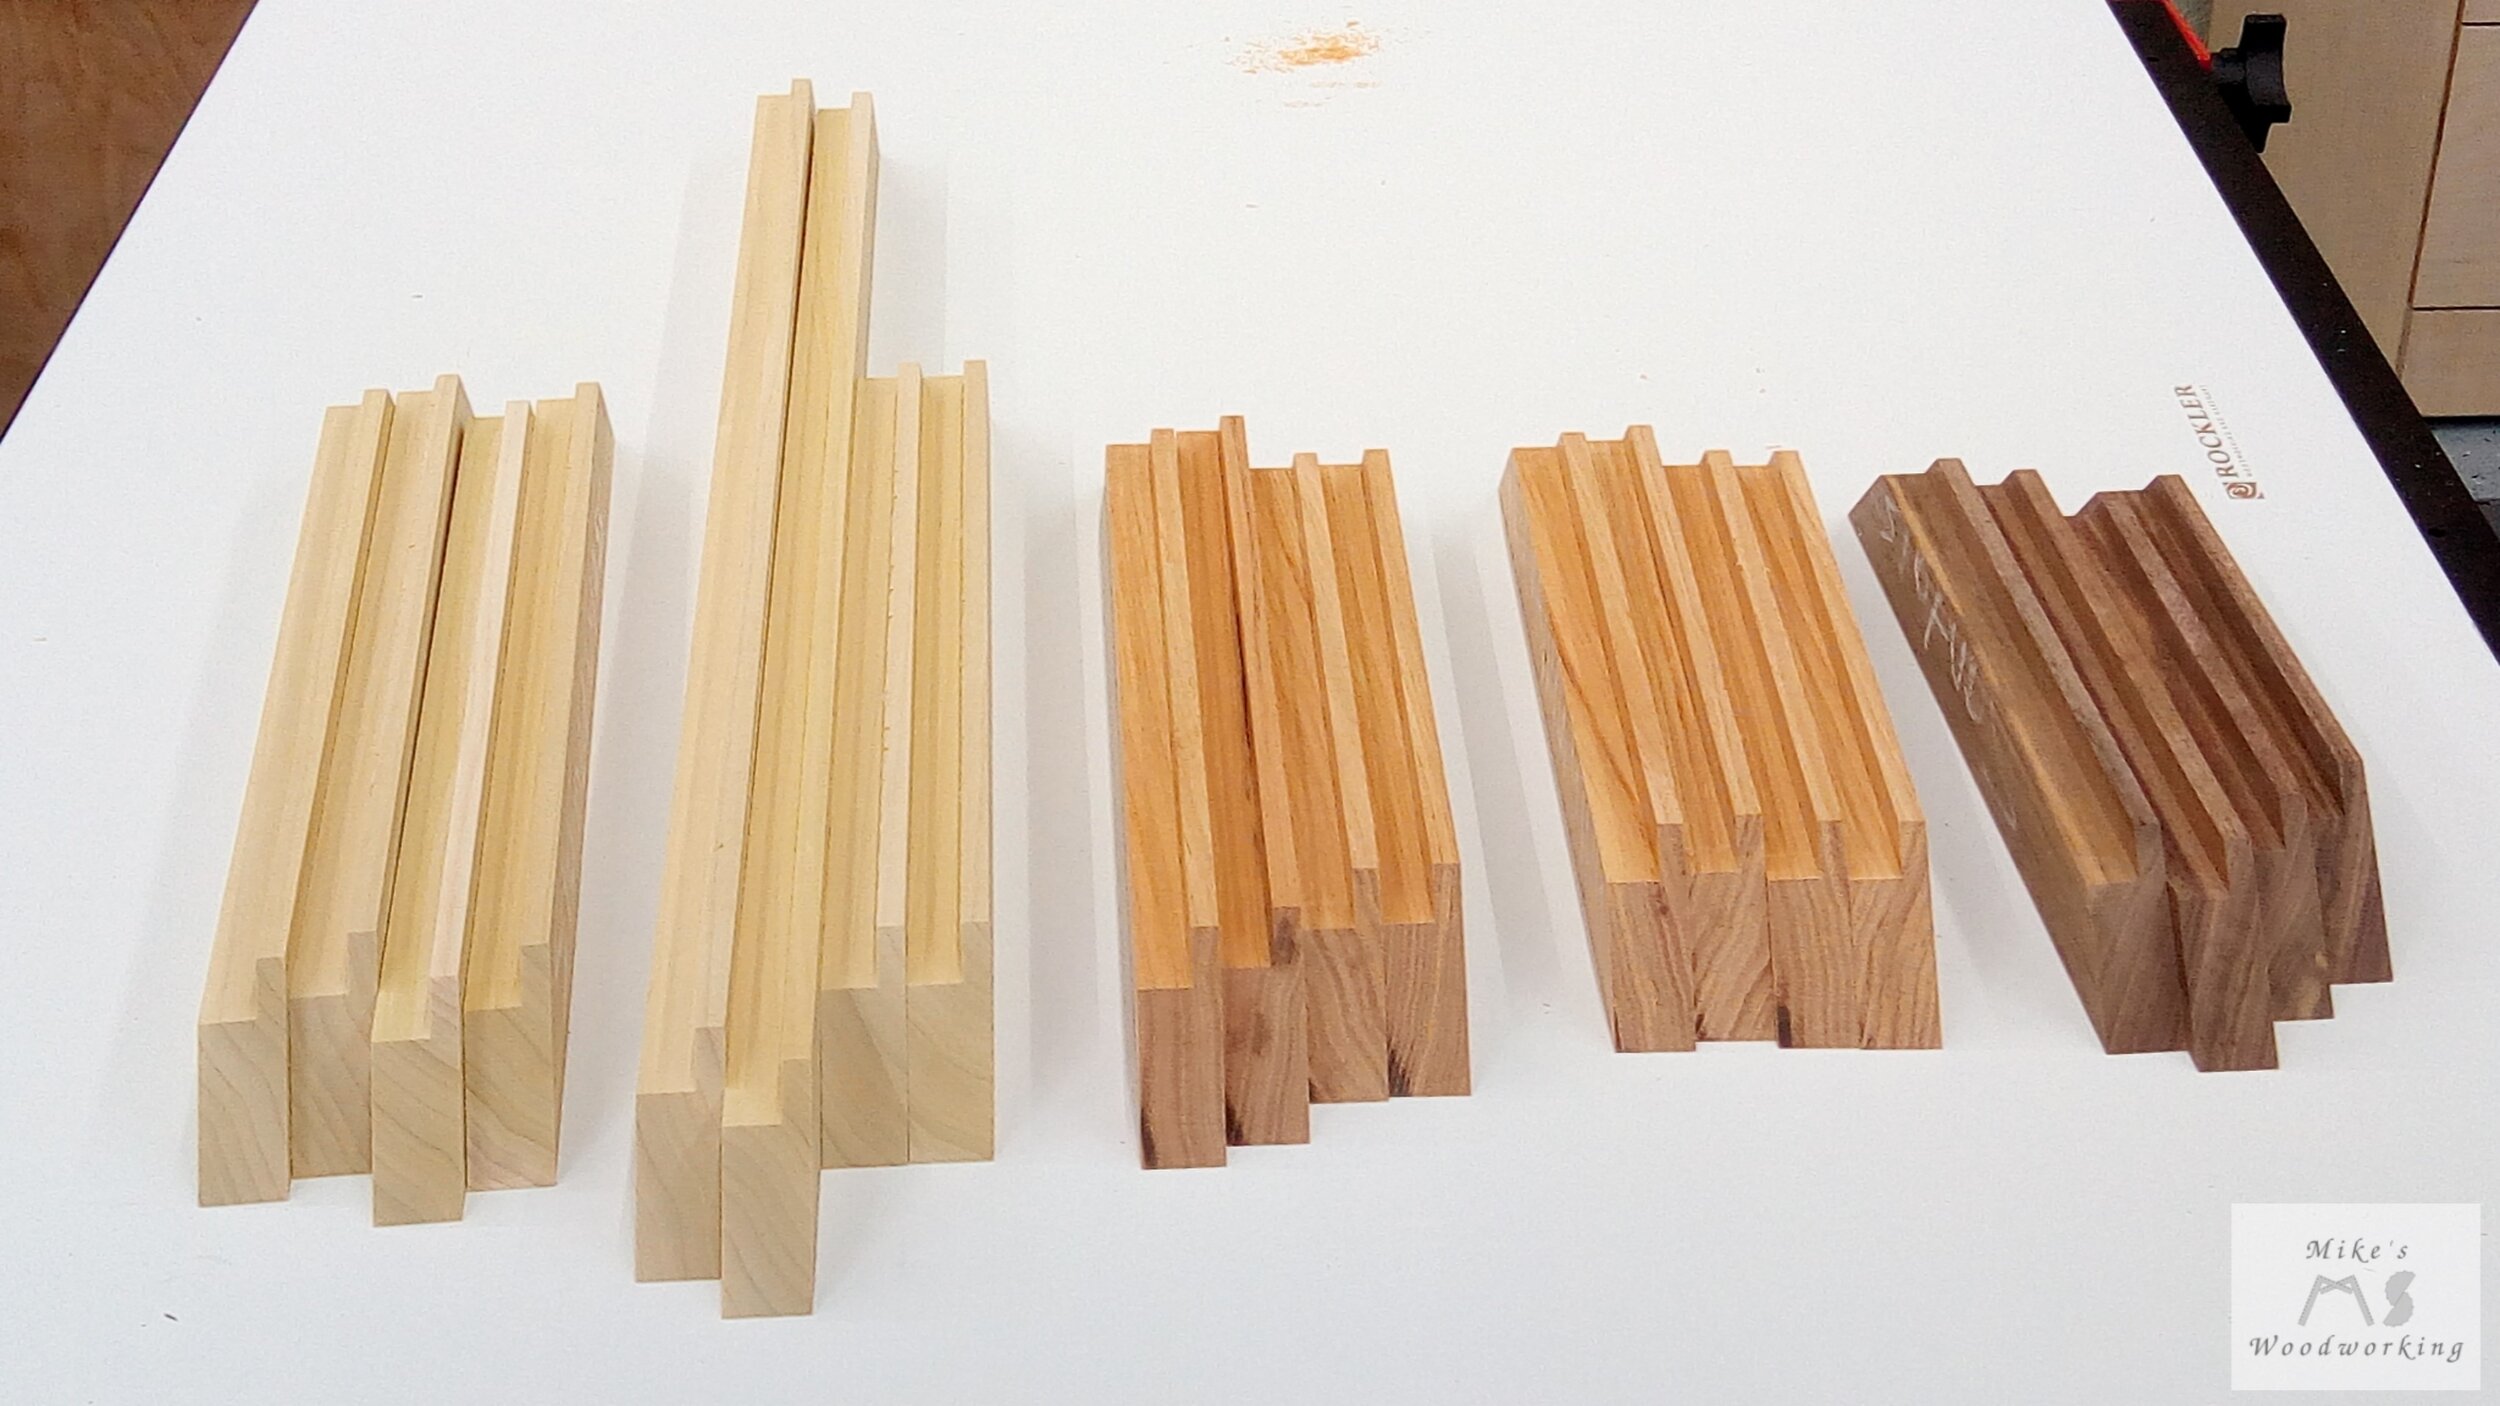
I was done with the band saw at this point and it was going to be all jointer and planer at this point. I went through the curly cherry, white oak and poplar until I had one face and one edge square. I then went over to the planer and started processing ALL of the wood at the same time. I started with the thickest pieces and planed off just enough so that I had two clean faces. I did the same with all of the subsequent pieces. After the planing was finished, I went over to the table saw and cut off the remaining rough edge. This left me with S4S lumber. Nothing was cut to any final dimensions just yet. I wanted to let everything sit overnight in case there was any more wood movement. I’d had all of this material in my shop for about 10 months, so I didn’t figure there would be much movement, but I wanted to be sure. Time to call it a day.

A Lot of Work, Plane and Simple
The next day came around, and I checked all of the materials for any movement. Low and behold, the walnut had warped on me ever so slightly. I had a feeling that would happen with the walnut because it did the same thing to me when I was working on another piece back during the hall bench project. I gave everything a quick pass through the jointer again, just to be sure, and now it was time to get everything to final thickness.
I was going for 3/4” overall thickness for all of the frames. Well, technically one frame is going to be made with two thicknesses of material, but I’ll get to that later. I got my planer all set up and made damn sure I had my dust collection connected and running (just a tiny bit messy, otherwise). I started with the thickest materials and started working them down little by little. I was in no rush to take off too much material at one time. Given the limitations with this planer’s setup, I can’t do that anyway.
Once everything was getting to around the same thickness, I started running everything through the planer at the same setting for each pass. This would ensure every piece would ultimately end up the same thickness, but this helped with preventing snipe as well. I’ve found that as long as I support a longer piece when it starts to clear the planer rollers, that can all but eliminate snipe.
I chugged away at the planer for what seemed like half an hour. I finally hit my 3/4” mark on the planer and it was time for one final pass. All of my material was now at final thickness. With that out of the way, it was time to rip everything to final width. All but one of the frames (the basswood being the lone exception) were slated to be 1-1/2” in width. I installed my 40-tooth ripping blade in my table saw and this made quick work of all the cuts.

Join ME, and I Will Complete Your FRAMING
Now, when it came to joinery, I was going to be employing two different techniques for these frames. The ones made from hickory, poplar and walnut were going to be made with traditional mitered corners. The ones made from curly cherry and white oak were going to use floating tenons, much like the Air Force Seal frame.
The basswood frame is going to be the lone outlier. It is going to utilize the loose tenons, however the corners are going to be walnut, and the corner pieces will be 1” thick instead of 3/4” like everything else. The basswood frame is also going to be a full 3” wide on all four sides, with the walnut corner pieces measuring 3-1/8” square. The extra width on the frame of the basswood would be for applying lettering in the form of a reverse print on a laser printer transferred to the wood.
With all of that being said, it was now time to start cutting the pieces to their final lengths. This was very easy to do using my spreadsheet and the Sketchup drawings I made for each frame. With all of my measurements confirmed I made all of the crosscuts using a miter sled at the table saw. I felt this would be a bit more accurate, and leave a cleaner cut, than the miter saw. All of the loose tenon frames were cut first, as they were the easiest.
Next up are the mitered frames. The last time I made mitered frames was the cancer ribbon frames. When setting the stop on my miter sled, at 45° I need to add 1/4” to the measurement of each piece to have it come out to the length that I require. I did the same thing this time around and everything appeared to be fine. I made a couple of cuts and put two pieces together and the miters looked flawless. I continued with each piece until the final miter was finished. It was time to call it a day. Back to work tomorrow (or so I thought).
As the Wood Turns
It’s the end of June, at this point, and I didn’t get back to work on the frames until over a month after I made the last miter cut. I was in the process of getting a new dust collector and I needed to rearrange my shop to fit things in their proper place. I sold my current dust collector much sooner than I had thought I would and was without any dust collection for my large tools for a little while. On top of that, a couple of parts on my plunge router base decided to fail causing me to wait for replacement parts to arrive.
It is now August, and I’m finally back in the shop to begin working on cutting all of the mortises in the frames that require them. Just like the Air Force Seal frame, I’m using the Mortise Master to make all of the cuts. It was still setup from that frame, so I only needed to confirm the settings with a quick test cut on some scraps. Everything looked on the up and up, so I set out to lay out all of the mortises on the frame pieces. Looking back, I should have taken better care in laying out the mortises on these frames, as you’ll see later.
With the layout complete, it’s mortisin’ time!!! With my trusty 1/4” spiral upcut bit in my router, I proceeded to make all of my cuts. The dust collection on my plunge router sucks (and not in a good way), so it made a huge mess.

After finishing the mortises, I needed to cut the tenon stock to proper length. I had a few pieces of tenon stock leftover from the previous frame project, so I used up the rest of it for all of these frames. Because of its construction, the basswood frame needed double the amount on tenons as a standard frame. I had just enough tenon material in the end.
I dry fit all of the pieces together and they went together just fine. The one thing I was noticing on all of the frames was that the joints weren’t all flush to each other. A lot of them were proud by as much as 1/32” or more in some spots. After thinking about it a bit I had a nagging suspicion that it was all due to my technique with the Mortise Master. I should have paid much closer attention to the cuts and made sure that the same front face of each piece was facing the same direction for all of the cuts. Because I did not do that, this lead to the problems I just mentioned. I noticed a similar effect on the Air Force Seal frame, but it was nowhere near as pronounced as some of these new frames. Again, I need more experience with some of these tools and jigs.
Note to Self...Get More Clamps
Now was time for the stressful part...gluing these frames together. I had plenty of clamps, so I wasn’t worried about that. It’s just that gluing these types of frames together is stressful to me. All glue ups are stressful to me at this point. I’m still not experienced enough to know all of the ins and outs yet. I’ll get there eventually. I ultimately got all of the standard loose tenon frames together (the basswood one was going to be its own separate project) and set them aside for the glue to dry. The next day I would focus my attention on the mitered frames.

The first thing I wanted to do on the mitered frames was to router the rabbet on the inner edge of all the pieces. This would leave a nice squared corner on the back of each frame and make for easier fitting of the acrylic and hardboard back panels. I set up the router table with my rabbeting bit, which still had the same bearing from the last frame project, and I decided to do things a little differently. The last time I ran the rabbeting bit, I did just one pass at full depth. This time I was going to go only half way for the first pass and final depth on the second. The final depth was only 1/2”, so I probably could have done it with no problem, but I was in no rush so why not do it in two. Most importantly, I was trying to avoid any chip out if I could. I ran all of the pieces through at 1/4” and then finished them all at 1/2”. There was a tiny bit of chip out on the poplar pieces, here and there, but nothing too bad. I think I might wind up using the table saw for any rabbeting cuts on mitered frames in the future.
A Slight Detour
It was at this point that I realized that I needed to change my dust collection around at my table saw. I changed it around when I moved the shop around recently. The way that it was before, my old dust collector had a 6” to 4” splitter that came with the machine. This allowed the table saw to have a dedicated connection and all of the other tools to connect with a separate hose. I used blast gates on both lines for when I wanted to change tools.
My new dust processor had a similar 6” to 4” splitter, but because of its location in the shop, I could no longer have a dedicated line run to the table saw. It would have been a major tripping hazard, and I’m not going to have that in my shop. What I did instead was to integrate the router table dust collection into the line coming from the table saw. I would have a ‘Y’ connector with a blast gate for the router table. If I wanted to run that, just open the blast gate, otherwise it was closed for table saw dust collection.
In theory this sounded good, but in actual practice, not so much. My new dust processor had much better suction than my old one, so I figured that drawing from the table saw and, with the blast gate open, from the router table at the same time would still provide adequate suction...WRONG!!! When I finished routing the rabbets on the mitered pieces, there was a pile of dust in the bottom of the collection box, something that wasn’t there in the old setup. I quickly changed it to have two separate connections and I’d test it when it came time to run the rabbets on the loose tenon frames. Anyway, back to the build!!!
Cue the Price is Right Trombones
I finally got around to working on the frames again, and it was time to glue up the mitered ones. I already removed the clamps from the loose tenon ones, and they were rock solid. I got out my miter framing clamping kit (I got this at Rockler in 2019, and now they don’t sell it anymore) and started gluing up the small walnut frame. I got it clamped up and set it aside. I left the frame to sit for a few hours before I removed the clamps. When I removed the clamps, I noticed a serious problem. Not all of the corners were perfectly glued together. They didn’t all meet at a point in each corner. A wave of disappointment hit me. I checked all of the other mitered pieces and found the problem.
None of the joints for ANY of the mitered frames made perfect miters. Something went afoul during the cutting of the miters. I’m still not exactly sure what happened, and at this point I’m not sure it matters. I made sure to double-check my miter sled before I made ANY cuts with it. It was at a perfect 45° when I started. I don’t know if the pieces somehow shifted on me ever so slightly, or something else went wrong.
I will say this about my miter sled. I have not been overly impressed with it since I got it. It’s a shame because it’s an Incra Miter 5000 sled. Because of space limitation in my shop, I have to hang the miter sled on the wall when it’s not in use. It is hanging from the holes that are already in the sled itself, so it’s not bumping into anything. Every time I take it down to use it, and I mean EVERY time, I check it to make sure that it’s square and it’s always off. I have to readjust it before every single use. I don’t know it it’s because I store it with the fence at 45° or if it’s something else. I’m pretty fed up with it at the moment and I’m thinking of selling it. I’ve got a new miter gauge on order and I’m hoping I have better luck with that in the future. Because all of the miters are off on all of these frames, I’m going to just scrap all of them and start over. I’m sure there is a way to fix these, but I’m in no mood to mess with them anymore.
No Light at the End of This Tunnel
With the mitered frames a total bust, I got to work on the loose tenon frames. I started by flattening all of the joints with my random orbit sander. I wanted to have a somewhat flat reference surface so I could use the drum sander on the other side. It took a bit of work on some of them, but I got them evened out as best as I could. It was now time to put the drum sander to good use. I’d used it a couple of times, sparingly, but not like this. I ran all four frames through, taking little by little with each pass, until I was left with an even surface. I’m happy with the job the drum sander did. I’m glad I’ve got it at my disposal.
Now that I’ve got a flat side as a reference, I ran each of the frames through the router table to create the 1/2” rabbet for the acrylic and hardboard panels. I, again, made two passes to help minimize chip out, but I still wound up with a little on the cherry frames. I tried an initial pass doing a climb cut, but this didn’t really help either. Not to mention, that is not the optimal way to make cuts on the router table anyway. I was extremely careful, but it almost got away from me a couple of times.
When I was finished routing all of the rabbets, I notice a bit of a goof on my part when I laid out the loose tenons. I didn’t take into account the 3/8” rabbet when laying out the 3/4” mortises. Consequently, when I was cutting the rabbets, I was also cutting into the corners of the tenons in the corners of each frame. This was a major screw-up on my part, and there wasn’t anything I could do, at this point, to fix it. However, given that it’s on the back of the frames and couple that with the fact that the acrylic, cross stitch and hardboard panels will cover up my gaffe, no one will be the wiser unless I say something. This is yet another learning experience to file away for later.


Show Me “Sand the Frame”
I now set about the task of sanding the sides of the frames. This was a perfect opportunity to take advantage of the moxon vise I made a few months prior. When I sanded the cancer ribbon frames with a random orbit sander, I wasn’t careful enough and I wound up rounding the edges a bit. I didn’t want that to happen this time so I figured I’d be better off clamping the frames upright and hand sanding them. This turned out great and it wasn’t really all that much work as the sides were in pretty good shape as it was. I’m really glad that I still had my old JET AFS-500 air filtration unit around. With its relatively small size, I was able to get it right up next to the work and limit the amount of dust that got into the air. I still wore my dust mask anyway, but the JET made for a lot less mess in the shop air.

The final bit of sanding was to give both sides a once over with 180 grit. I put a 120 grit sanding belt in the drum sander when I was flattening them, so I could save a little time with the final sanding. I’m so glad I did that because I made quick work with the 180 grit with the ROS. One last bit of hand sanding to clean up any glue in the inside corners and these frames were pretty much complete.
Baby Got Back (Panels)
I referenced my spreadsheet one more time to see what the measurements were to be for the acrylic and hardboard panels. I double-checked these with the actual measurements on the frames and they were a perfect match. All of my work on the spreadsheet and planning at least paid off here.
I swapped out the blade in my table saw to the Freud plastics blade I bought for the previous frame project. This made quick work of cutting the acrylic. To make sure both pieces were the exact same size, I went ahead and cut the hardboard at the same time without moving the fence. The plastics blade had no problem with the hardboard so I’ll likely move forward during future projects in the same way. This will eliminate making unnecessary blade changes and guarantee both pieces will be identical in size.
With all of the panels cut, I now needed to round off the corners on them. Because I used a rabbeting bit in the router table, all of the corners are rounded on the backs of the frames. I could cut the corners square with a chisel, but my chisels are definitely not up to that task. Rounding the corners will take less time and be easier anyway, especially now that I know what I’m doing.
To make easy marking of the corners, I took a 5/8” washer and lined it up with the edges of the panels. The outside radius of the washer is the same as the radius left by the bearing on the rabbeting bit. With these laid out, I went over to my oscillating belt sander. I changed out the 80 grit belt and put on a 120 grit one instead. The last time I used the 80 grit with the acrylic, it didn’t turn out that great and seemed just too aggressive. With the 120 grit, I was still getting a bit of melting of the acrylic, but by moving the acrylic backwards on the belt while rounding the corners, that seems to mitigate the melting problems. Any further rough spots could easily be sanded off by hand.


The Finish Line is Near (Partly)
Now that all of the panels are cut, the only thing I’ve got left to do is to apply the finish. I decided to go with spray lacquer, again, for all of these frames. My last frames were finished with Rust-O-Leum spray lacquer, and I wasn’t extremely happy with the results. I decided to give Miniwax a try this time around. When I went to shake the can, I was surprised that there was no marble inside the can. I’m not entirely sure that the marble helps with the mixing of the contents of the can to begin with, so I guess it might not be needed at all.
I started with the smallest cherry frame first. I think part of my problem the last time I used spray lacquer was that I was laying on way too much. I tried my best to go with nice light even coats this time. The directions state to do this anyway. After the first coat, I let it dry for 30 minutes before proceeding to the next coat. There was no sanding needed between coats (I hate sanding). I gave the back and sides of the frame three coats and then proceeded to do the same with the front of the frame. After the last coat dried, the finish looked and felt great. I was impressed with the results using the Miniwax spray lacquer. I think I will proceed with that brand for all of my future spray lacquer needs (at least for small projects).
The one main problem with ANY type of spray lacquer is the awful smell. I had both of my air filtration units running with odor-eliminating filters and I had the one-car garage door cracked. I finally found some good use for the old air mover fan I still had from my failed air filtration cart. I pointed the fan outside and it did a great job at removing a lot of the smell. I only had my garage door open enough for the fan because there is one little thing I needed to avoid this time of year in Florida...LOVEBUGS!!! Anyone who’s been in Florida in March/April and in August/September knows of what I speak. If I had the door wide open, I would have had a ton of lovebugs flying around my shop and landing on my drying frames. I was not about to have that. This year, the bugs seem a lot more widespread than in the past few years, too.
With all that being said, I got all of the frames finished. All of the loose tenon frames are completed (minus the hanging hardware), but I’ve still got the five mitered frames and the basswood special to complete. I’ve hit the pause button on all of these remaining frames for the time being. I’ve had other projects come up in the meanwhile that will have a deadline, and I need to focus on those before I can get back to more picture frames.
For the most part, I’m happy with the end results of the completed frames. They are exactly what Lisa wanted for her projects, and the mistakes that were made won’t be seen by anyone. I’ve learned (the hard way) that I need to be more careful in laying out loose tenons, especially with picture frames. As long as I don’t repeat the same mistakes in the future, I’ll be happy.


