
Air Force Seal Picture Frame
My wife, Lisa, found a great cross stitch pattern of the United States Air Force Seal and wanted to make it for me. I have no idea how long it actually took her to complete it (she doesn’t keep track of the time spent on cross stitch projects as she normally has multiple ones going at the same time), but it was just something I had to frame right away. I’d only made two other picture frames for the cancer ribbons the previous year, and those were traditional mitered frames with splines. I didn’t want to use miters on this project, so that only left a couple of options from which to choose.
Dominos (and I don’t mean the pizza)
A couple of months prior I saw a video by Jay Bates at Jay’s Custom Creations for a new product that allowed the use of a router to make mortises for loose tenons (AKA dominos). It’s called the Mortise Master and it was created by Don Browning. Don sent one of his Mortise Masters to Jay to try out and to get feedback. Jay made a full video on setting up and putting the Mortise Master to use. I loved what I saw.
I always loved the Festool Domino machine. The speed and precision with which you can make mortises is unparalleled. However, the $1,000 price tag just could not be warranted given how infrequently I would use the tool. For a production environment, the Festool Domino is almost a necessity. For hobby woodworkers like me, the Mortise Master was a much better option. For only a couple of hundred dollars, I could use a plunge router that I already owned to make mortises of similar quality to a Festool Domino for a fraction of the price. On top of that, with the use of scrap hardwoods laying around the shop, I could make my own tenons and save money there as well.
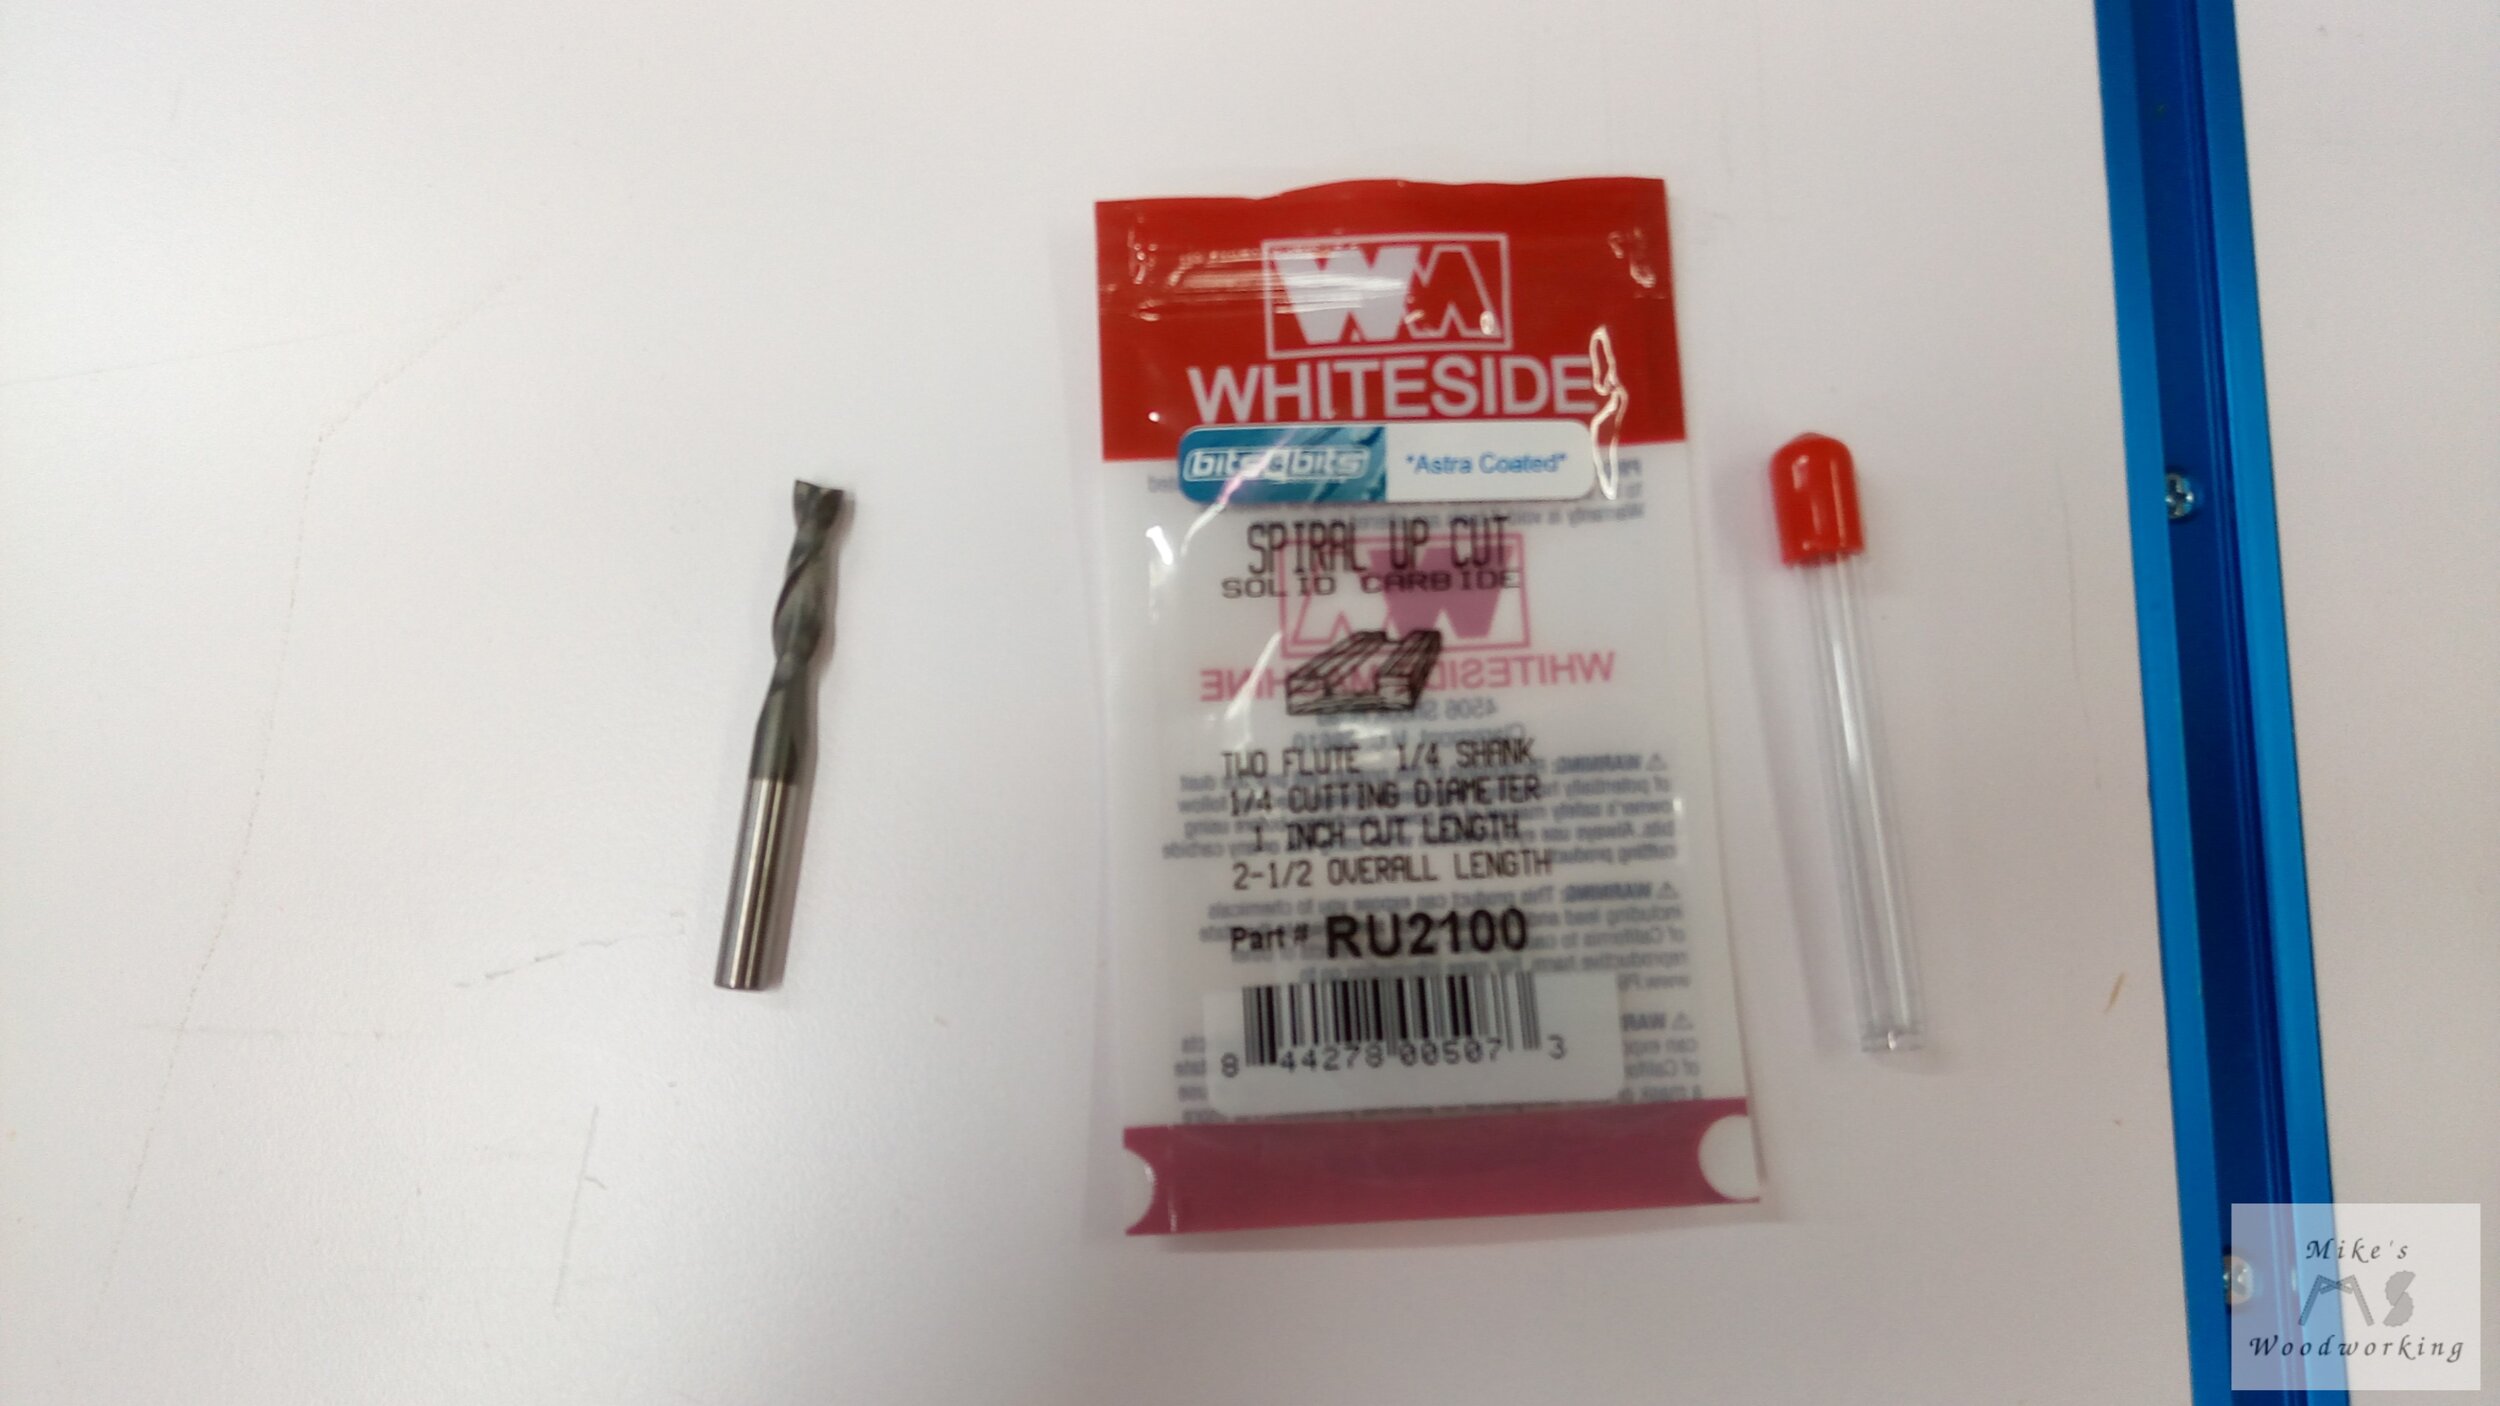
Knowing that I had my Mortise Master, I figured this would be a good project for trying out loose tenons. I hadn’t actually set up the Mortise Master and tried it yet, so I grabbed a couple of scrap plywood pieces and got to work. I installed a 1/4” spiral upcut bit from Bits & Bits into my plunge router to make the mortises. After going through Jay’s video a couple of more times, I made my first cuts. I made the tenon stock a little smaller than the mortises to allow for easier alignment. The final results were great.
VERY Necessary Walnut
Now that I was more familiar with the Mortise Master, I needed to get to work on my frame. Long before I even started this project, when Lisa showed me the cross stitch pattern, I knew I wanted to make the frame out of walnut. I had plenty of walnut laying around from when I was working on my failed hall bench project. I processed the rough walnut and got everything down to near final dimensions. The walnut I used had been sitting in my shop for quite a long time, so it should have been well acclimated and dry. However, I let the pieces rest overnight to allow for any additional wood movement anyway. I checked the pieces the next day and all was good. I processed the pieces to final dimensions and pressed on with the build.
The overall dimensions of the frame would be 15-5/8” square with the frame being 2” wide and 3/4” thick. There would be a 3/8” wide by 1/2” deep rabbet for the install of the acrylic, cross stitch pattern and backer panel. The construction would be, obviously, loose tenons and the frame itself would be built more or less like a rail and stile door.
It’s Wabbit Season
I laid out the mortises on each of the rails and stiles of the frame and positioned each piece in the Mortise Master according to my needed measurements.

All of the cuts were made and I tested the fit with some tenon stock I previously cut. Everything fit together great. There was a tiny bit of adjustability to get the sides of the frames flush. The boards were just a tiny bit proud of each other on a couple of joints, but that wasn’t anything that couldn’t be cleaned up while sanding. Being as this was my first time using this jig for a project, I still need to refine my technique and get more time using it to get more proficient with it.

I glued up all of the pieces and called it a day at that point. I left the glue to cure overnight and would start fresh the next morning.

I sanded the whole frame, starting with 80 grit to flatten where some of the joints weren’t flush. I then went up to 120 grit, then 180 grit for the final sanding. Next up I needed to cut the rabbet. I knew going into this step that I would wind up with rounded corners on the back. This would leave me with the option of squaring the corners or rounding over the edges of the acrylic and backer panels. I chose the latter option. I only have a couple of chisels and they are in no shape to be clearing material from nice hardwoods right now. Eventually I’ll get these chisels properly sharpened to tide me over until I get some better chisels.
I set up the router table with the rabbeting bit. This was the first time I’d used this adjustable rabbeting bit, so I had to change out the bearing to match the 3/8” rabbet I wanted for this frame. I made the cut at the full 1/2” depth and everything came out fine.

Looking back, I probably should have made a couple of shallow passes instead of a full-depth one. There was no tear-out in the walnut, so I moved on to cutting the acrylic and backer panels.


A Cut Above the Rest
When I was making the cancer ribbon frames, I used an 80-tooth fine trim blade for cutting the acrylic. It certainly did the job, but the quality of the cut left a very sharp edge which wound up cutting my finger. I decided that it would be in my best interest to invest in a saw blade that was designed specifically for cutting plastics. I found one made by Freud and tried it out for the first time on this project. What a difference. The edges were crisp and clean and didn’t leave a super sharp edge like the trim blade.
After sizing the acrylic and hardboard panels, I now needed to round the corners of each panel to fit the frame. I didn’t want to just start sanding the corners and hoping I would get a good fit. I needed to mark an accurate and defined line to follow when sanding. I looked around the shop and found the perfect solution. A 5/8” washer has the matching radius for the rounded corners left by the rabbeting bit. I lined up the washer in the corner of the panels and marked the curve. The oscillating belt sander made quick work of removing the material and rounding the corners (too quick I think). I had an 80 grit belt on the sander and it was producing a lot of heat and melting the acrylic a bit. I didn’t have a finer grit for the belt sander so I had to make due with what I had. I finally got the corners to the proper shape and got the panels fitting great. I made sure to leave a tiny witness mark on the inside of the rabbet and the panels so I would know which corner went where because the panel wouldn’t fit any other way, even though it was a square.
FINISH HIM!!!
Next up was applying a finish. I had my Earlex paint sprayer that was still sitting around and not used since I bought it, but I wanted to get this frame done quickly. I opted to go with a can of spray lacquer instead. This was actually my first time finishing any project I’d done. The last frames I made were painted by Lisa, so I didn’t finish those. I put on a few coats of lacquer all over the frame. I think I went a little overboard with the lacquer to be honest. I think I used almost half a can on this one frame. This was my first time using this stuff, so I was still learning. It’s just going to take more time to learn.
Once the lacquer was fully dry, I attached one of those saw tooth picture hangers on the back. Lisa cut the cross stitch fabric to size and it was placed on top of the acrylic and the back on top of it. I used my point driver to hold everything in place and I could finally get a look at the finished product. It looks absolutely awesome. The time and effort Lisa put into the pattern was well worth it. The walnut frame really makes the blue fabric and the whole Air Force seal pop. I can’t wait to hang this on a wall in the house.
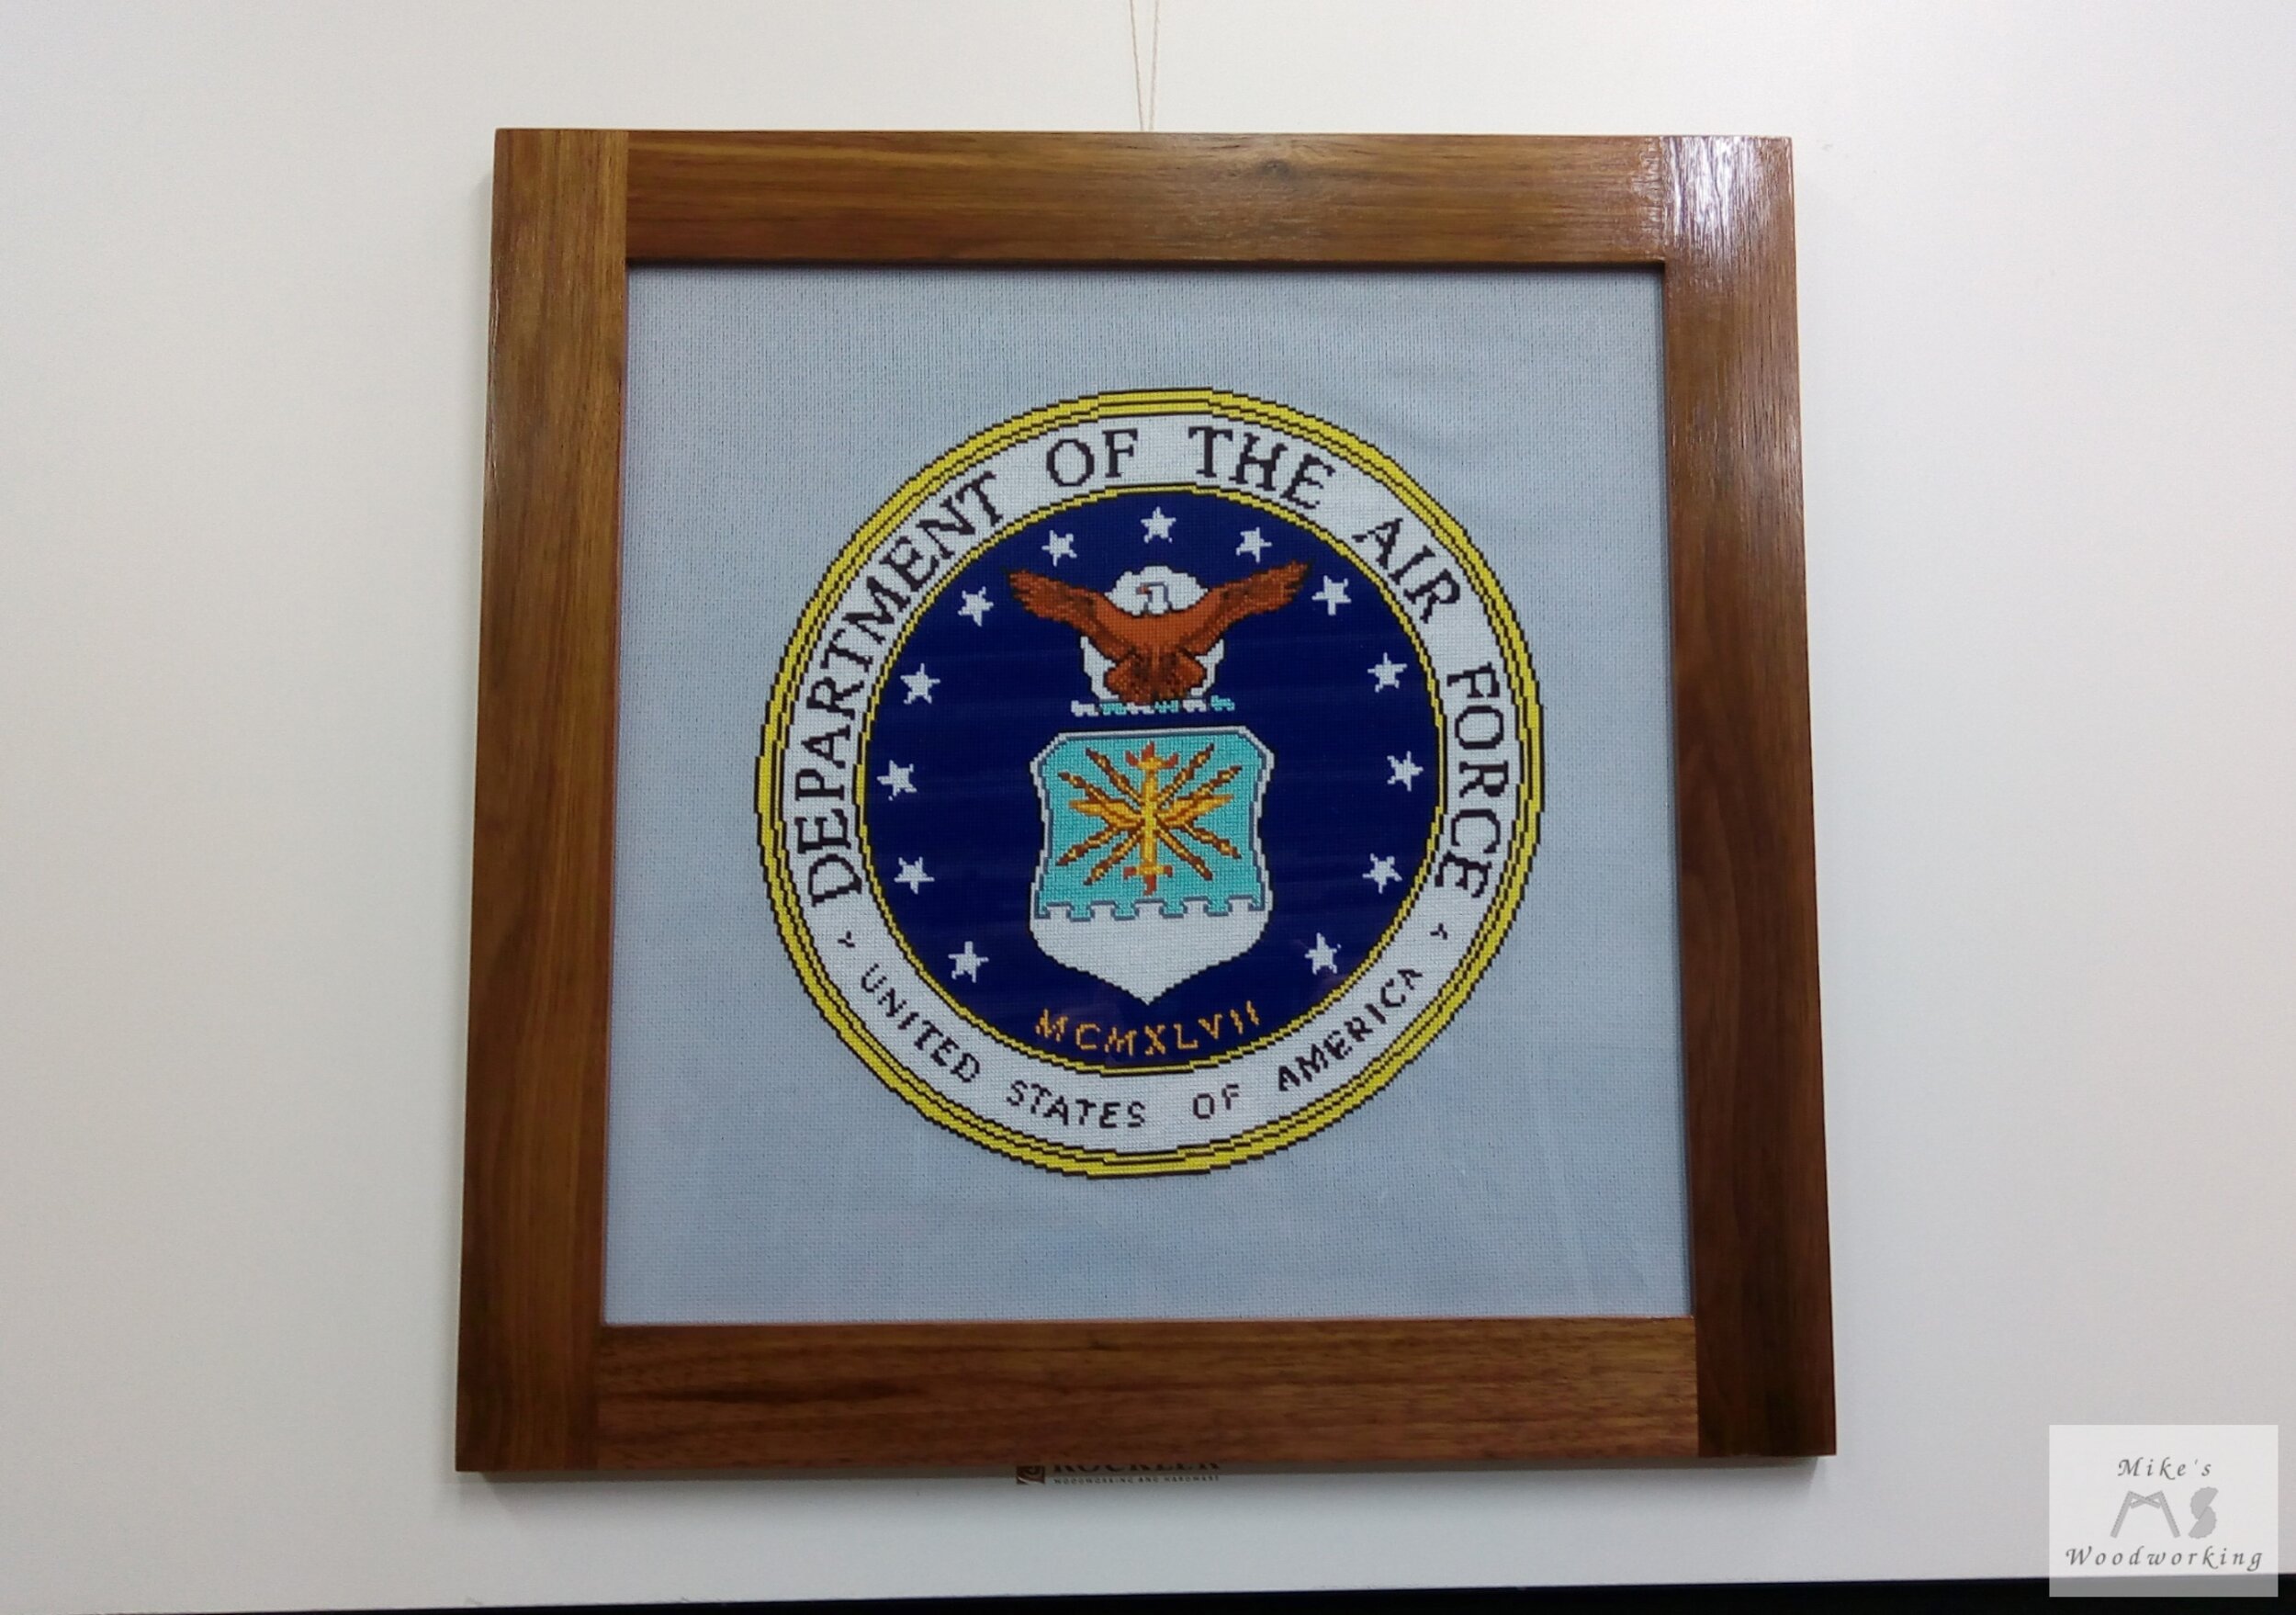

I’m extremely happy with how this project came out. This was the first project that got me back using the jointer again since my accident. I was much more mindful of where my hands and fingers were this time around. I really took my time running the rough walnut stock through the jointer and I had no apprehension using the tool at all. That coupled with the wonderful results, and this was the biggest project win to date.