
Utility Sink Cabinet
When we had our house built back in 2017, we had the builders put a plumbing drop in the laundry room for a utility sink that I would install in the future. Well, it took me a couple of years but I eventually installed one of those sinks you can find at most big-box stores. I went with this model, specifically. I eventually replaced the faucet that came with that sink as it broke (shocking, I know).
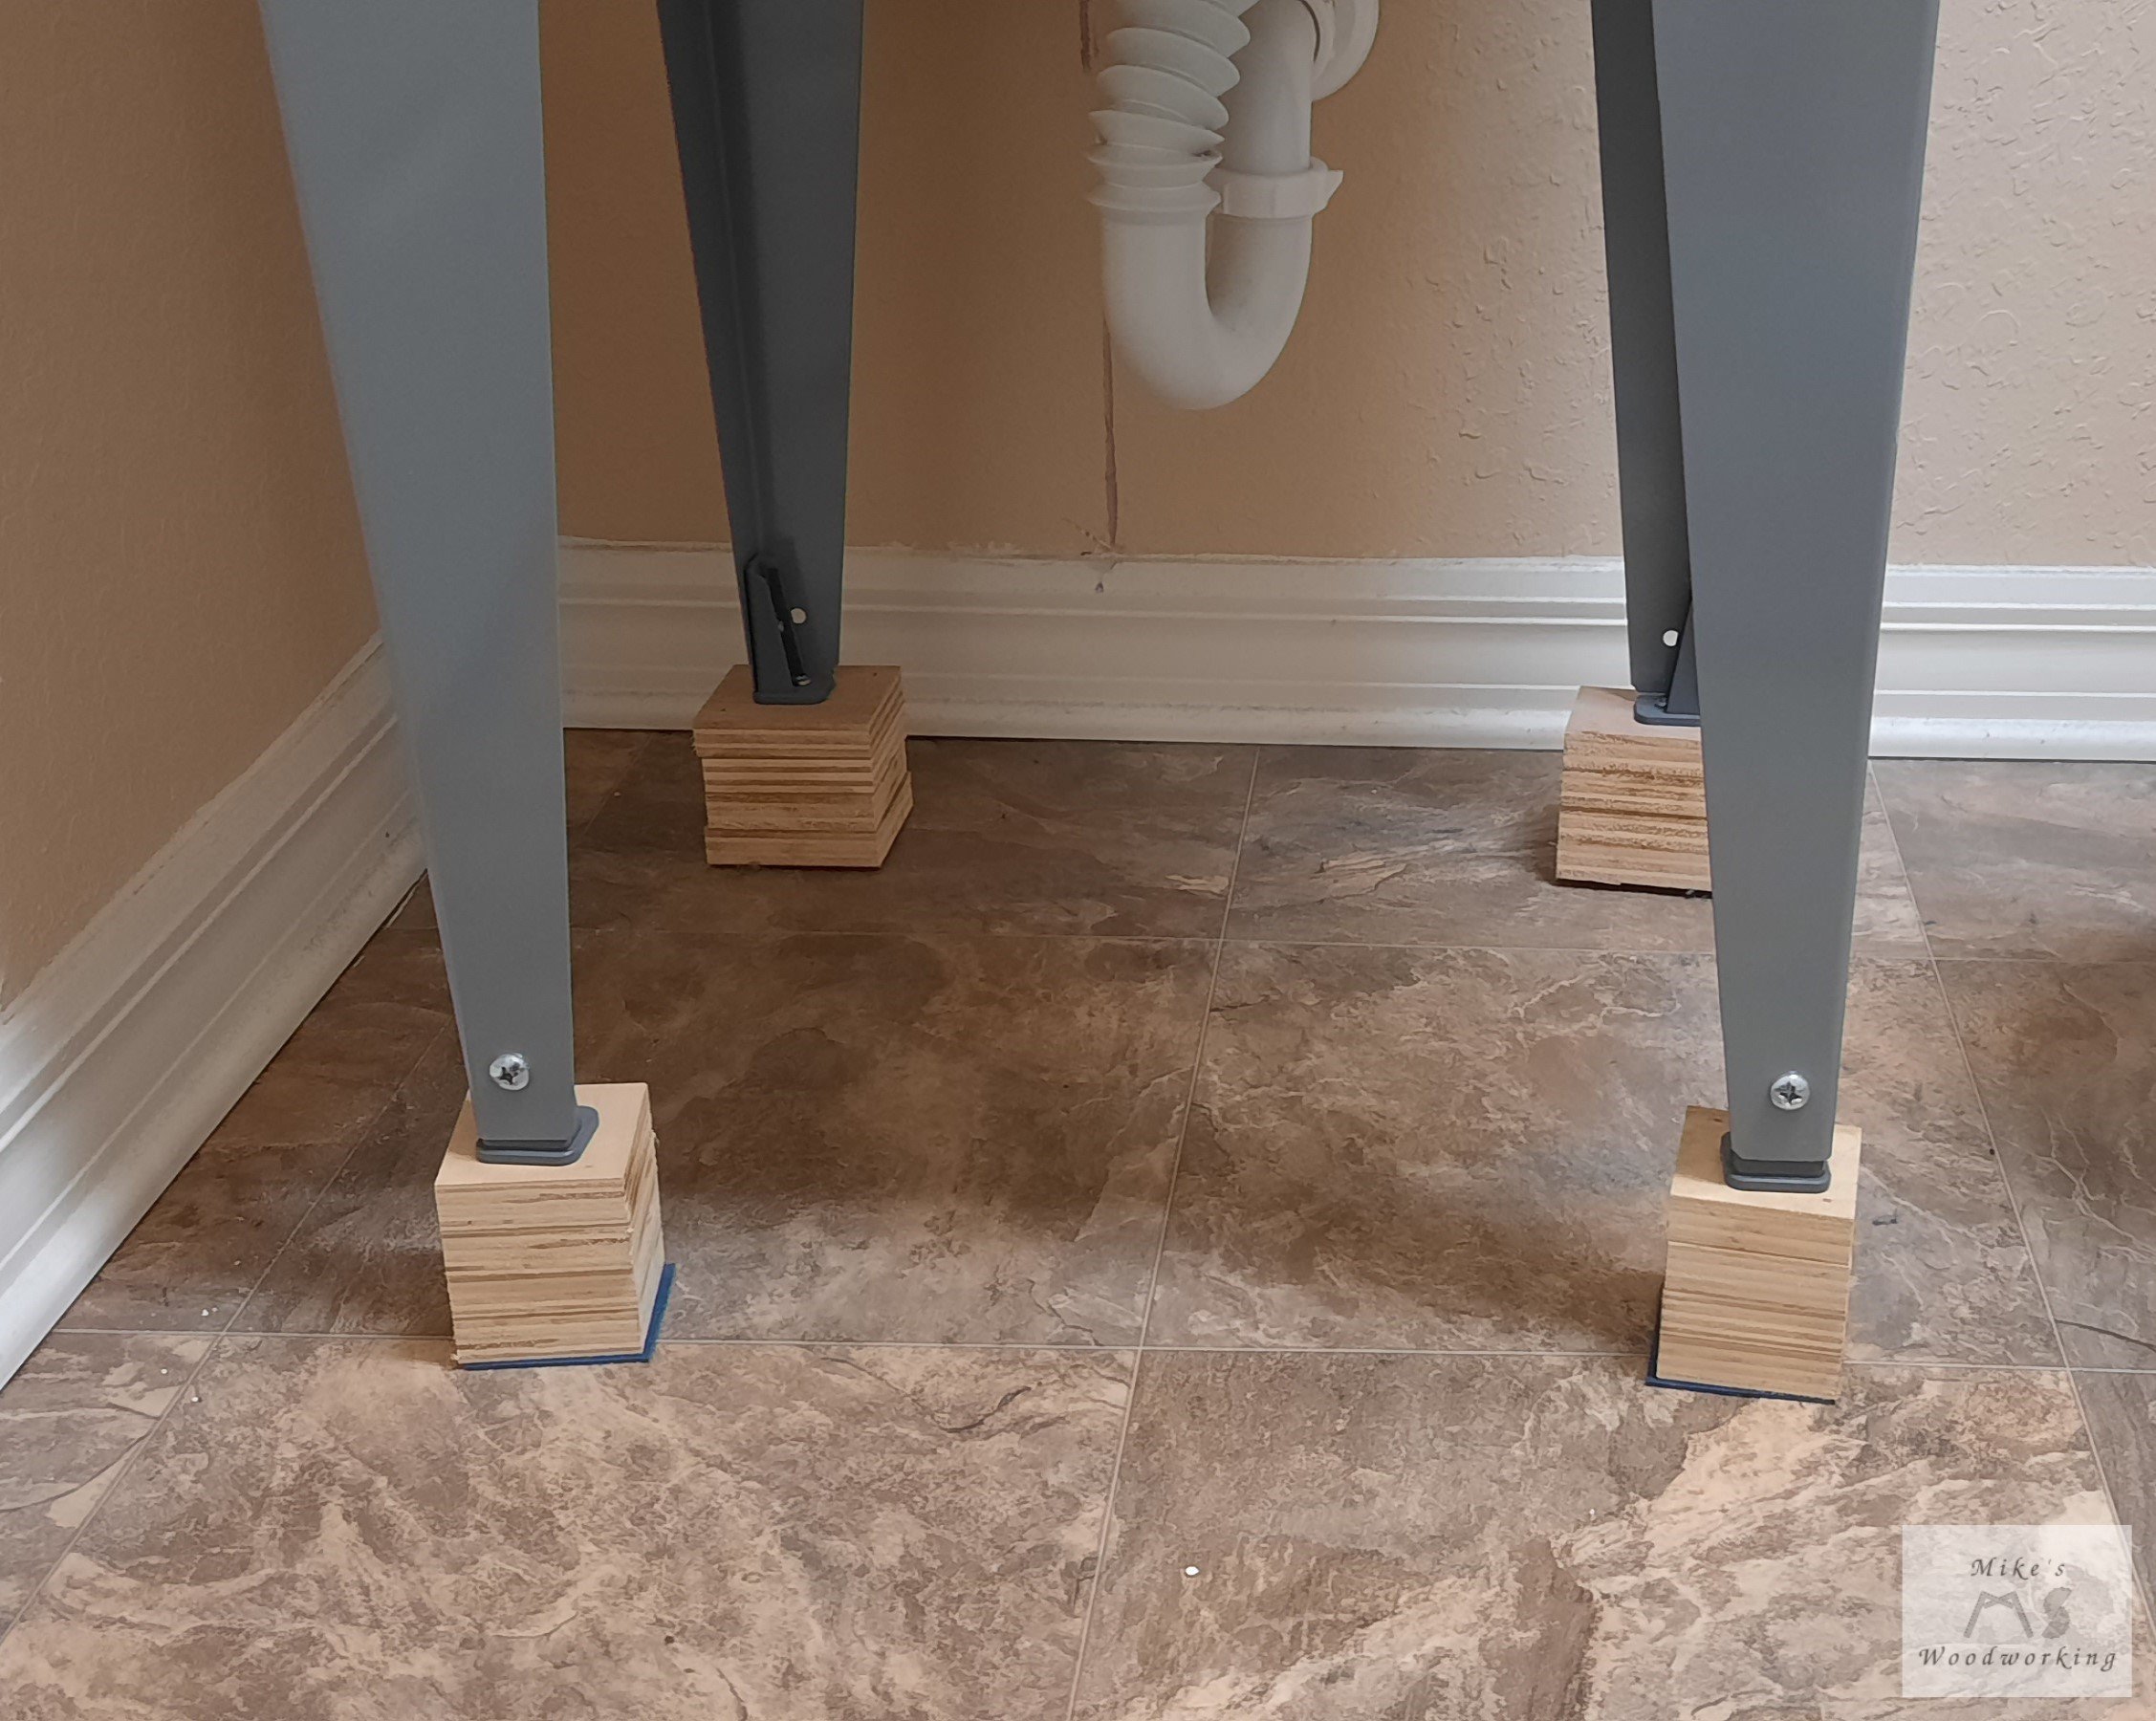
With this being a fairly straight-forward and basic plumbing job, I got it installed without much issue. The one issue I DID have was that the height of the utility sink and its legs did not work well with the layout of the plumbing coming out of my wall. Because of this, I had to place the sink on some riser blocks to make up the height difference. I also had to use one of those adjustable p-trap pipes because the drain didn’t line up with the pipe coming from the wall. I could have made a better permanent connection with a bunch of different fittings, but I wanted to get this done now. Here is the end result after having been in place for a few years now.


Now that I’ve got a bit more woodworking experience under my belt, I think it’s come time that I make a custom cabinet for a nice new utility sink.
We’ve got about four feet of space between the wall and the washing machine, so the best option is a 36” cabinet. I could go all the way across, but I still want to have easy access to the plumbing shut-offs just behind the washer.
Regular birch plywood will suffice for the carcass. As for the cabinet construction, I opted to use dadoes and wood glue to attach the bottom to the sides. To beef up the overall carcass, horizontal stretchers with pocket holes were used.

The top front stretcher was installed vertically instead of horizontally because of the size of the sink. I needed every inch I could spare. I cut the toe kick notches on the band saw.
With this cabinet being a bit wider at 36”, I opted to install a center brace with a leveling foot to help prevent the bottom from sagging over time.

I’ve got a bunch of these leveling feet that I bought from Rockler over the years just sitting in a drawer. The strategically placed hole I drilled is just big enough to allow a 5mm hex wrench to fit with no slop.
I chose to utilize a face frame on this cabinet, which was a first for me. I used iron-on edge banding on frameless cabinets for all of my office furniture, but I wanted to try something different for once. I had some cherry left over from the chess board build, plus a few more pieces that I’ve had lying around for a couple of years now. It wound up a bit of a mishmash in colors and grain, but it’s a utility sink cabinet so I’m not that broken up about it.
To attach the face frame to the carcass, I used pocket holes located on the outside of the left side (up against the wall and unseen) and the inside of the right side (visible only if the doors are open). I thought about putting the pocket holes on the outside of the right side and using some dowel plugs to cover the pocket screws, but that seemed like unnecessary work and wouldn’t look very good.

I wasn’t going to put a stretcher on the bottom (behind the toe kick), but I wanted the toe kick to attach to more than just the sides. I fastened it in place after the face frame, else I would have had problems attaching the face frame’s bottom rail to the bottom shelf.
The doors were an easy choice…shaker-style doors. I’ve made these a few times with my Finishing Station and most of the doors for my office furniture, and while they can be a bit fiddly to cut on the table saw, they have a nice and simple look to them. On top of that, I had just enough 1/4” maple plywood (again, more scraps) for the door panels.
Some of these pics were taken out of order, plus I didn’t get pics of the doors before I applied finish. The knobs, coincidentally, were the last two I had from a purchase a LONG time ago.
The choice to go with a face frame meant that I would not be able to use the same kind of hinges I installed for my office furniture. I had to get similar ones meant for attaching to a face frame.
With the width of the face frame stiles at 1-1/2”, I wanted the hinges to overlay half of that and have a soft-closing feature. After checking on Rockler’s website, I found these hinges (#44308) were perfect for what I wanted. With the addition of the right jig, this made installing the hinges on the face frame a breeze.
I already had a JIG IT® Concealed Hinge Drilling Guide, but in the past I found it to be a pain in the ass to position it twice for each door. I decided to invest in the JIG IT® Deluxe Concealed Hinge Drilling System to allow me to lock both hinge drilling positions in place at the same time. After using the deluxe jig on these two doors, I must say that I’m a big fan. The original single drilling guide won’t be a waste as it will come in handy when I need to install more than two hinges on a large door in the future.

The drilling jigs made installing these hinges very easy. Also, you can see one of the pocket holes used to attach the face frame to the right cabinet side. Oh yeah, and that 1/4” maple plywood had a couple of NASTY spots on it, like that big ol’ knot (hence it’s on the inside).
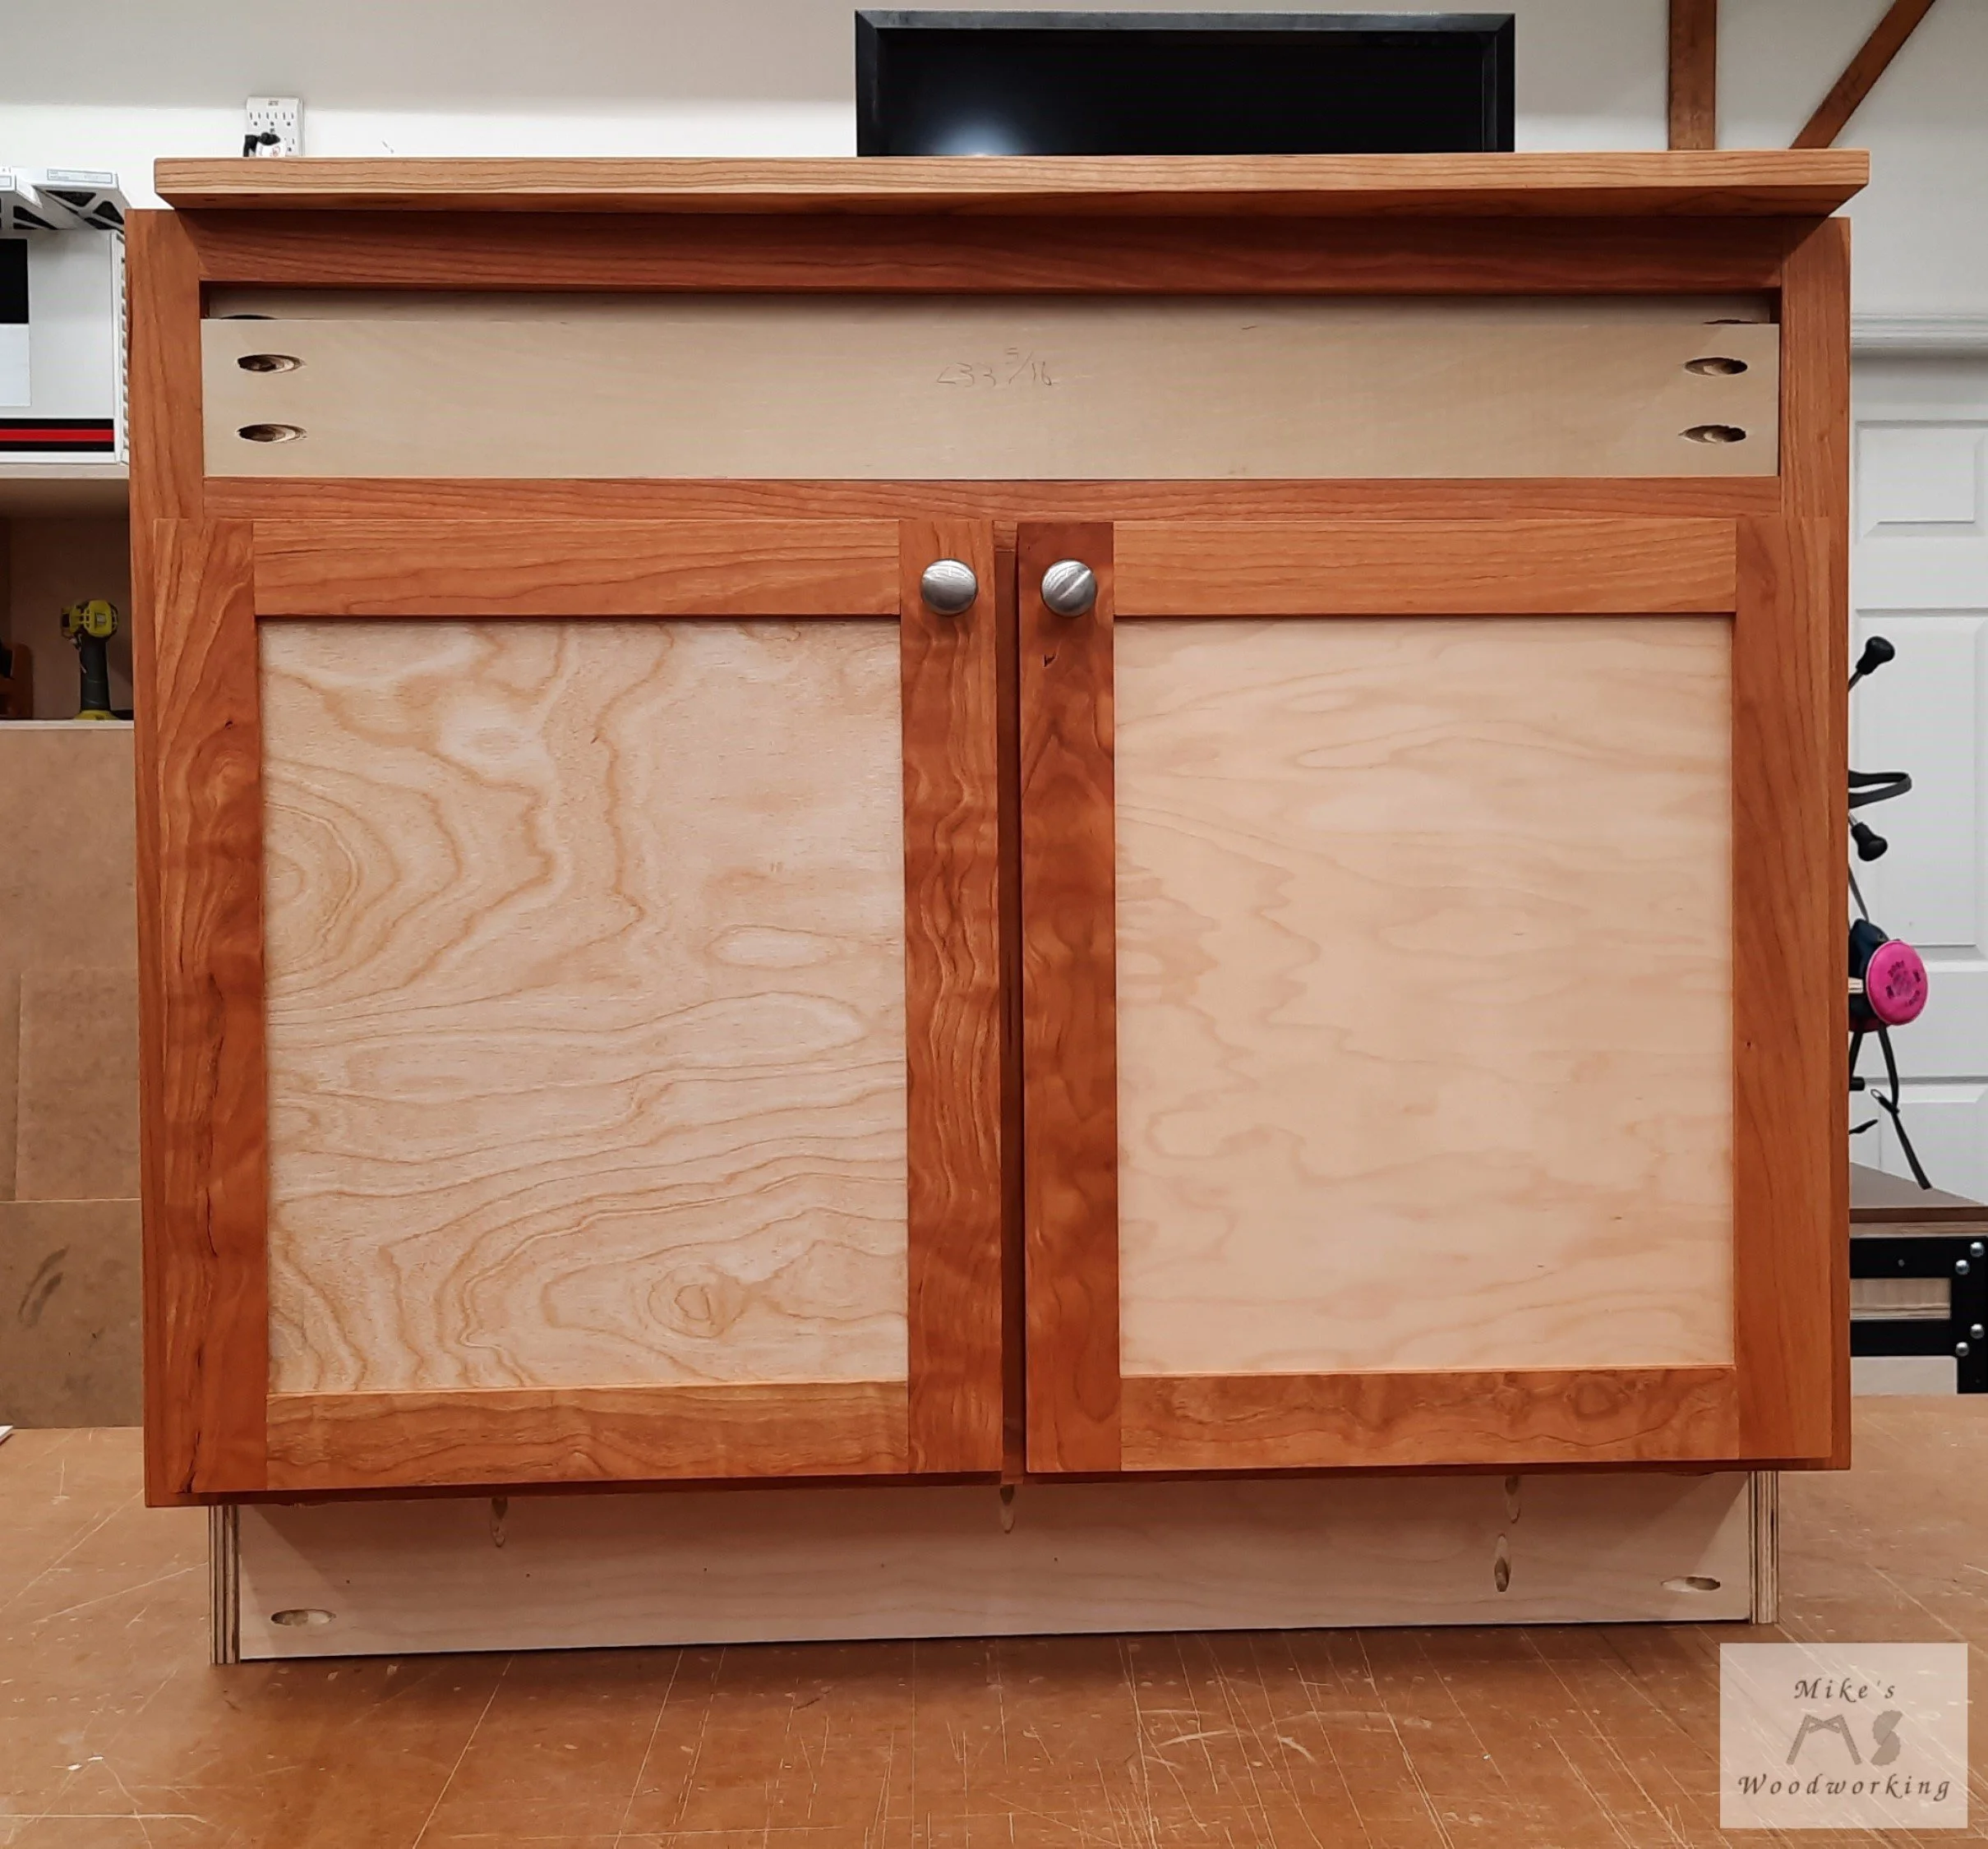
Because this is a sink base cabinet, and the size of the sink itself, I needed to install a false drawer front to close off the top section of the face frame. I attached a backer of scrap 3/4” plywood behind it (see above pics) to allow me to secure the drawer front in place. I did make sure to elongate the holes in the plywood to allow for any wood movement (probably not necessary).
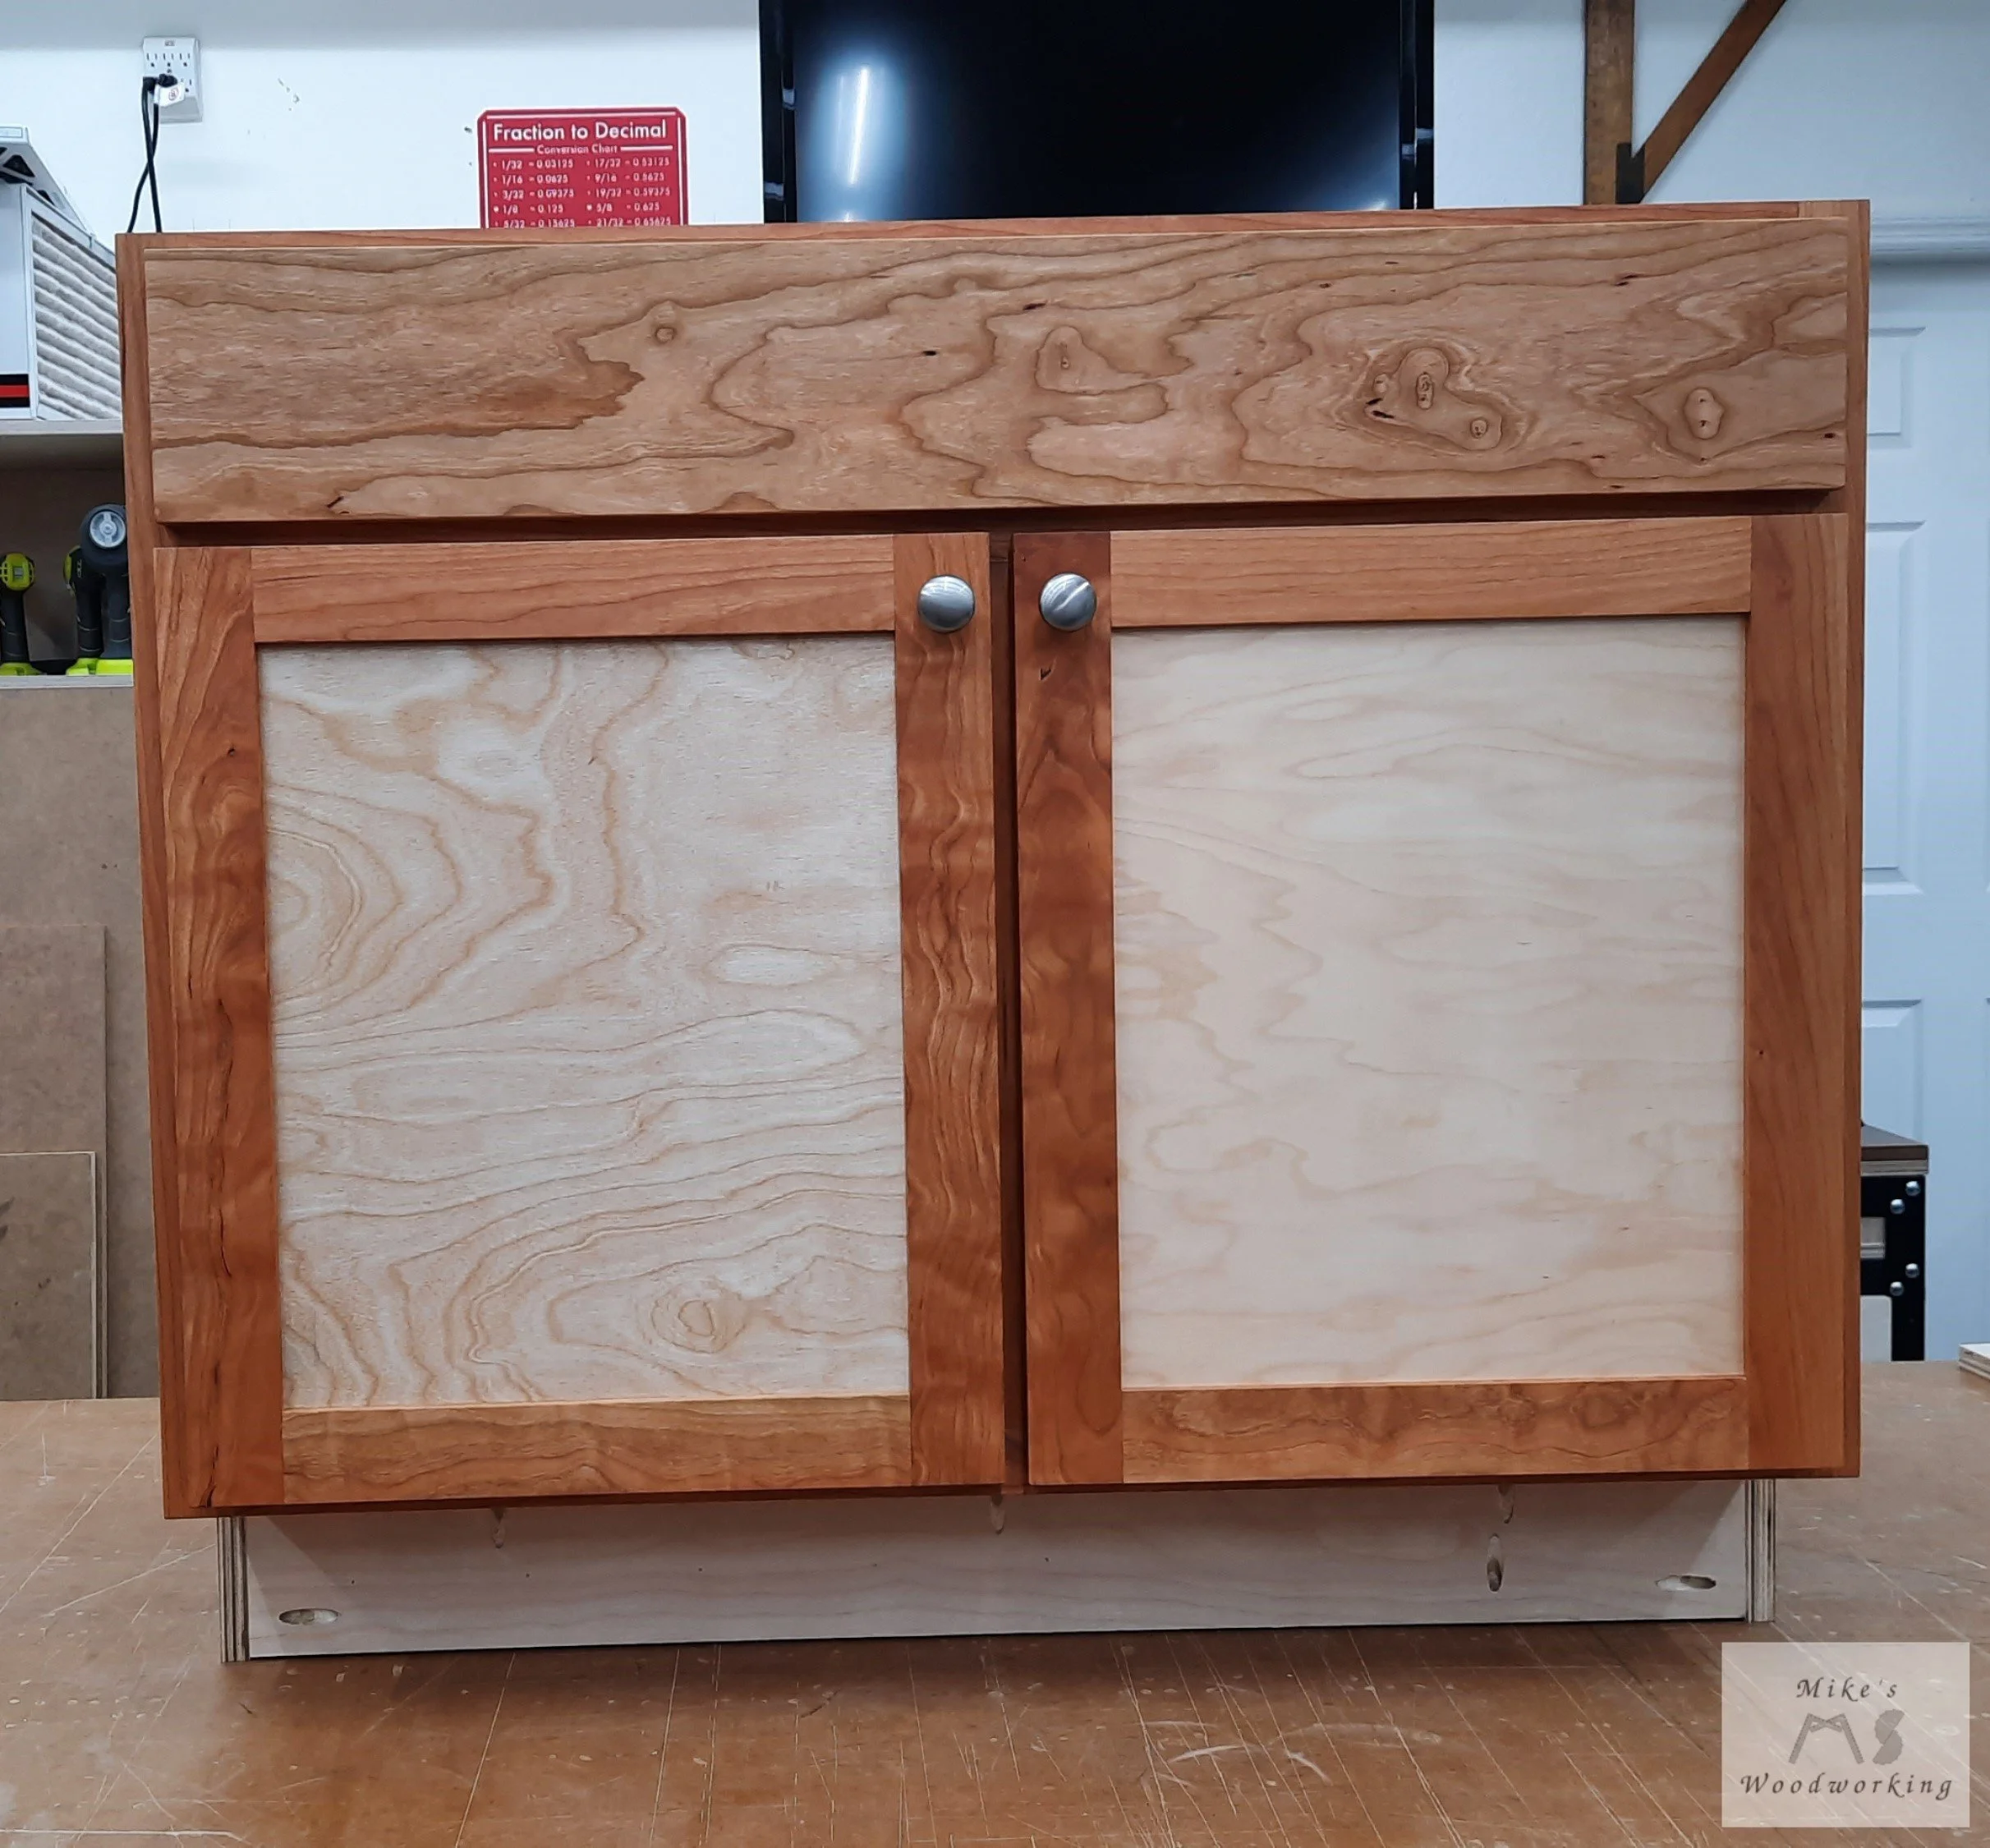
The grain and color for the drawer front is a little off from the rest of the material I used. The show face is A LOT better than the reverse side, as that had quite a bit of lighter sap wood showing. For using up what I already had on hand, I’m happy with it nonetheless.
The toe kick is just another piece of cherry that I milled at the same time as the doors, face frame and false drawer front stock (to allow for consistency). I attached it, after securing the cabinet in place, with Titebond III and a few 1-3/8” pin nails.

There’s a noticable wave with the floor compared to the toe kick…yeah…that’s what caulk is for.

I couldn’t believe there was only ONE stud over the whole 36” span (unless my stud finder was on the fritz). Two screws (one in each the top and bottom) ought to be plenty to hold it.
As for the top, I went through a few different ideas but ultimately decided on something rather simple that would use up more scraps in the process. The top is a layer of 3/4” birch plywood with a layer of 3/4” MDF attached to it. I didn’t have enough MDF scraps to match the exact size of the plywood portion of the top. I had enough to make a couple of filler pieces to make up the difference, though. I glued both layers together with more Titebond III and a few strategically placed 1-1/4” brad nails, mostly on the edges of the larger piece of MDF as it was a little bit bowed.

You can just see the seam of the two small filler pieces on the bottom of the picture. Bowflex weight clamps FTW baby!!
Once the glue was cured, I used a flush-trim router bit to get the oversized MDF even with the plywood. This was A LOT easier than trying to make the MDF match exactly to the plywood. Word to the wise, make sure you have dust collection running while routing MDF. Even with my router hooked up to my dust extractor I STILL made a mess on the floor.

I made sure to sand the seam between the two strips and the large MDF panel since there was a slight ridge there. I needed to scuff the surface in preparation for the contact cement anyway. The two pieces to the right of the top panel will be the backsplash.
***You’ll have to bear with me for the next few steps as I completely forgot to take pictures of the process***
With the top glued up and sanded, I went about attaching the laminate top. I had a gallon can of contact cement from when I built Workbench, Version 3 some five years ago. I had a feeling that it might not be good anymore and, boy, was I ever correct with that assumption. I stuck a stick in the can to stir it and it went in about three inches and stopped. The bulk of the contact cement had solidified in the can and was completely unusable. Oh well, I went and got a quart can along with a new foam roller from Lowe’s.
I completely forgot that applying contact cement to MDF was going to be a long process. Like with any liquid, MDF just sucks up anything wet like a straw. It took four to five coats to get the edges of the MDF to stay tacky and two for the top faces. The laminate only took one coat for adequate coverage. After attaching the laminate, I used a small flush-trim router bit to cut off the overhang on all sides of all pieces.
Throughout the entire process, I made sure to have the garage door open with a fan blowing out to help with the horrible fumes. I also had both of my JET air filtration units running at full blast with charcoal filters to help with the terrible stench. I was wearing a respirator for the majority of the time, but even then I had to just leave the shop after a while because I couldn’t stand sitting around waiting for the contact cement to dry. I even got a nosebleed from my right nostril, I think from the few times I had my mask off and was breathing the fumes…not fun or recommended.
Prior to applying the laminate, I put the top in place to test for fit and my measurements were fine. There was a small gap between the top and both walls, but I was NOT about to go through the whole scribing process for this thing…that’s what the backsplash and caulk are for IMO.

The shadow lines along the wall show where the walls are not completely straight. The backsplashes themselves aren’t flat on the top either…again, caulk will come to the rescue.
As for cutting the hole for the sink, I got out my laser level and used that line up with the center of the drain coming from the wall. This left the sink itself off-center from the cabinet, but I didn’t want to have any complications with the plumbing, plus Lisa was fine with it that way.

The tripod I use for taking pictures in the shop came in handy.

That line was as close to the center of the drain as I could get. Notice the position of the pipes coming from the wall…more on that later. I left the old adjustable pipe and p-trap in place to provide a seal from the septic system to prevent any gases from coming back into the house.
The laser level I have didn’t project quite enough of a line onto the wall above the countertop so I had to improvise a little. I took my big carpenter’s square and used that to transfer a line from the wall to the counter. I double-checked my measurements and it was still centered in the end.
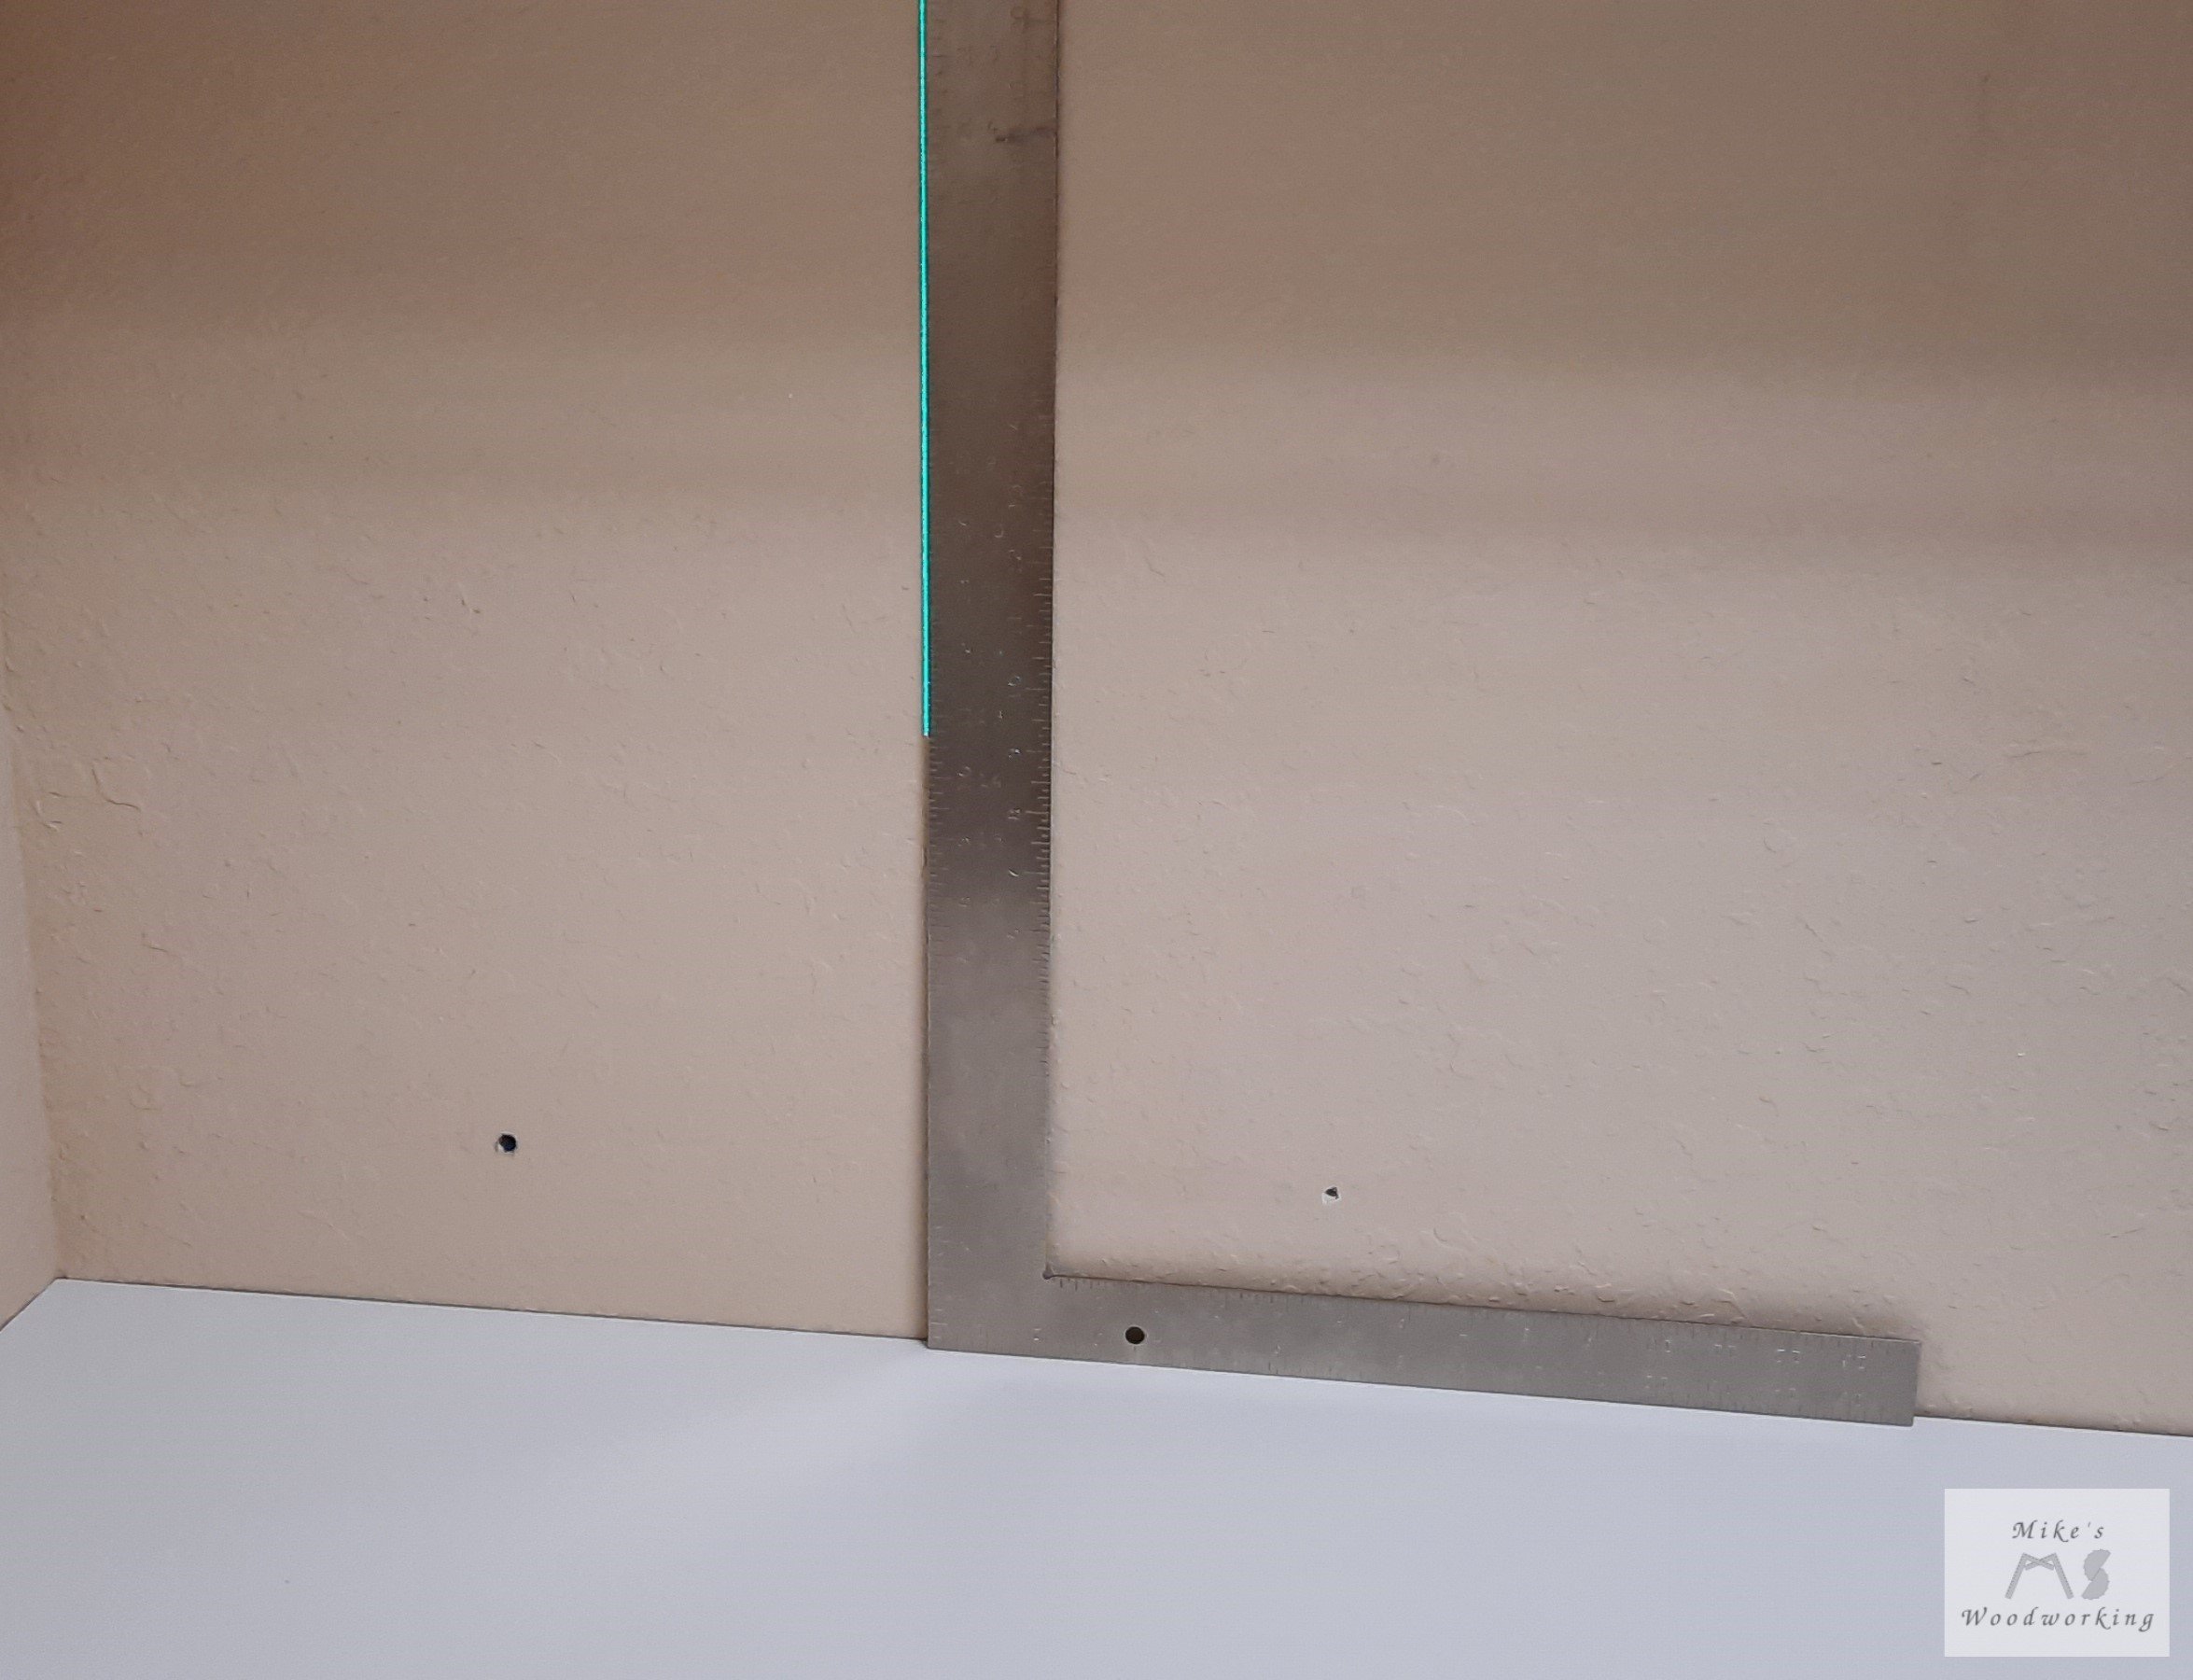
Pay no attention to those holes in the wall from the old sink…they’ll be covered by the backsplash.
I marked the center of the provided sink template and lined it up side to side with the line I drew on the counter. I then had to line it up front to back, taking into consideration the counter overhang, the face frame and the front stretcher. I taped the template on the corners and traced a line around it.
I wasn’t too keen on using a jig saw to cut through 1-1/2” of MDF and plywood, so I opted to use my track saw instead. Since the sink I’m using had square corners, it was a no-brainer to ensure straight cuts all around.
After taking my time lining up the cuts, the track saw made quick work of cutting the top. I plunged down to full depth on the saw to make my cuts which meant I was able to go directly to the corners on the top side. However, because of the curve of the blade I was not able to cut all the way to the corners on the bottom side. It was simple enough to use my Japanese pull saw to finish the cuts though. It’s amazing how much lighter the top now was with a large portion of the middle cut away.
I put the top back on the cabinet and then secured it in place with pocket screws from below with the holes I drilled prior to assembling the cabinet.

You can see how off-center the sink will be in relation to the cabinet and top. The backspashes are still not full attached at this point.
With the top fully attached, I took this opportunity to get the rear backsplash section attached to the wall with some construction adhesive. The side section will simply be held into place with caulking once everything else is done. The reason for this is the rear backsplash piece is a little bowed, but the wall is pretty straight. The other wall, however, has a bit of an inward curve in it, but the backsplash piece is straight. The gap was simply too large to force the side backsplash to conform to the wall.

This was definitely my only option for getting ANY kind of pressure against the wall. Being able to reverse the jaws on these Bessey clamps is a nice bonus.
Next up was my least favorite portion of the whole project…the plumbing. I looked at where the drops were for the water lines and wasn’t sure that the sink would even fit into place. I carefully set the sink in place and this is what I saw.
Yeah…this is definitely NOT going to work. I wouldn’t even be able to turn the hot water on with the sink right there.
Because of the depth of the sink, it was nearly sitting on the top of the hot water shut-off valve. I might be able to just move the valves backwards, but there wouldn’t be much of the pipe left coming from the wall if something needed to be done in the future. I’ll have no choice but to move the shut-off valves.
I had to attach any new plumbing to something to prevent it from flexing or breaking if accidentally getting bumped, so my only option is the bottom rear stretcher. Even with the 20” supply lines I have, that might be a bit too far. I opted to install two vertical stretchers between the top and bottom ones to give me another place to attach the pipes to the wall. When all was said and done, here’s what I wound up with.

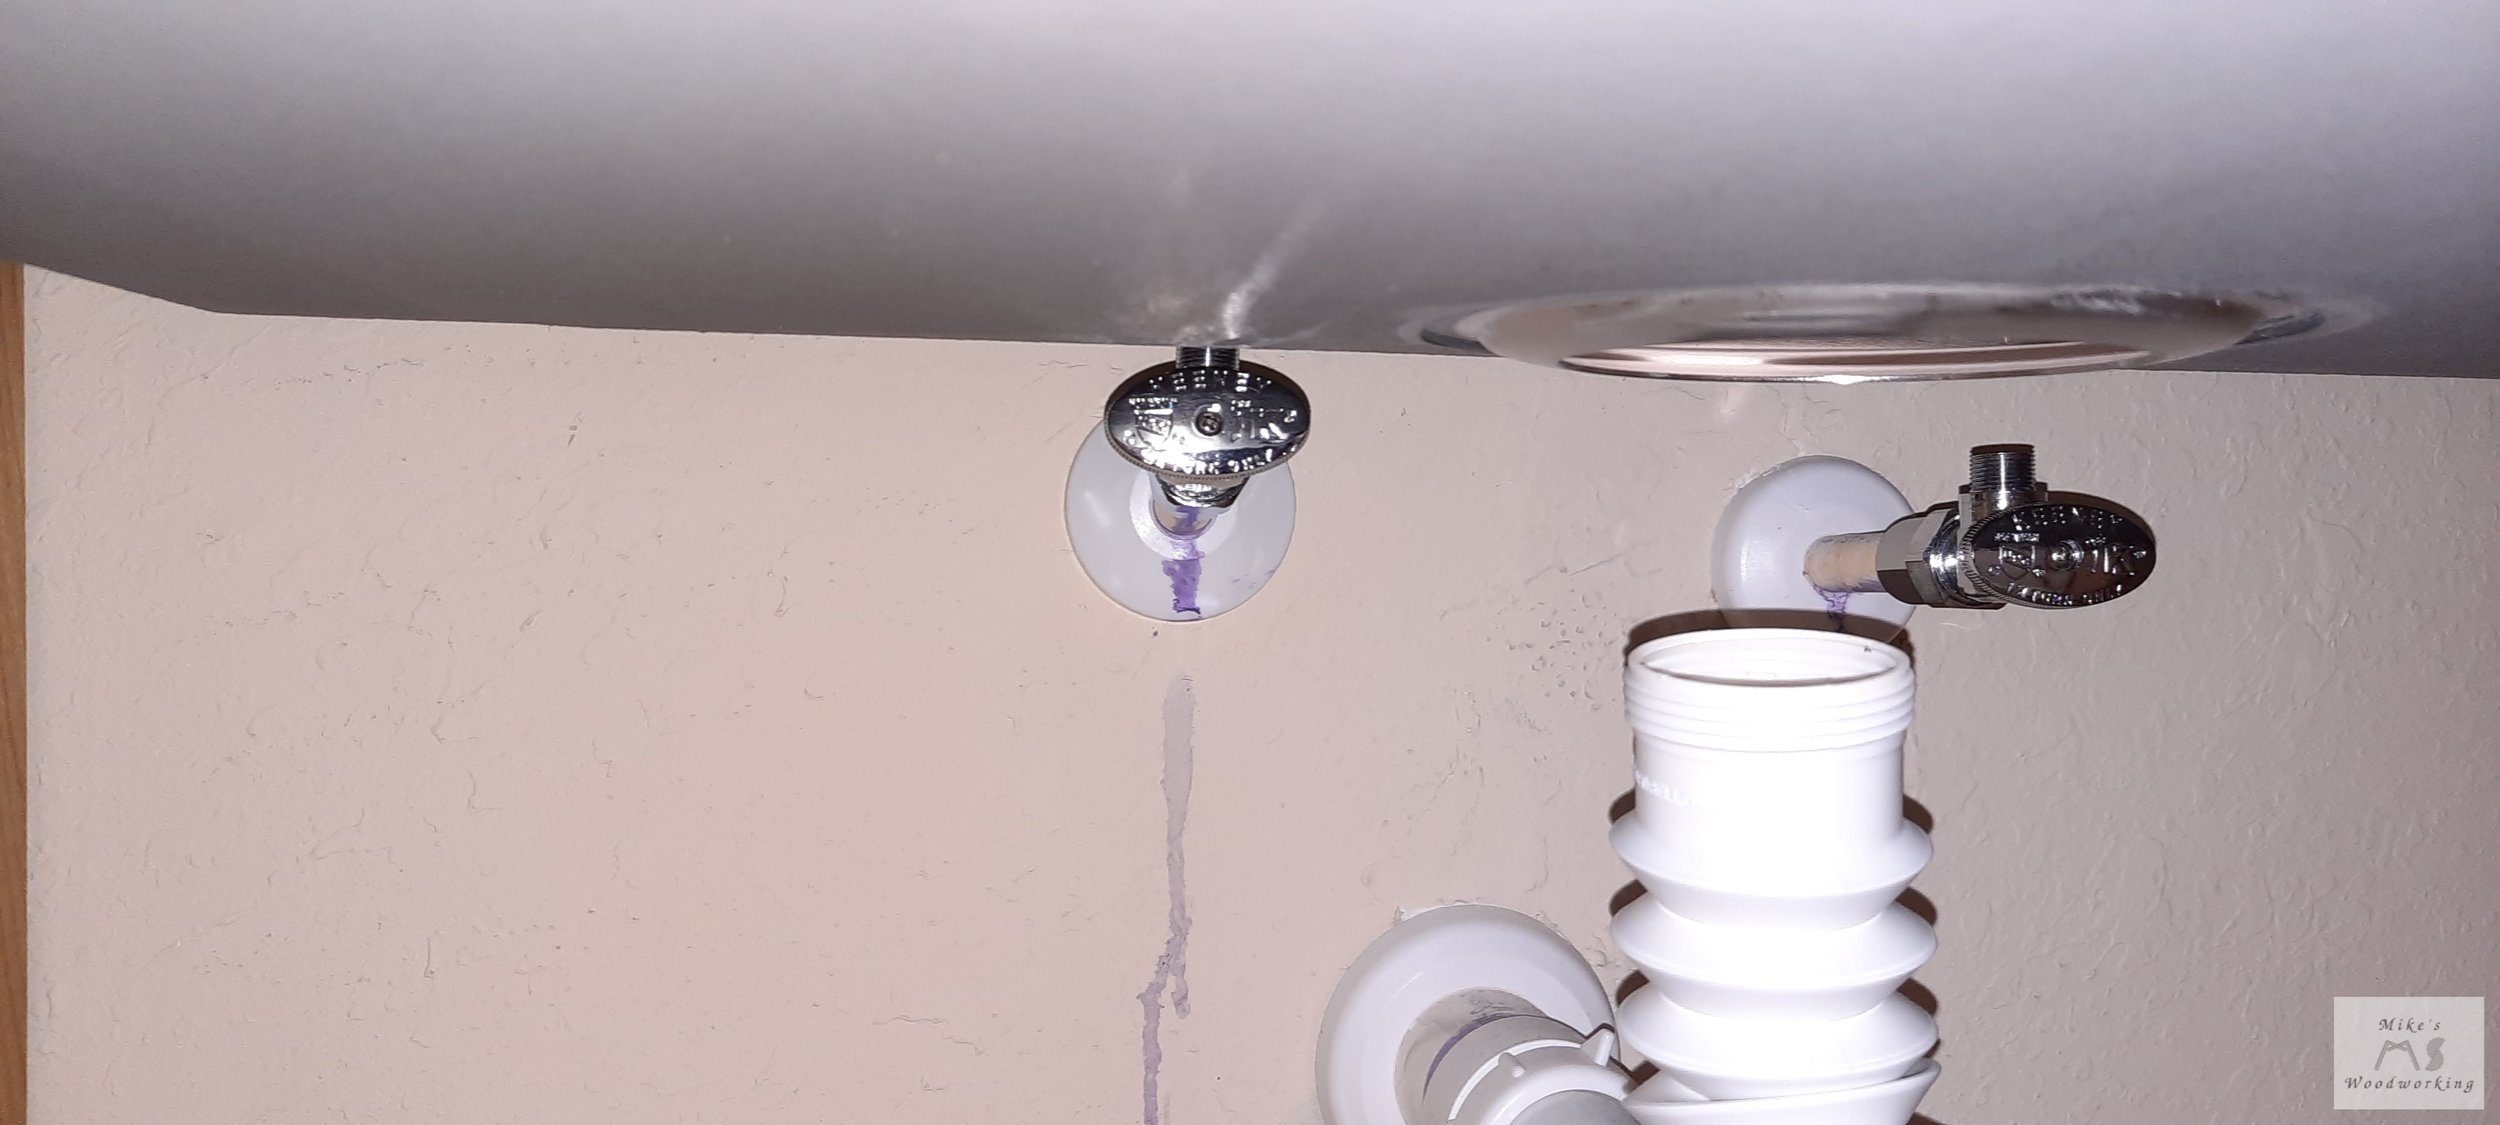
Yes…I made a mess with the purple pipe cleaner/primer and PVC cement…it was pretty much unavoidable. I never claimed to be a professional plumber. The purple stains on the wall are actually from when I installed the original valves a few years ago…progress :)
With the plumbing moved to a better and more accessible location, I tried the sink again and it was a MUCH better fit.

DEFINITELY a better location for the shut-off valves. I still don’t know why I have the first couple of bends on the hot side going up at an angle.
While I was test-fitting the sink, I took the opportunity to see if the clamps that came with sink were going to work with my thicker-than-usual top. Given the limited space I had in the front and back, I would not be able to use those, but the sides would at least give me a bit of hold. I opened a clamp all the way and it was about 1/2” too short.
I checked on the manufacturer’s website and they actually made longer clamps. I ordered a set and got them after only a few days. I tried one really quick and it was MORE than adequate for what I needed.

Here you can see how much longer one of the new clamps is in relation to one that came with the sink. Honestly, I think they should just supply the longer ones with ALL of their sinks to avoid the hassle I had.
Prior to installing the sink, I removed the faucet from the old utility sink and installed it on the new one (we liked it and it was still perfectly good). There was NO WAY to get behind that VERY deep sink to do ANY kind of work once it was in place. Once in place, I attached the sink to the top with the new longer clamps.
The last thing to do was install the drain. This was simple enough and only took a few minutes once I sized the pipe. My care in taking measurements prior to cutting the opening for the sink led to the drain pipe lining up almost perfectly.
I grabbed Lisa for the inaugural trial of the sink. I turned on the supply lines…no leaks. I turned on the faucet for a little bit…no leaks. SUCCESS!!!
It was such a relief for there to be no leaks on the first try. I guess after my years of doing home plumbing jobs and watching Ask This Old House I’ve finally learned a thing or two :)
With the addition of some caulking, this project is finally completed. The sink is made by Ruvati and is model #RVU6010. I found it at Home Depot. All of the wood, with the exception of the 3/4” plywood, was scraps I had in the workshop. For a finish I went with Bumblechutes All-Natural Wood Finish like I did on the chess board. It’s a simple blend of citrus solvent and tung oil which makes for a solid finish upon curing. I love it for its simplicity of application.


I filled up the sink with a couple inches of water and left it overnight…the stopper didn’t leak one bit.
I’m very happy with how this cabinet turned out. Replacing the generic utility sink was long overdue, and I think this one will last for quite a long time.