
Table Saw Storage Cabinet
Now that I’m back from Christmas vacation, with some well-needed time away from the shop, it’s finally time to get back into the groove again.
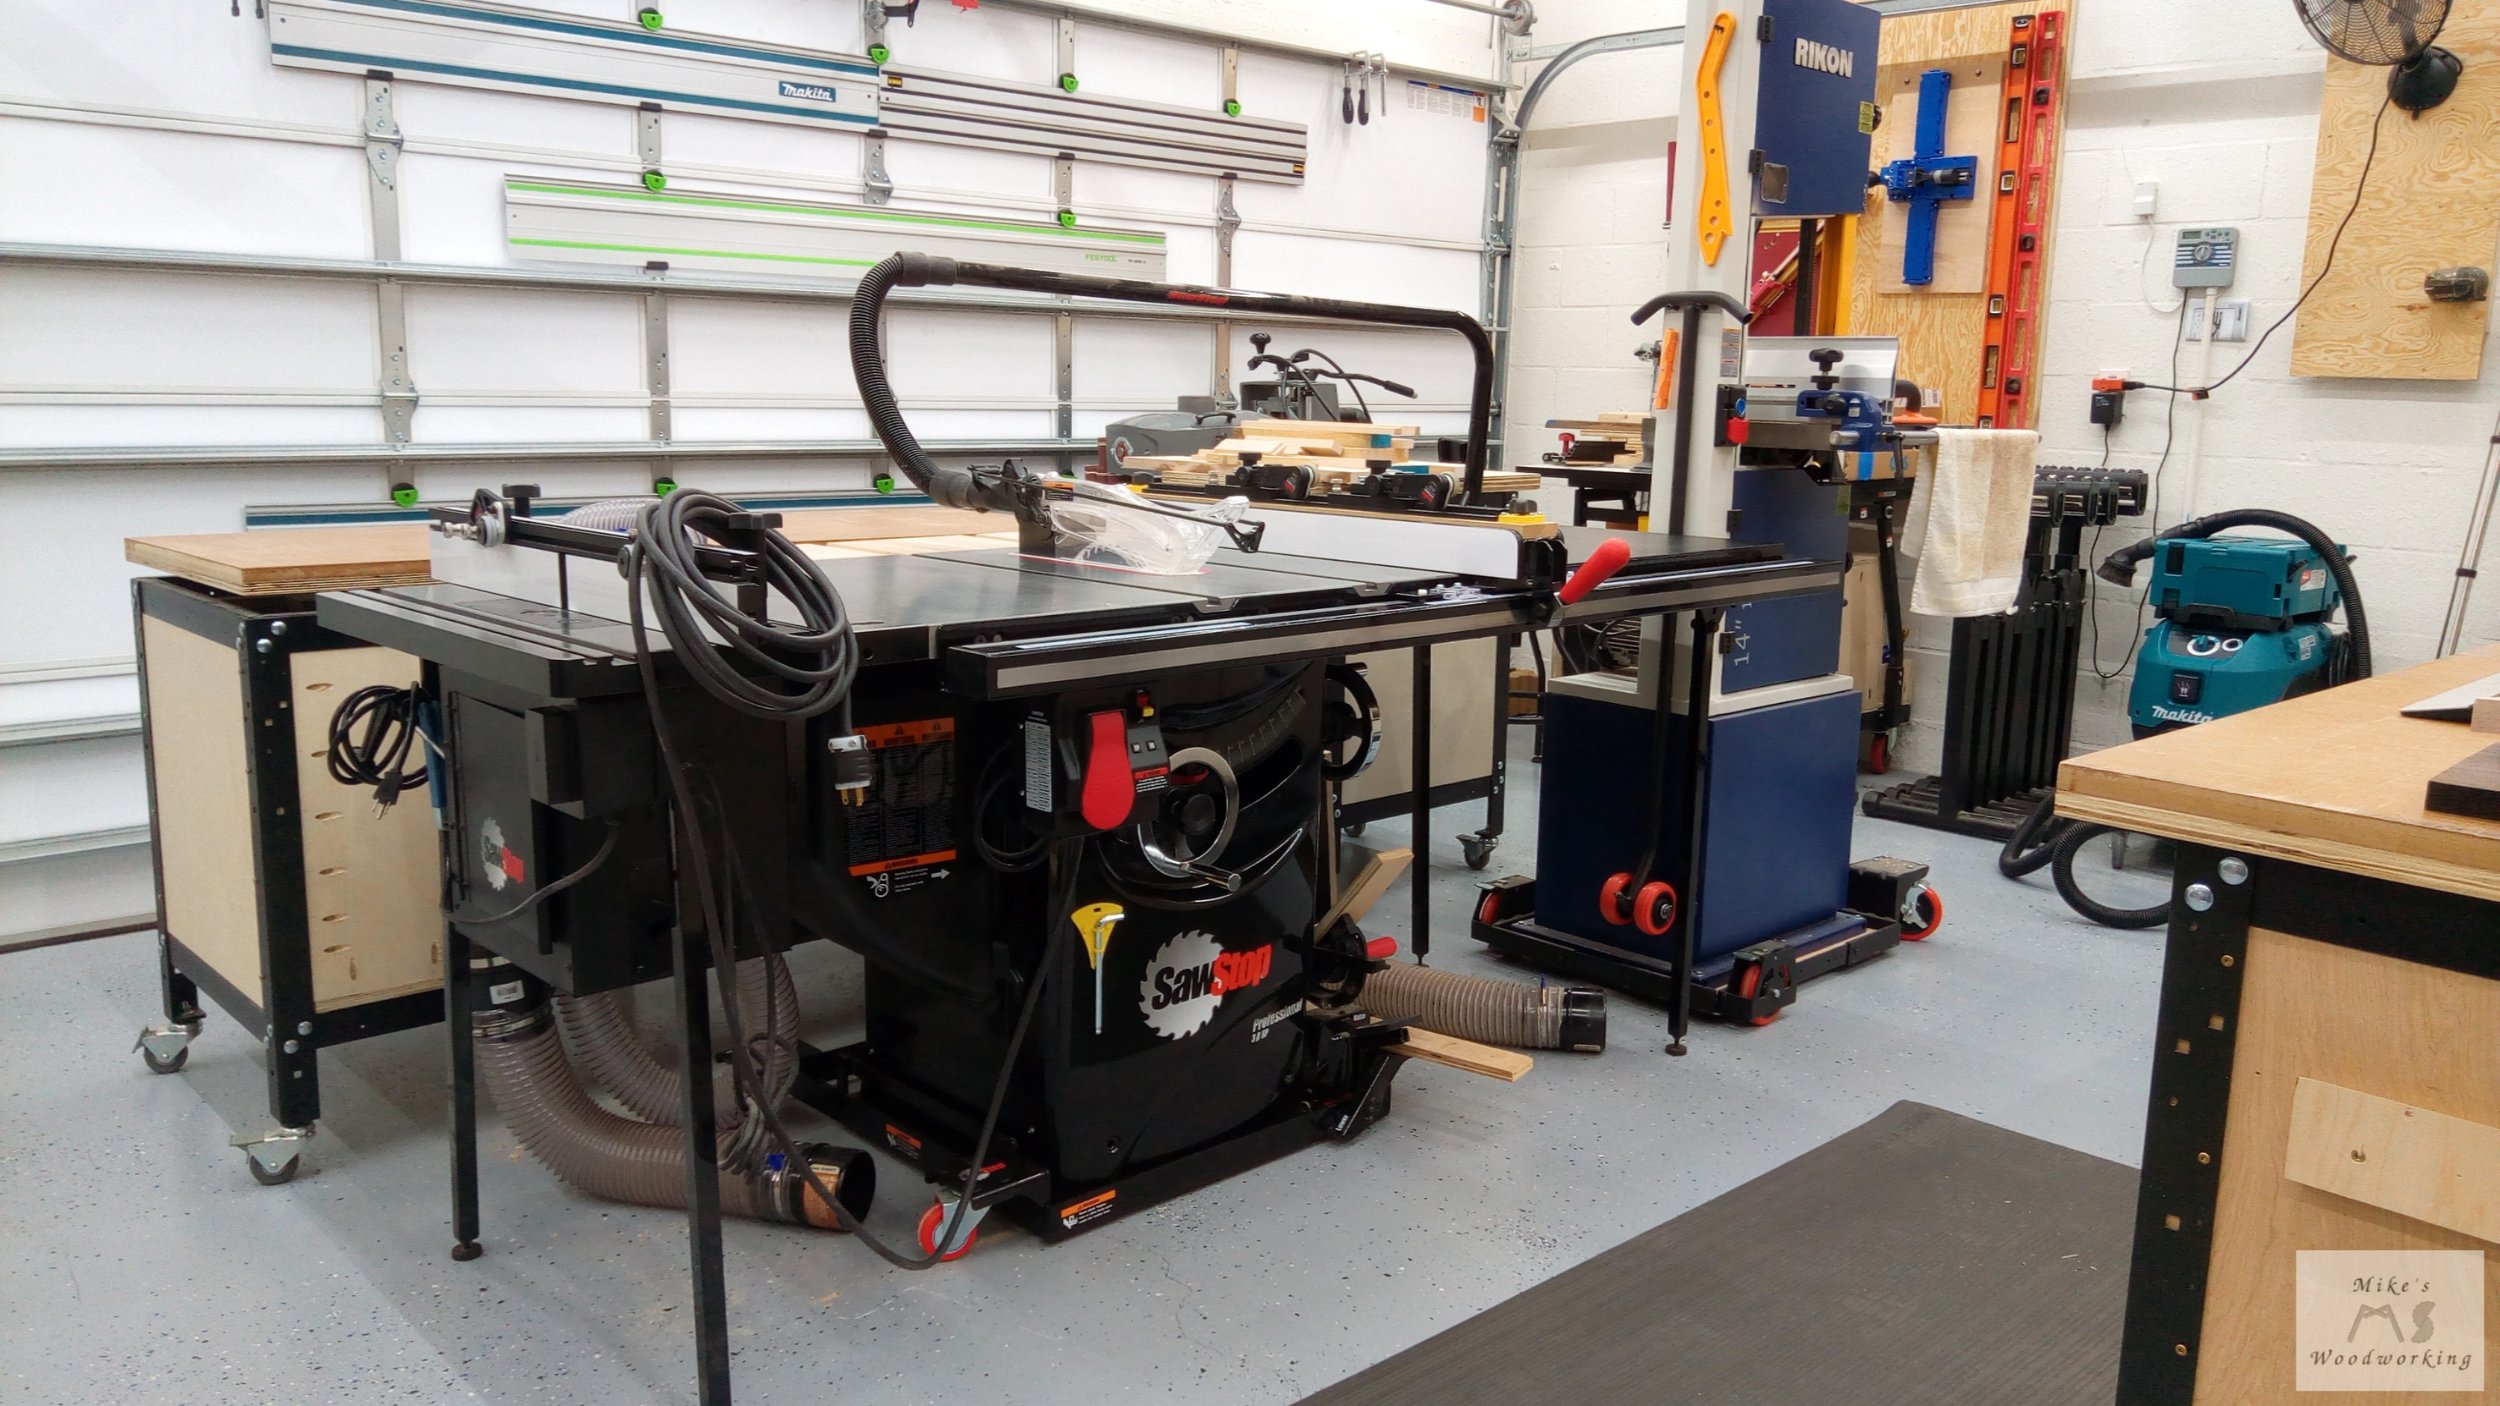
Back in August 2022, I moved some things around in my shop (shocking, I know). I was growing tired of the setup with my router table in conjunction with my table saw. I had the router table attached to the right side of the saw, but this caused a couple of problems.

First, the tube for the over-arm dust collection would sometimes get in the way when trying to run wider and longer pieces through the router table. Sure, I could loosen a couple of screws and rotate the tube out of the way, but that was a pain in the ass and VERY inconvenient. In addition, the fence and its dust collection hose were in the way constantly when trying to use the table saw.
Along those same lines, with the router table in this position on the saw, the area under the right side of the saw was all but useless. With the amount the dust collection box hung down, coupled with the industrial mobile base for the SawStop sticking out, I couldn’t do anything with this space. With all shop space at a premium, this simply wouldn’t work any longer.
Lastly, all of my most used table saw accessories and blades were housed in the Rockler Table Saw & Router Cabinet I made in 2021. While a very functional piece of shop furniture, it was inconvenient to constantly run back and forth to get featherboards or change saw blades/blade brakes, especially when I was in a good working groove.
With all that in mind, I finally took the time to move the router table to the left side of my table saw and reinstall the wood extension wing on the right side as it was originally constructed. This did cause the table saw to take up a little more space, but the space gained under the saw would be worth it.
I still need to do something with the 2.5” hose and the router table fence, for when they are not in use, but that will be for another time.
You can see the 4” dust collection hoses just sitting on the floor. The router table one would later be extended to run behind the saw and sit next to the other on the right side. I’ll address this a little later.
Now that I have all of this space, it’s time to make another shop cabinet to fit under the table saw.
There are MANY such cabinets to model mine after, but I opted to go with the one by Brad at Fix This Build That (FTBT) since I already had the plans from a bundle I bought some time ago.

Brad’s Table Saw Storage Cabinet.
Since I have a bit different model saw than Brad, I modified the plans to fit my space and needs. I won’t get into the specific dimensions for this project, but here is what I came up with.

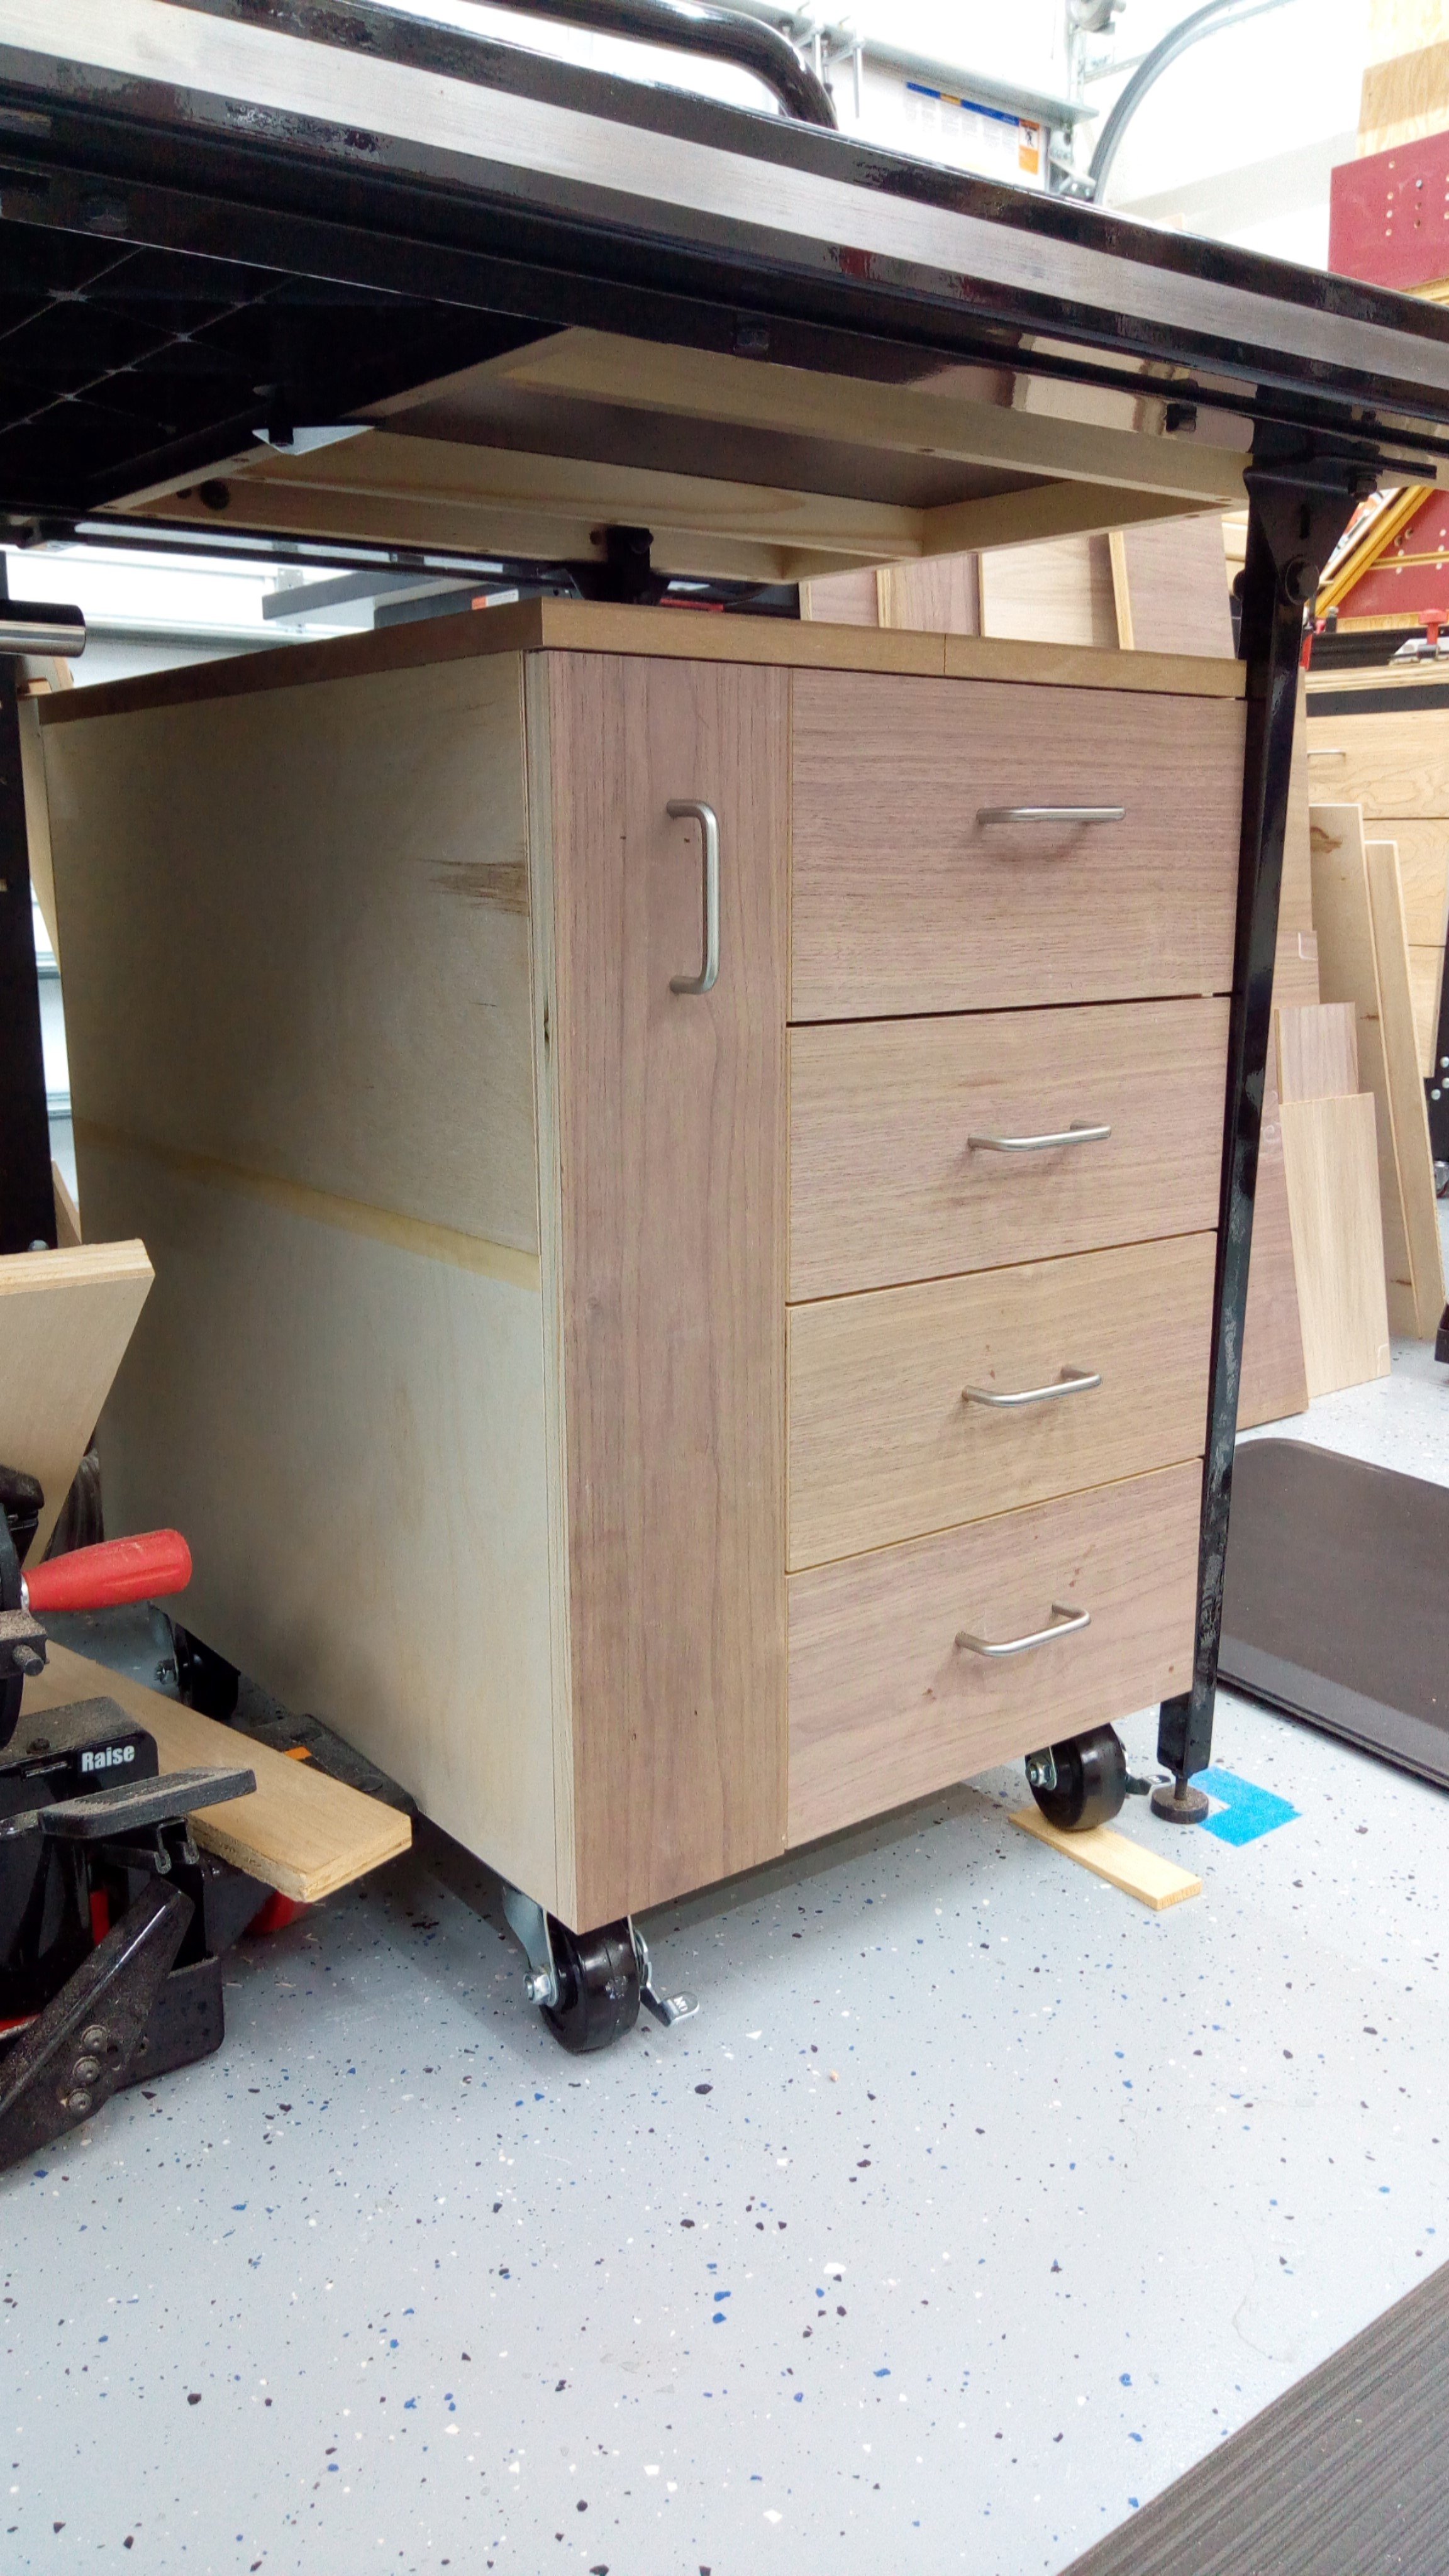
As you can see, when compared to the FTBT version, mine is a bit narrower with only the one vertical drawer. I would have loved to have that extra drawer, but the space taken up by the industrial mobile base of the SawStop prohibits that.
I wanted to use nothing but plywood scraps for this entire project. After recently doing my annual scrapwood purge, this would allow me to get rid of more material that I simply didn’t have room for in the shop.
There will be absolutely no continuity with this cabinet when it comes to materials. As you can see from the above picture, it will be made with Baltic birch for the carcass (and unseen drawers), walnut plywood for the drawer faces, and even a bit of MDF for the top.
I didn’t have panels large enough for the sides of the cabinet, so I simply glued up two pieces utilizing a few biscuits and some pocket screws. The panels didn’t come out the best, but for this project, I’m looking for function over form.
The construction of the carcass and drawers was standard fare for most of my shop projects…pocket screws. For utilitarian pieces like this, that’s all that’s necessary. The only nails I used were when I attached the 1/4” plywood back and the MDF top to the cabinet.
Before I attached the three vertical dividers in place, I made sure to install the two drawer slides as I would simply have no room to do this after the fact.
Like everything in the shop, this cabinet needs to be on wheels. I used some old 3” rubber casters I had on hand, two locking. These aren’t my favorite casters, but they’re what was available without spending more money. I attached them with a combination of screws into the sides of the carcass and t-nuts and bolts through the bottom.
The floor isn’t quite flat, so I jammed a shim under the front wheel to keep it from rocking.
In the vertical drawer, I recycled the holders from the Rockler Table Saw & Router Cabinet for the saw blades, blade brakes and dado shims. I actually had to make another one (hence the VERY unnecessary walnut). The only blade that didn’t transfer over was my stock 12” miter saw blade. As for the other conventional drawers, I’ve still got things to move around.

That walnut block really does stand out like a sore thumb. It was the only piece of scrap I had that fit, plus I didn’t feel like cutting something else (lazy).
One final thing to add concerns the dust collection hoses for the table saw and router table. I had them just sitting on the floor, which was not ideal by any means. To get them off the floor, I attached a couple of 4" Dust Right Mountable Dust Couplers to the outside of my new cabinet. This gets them off the floor and makes it easier on me to connect things.

I made sure to label both couplers so I don’t hook up the wrong tool and throw dust everywhere.
With that, this newest piece of shop furniture is complete. I didn’t sand anything and obviously no finish was applied. It’s certainly not pretty or perfect, but it will get the job done. The best thing was I got it done in only three days. For me, given that I just got back into the shop for the first time in 2023 (after a month away), and I’m trying to take it easier this year, this was a major win.