
Adjustable Storage Cabinets
We have a spare bedroom that has become kind of a catch-all for junk. This was to be expected after moving into a new house. We got rid of some stuff prior to the move, but a lot of this was stuff we had set aside from my mom’s attic when we cleared that out a couple of years prior. In addition to all of the junk, there was some gym equipment in this room as well. It was originally planned on being a small home gym once we got settled. Needless to say, it has not quite worked out that way just yet. We needed some kind of storage solution for this room.
This storage solution would accomplish two things. One, we could go through all of the various stuff that was in boxes and bins and finally decide on what to keep and what to throw out (most of it, as it turns out, got tossed). Two, I had another workshop project in the works that would need to utilize some of the space in the garage that was currently occupied by another set of shelving. By consolidating the few things we kept from the junk room and the things we were keeping from the garage storage, we could put all of it in the spare bedroom and clean up and organize everything in the process.
Design
I went into Sketchup and started drawing up a simple storage cabinet that would have adjustable shelving. Since we have 9’ ceilings, this gave me plenty of room for a tall cabinet to maximize the usage of space. Given the measurements of some of the bins and boxes we wanted to store, I decided to make two cabinets instead. I modeled up a drawing of the room in Sketchup and figured out a perfect place for both cabinets. Now was the time for figuring out the choice of materials.


From the beginning, I figured on using Baltic birch plywood. I’d always wanted to use this material when making things for the shop but, for the longest time, there was never anywhere around me that carried it. It wasn’t until I starting looking into buying hardwoods for the Hall Bench project that I realized I could get full 4’ x 8’ sheets of Baltic birch plywood from Hardwood Lumber & Millwork (HLM) in Lakeland. It was a little bit more expensive than the plywood available at Lowe’s and Home Depot, but it was of a much higher quality, thus worth the extra few bucks.
The cabinets were going to be a full 8’ tall, just short of 4’ wide and just short of 2’ deep. This would maximize the use of the plywood and space available in the room, while minimizing the number of cuts I would need to break down the plywood. I broke down the storage cabinets in Sketchup to figure out the best way to use the plywood I would need. Since I was planning a new Scrapwood Storage Cabinet for the garage as well, I made sure to design and account for that in the plywood layout.
When all was said and done, I was going to need 10 sheets of 3/4” plywood and three sheets of 1/4” plywood for both projects. I contacted Carla at HLM to see if she would have that much material available. As it turned out, she would only have nine sheets of the 3/4” Baltic birch available. She had plenty of imported birch plywood available, so I opted to get a sheet of that to make up the difference with the 3/4” plywood. I headed down the next day to pick up all of my plywood. I was so glad they were helping me load everything in my truck. My left hand was still lacking grip strength at the time (it’d only been about a month since my accident) and those sheets of Baltic birch are a lot heavier than normal plywood. There’s no way I would have been able to get those by myself. I made my way back to the shop and offloaded everything. Thankfully, I was able to back my truck up right behind where my table saw was, at the time, and slide everything off the truck, over the table saw, over the outfeed table and onto my assembly table. There wasn’t a whole lot of actual lifting involved so I was able to manage this by myself.
Houston, We Have a Problem (Almost)
It would be a few days before I would begin working on the storage cabinets, so I decided to finish up the cutting diagrams in Sketchup. I was taking a break from Sketchup and decided to watch a video by Johnny Brooke from Crafted Workshop where he was building and installing a Murphy bed in a spare bedroom. He made note of a couple of mistakes he made in measuring and layout where he didn’t take into account the window casing and stool. This caused issues with installing one of his cabinets. This got me to thinking about where I was going to install the two storage cabinets in the spare bedroom, so I went in there to remeasure and make sure things were going to fit. In the words of the knight in Indiana Jones and the Last Crusade (best Indiana Jones movie of them all, in my opinion), I had chosen wisely.
I had not taken into account the swing of the upper right door of the left cabinet and the upper left door of the right cabinet in relation to where the ceiling fan blades were. Given the width of the cabinets, the doors were going to be half of the overall width, which meant they would be sticking out nearly four feet from the wall when opened. This would cause them to hit the ceiling fan blades. Armed with this new information, I went back into Sketchup and made the necessary changes to the dimensions. I dropped the top of both cabinets by 8” to give myself a good 2”-3” clearance under the ceiling fan blades. Thank you, Johnny, for showing your mistakes on your build as it saved me from making a huge mistake on mine.
Thankfully, changing the overall height of the cabinets by 8” wasn’t going to cause me any headaches when breaking down the plywood. I simply had to change the position of the adjustable shelf standards to compensate for the shorter height. Speaking of the adjustable shelving, I decided to go with these zinc shelf standards from Rockler for both cabinets. These would allow greater flexibility when placing the shelves should we move stuff in and out of the cabinets in the future.
Let’s Kick This Pig
Now that everything was properly laid out and my cutting diagrams indicated the updated measurements, next came the task of breaking down the plywood. For the majority of the plywood for the storage cabinets, I only needed to rip the sheets in half (well, 23-7/8” to be exact). This was true for the sheets marked for the sides as well as the shelves.

The sheets for the doors had to be crosscut with the track saw, first, and then the remaining large piece was cut to the same dimension as the sheets for the shelves. The only small pieces required for both cabinets were the stretchers in the fronts of the cabinets, the braces which would help support the weight of the cabinets in the center and a piece of trim for the front to cover the stretchers.
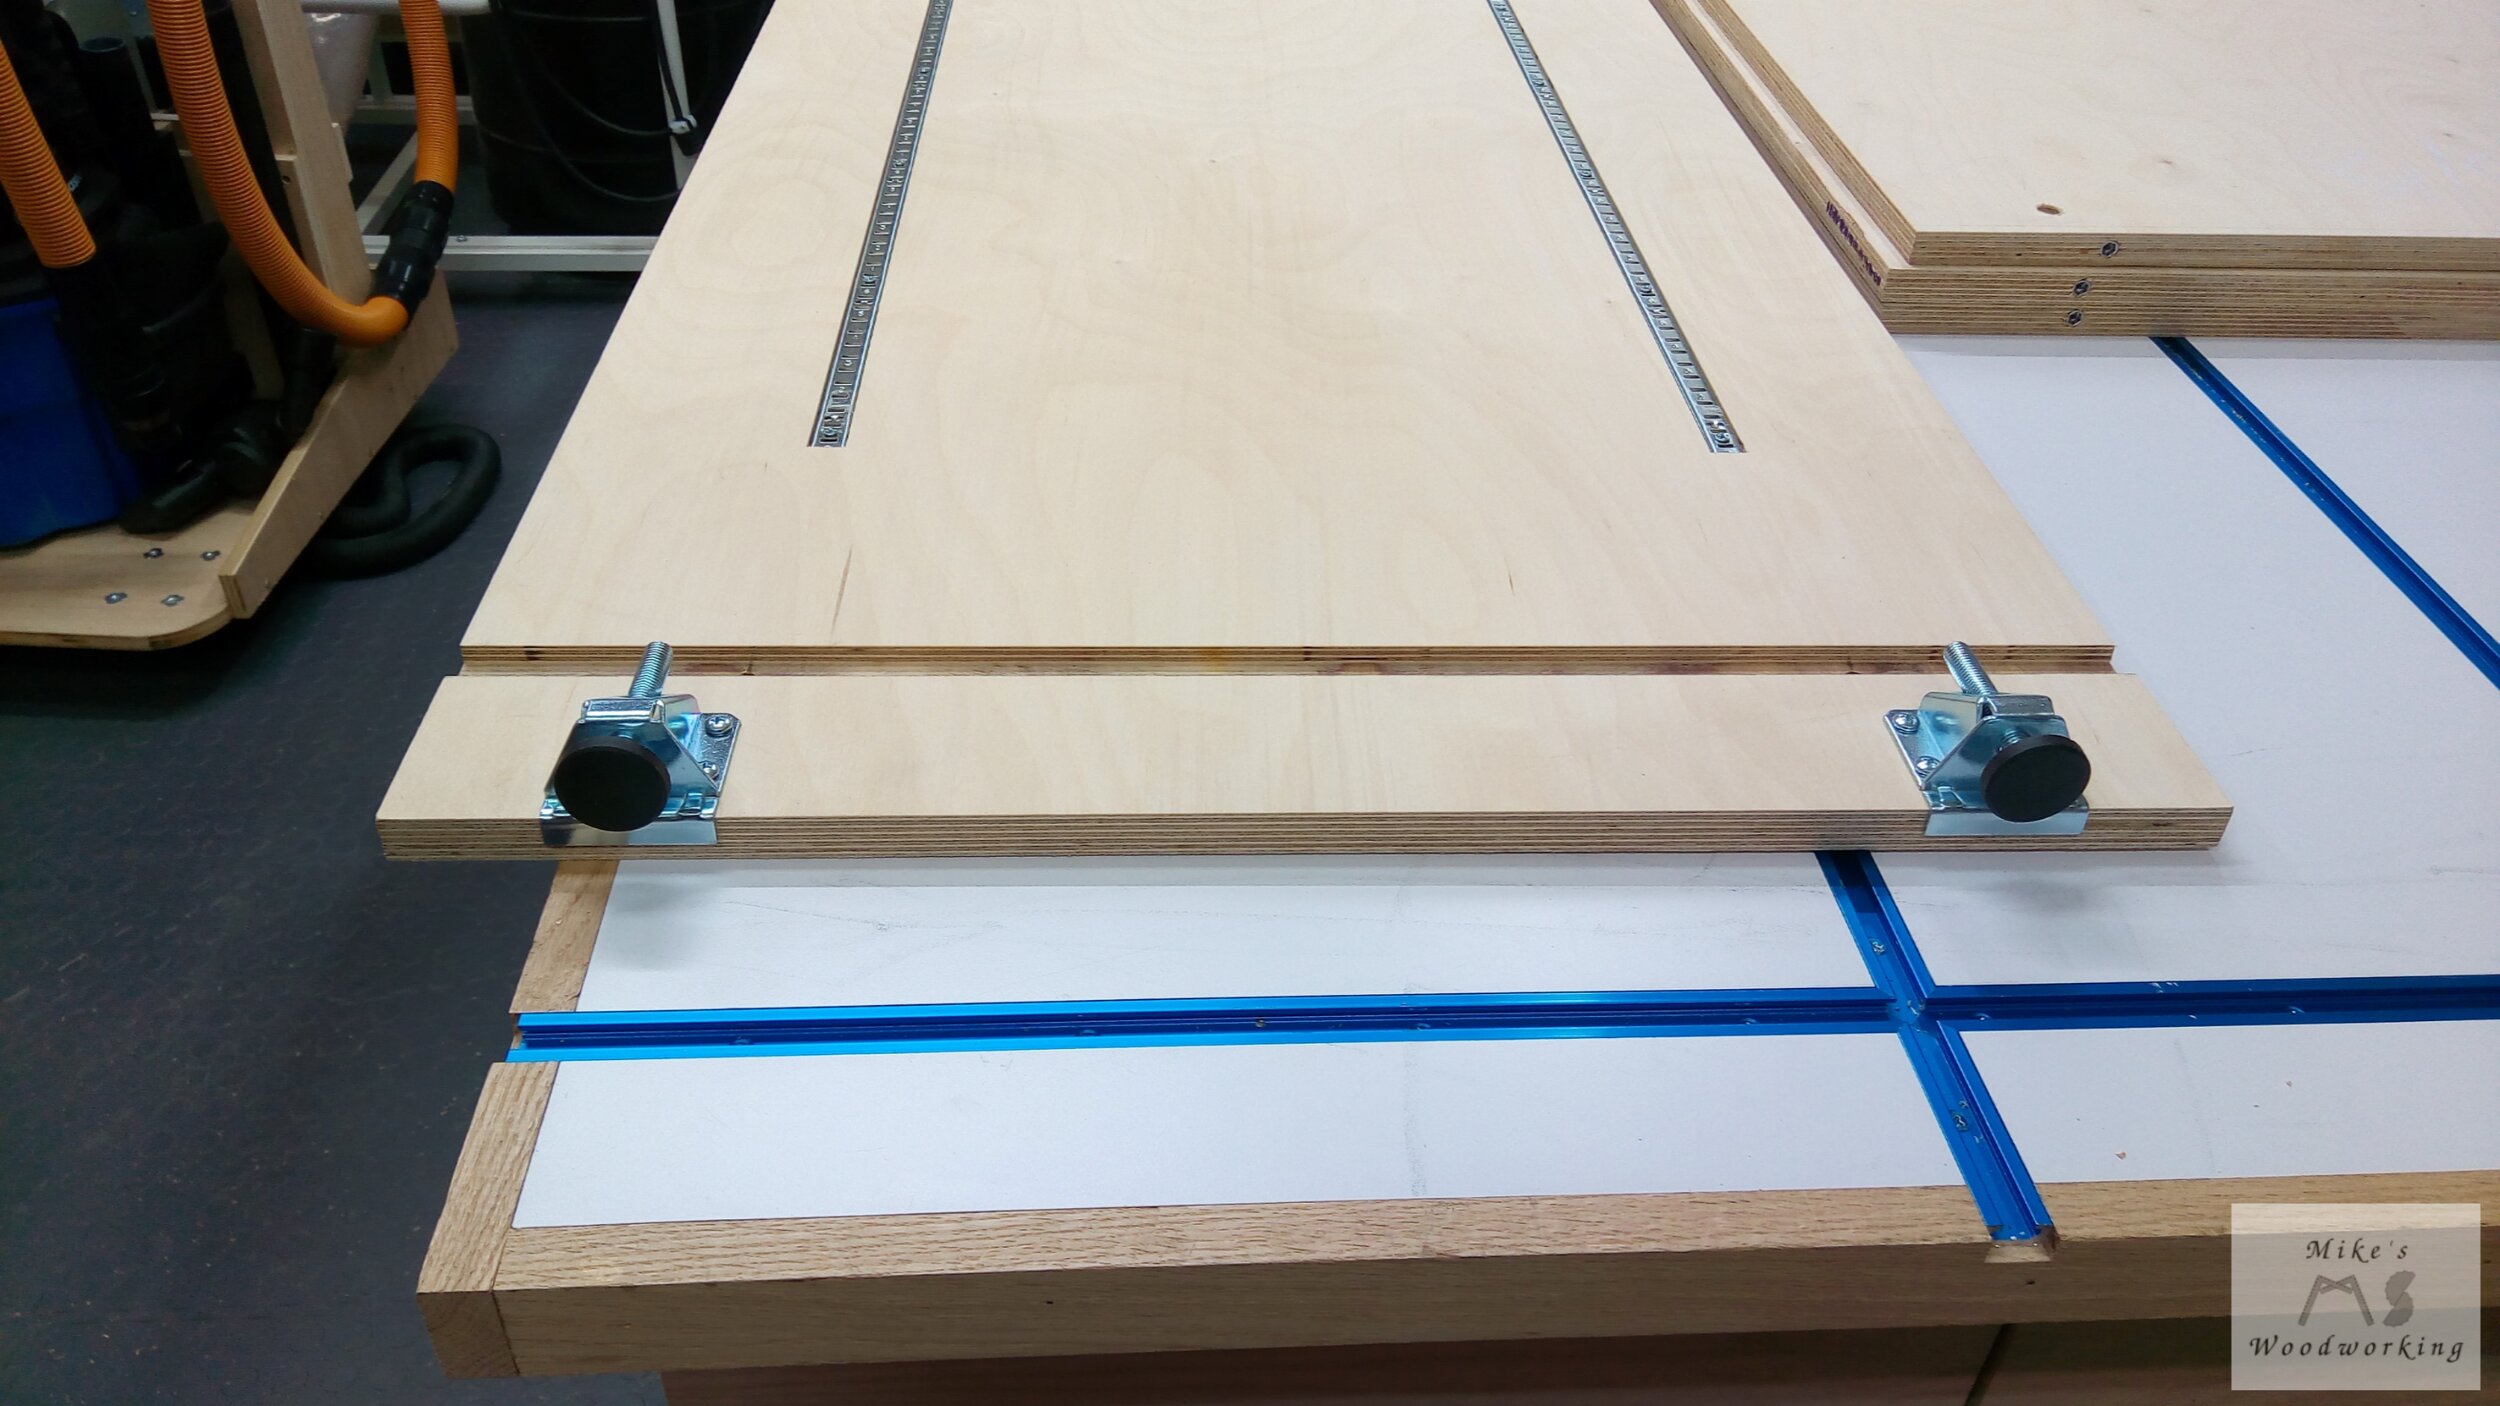
The major parts breakdown was complete. Next was the task of laying out the dados for the fixed bottom, middle and top shelves. These shelves were placed in dados for the express purpose of providing some rigidity to the cabinets as well as points for holding the cabinets together with bolts and threaded inserts later. I made sure to place the two sides back to back on my assembly table. This way, I could get both pieces lined up exactly, ensuring that the shelves would fit without issues later. This was a perfect opportunity to utilize my DeWalt track saw track with the router attachment for my DeWalt router. I could simply line up the router while it was on the track, cut one side of the groove with a 1/2” straight-cutting bit, then use the adjustment screw on the router track attachment to move the router over and make the final pass. I was only cutting 3/8” of material, so I didn’t make multiple shallow passes when routing the dados.


An Error in Judgment
Now that the shelf dados were finished, next was the task of laying out for the shelf standards. To best support any load put on them, the shelf standards needed to be recessed into the sides of the cabinets. To ensure everything lined up straight, I again used my DeWalt track saw tracks to make the dados required for the standards. This was easy enough to set up. Once I had the track in place for one side, I made note of the measurement from the edge to line up the other slots. I marked a start and stop point for the dados and plunged into the plywood to make the cuts. Because the dados were so shallow, only one pass with the router was required. I did lose track of my marks once when running the dados. This caused me to over-cut one of them by a couple of inches.

It’s only a storage cabinet, so I wasn’t too concerned. Once all of the dados were finished, I simply squared up the rounded corners with a chisel (a dull chisel I might add), dropped in the standards and screwed them in place.
There was one dado I still needed to make, and that was for the brace that would be attached to the bottom shelf. This was a quick and easy operation as I only needed to find the middle of the shelf and run the groove. I made the groove a little bit over-sized, so the brace wasn’t exactly the snug fit I wanted. It was going to be glued in place, so I wasn’t at all concerned. Gluing the brace in place was rather awkward. I couldn’t clamp it in place by any traditional means. I clamped one edge of the brace in place on the edge of my assembly table, and used my plunge router and a gallon jug of wood glue on top of the brace to help hold it in place until the glue dried. Eat your heart out, Bob Clagett…CLAMP CHAMP!!!

Once the glue was dry, I installed the heavy-duty leveling feet on the brace. I made sure to put one on either side of the brace to provide equal force when weight was added to the cabinet. I also installed the leveling feet on the sides as well. I had one final thing to do and the cabinets would, essentially be done.

Measure 137 Times, Drill Once
Because of the size of the cabinets, I felt it would be best to put them together in place in the spare bedroom. Moving them into the room fully assembled would not have been possible no matter how we worked it. To make assembly easy, the sides would be screwed into threaded inserts in the shelves themselves. This would make the cabinets essentially knockdown furniture should we need to move them in the future.
This was, by far, the most tedious process of the entire build. I had to clamp the entire cabinet together on top of my assembly table. The cabinet is wider and longer than my assembly table, so that provided some challenges. I needed to make sure, with absolute certainty, that the holes drilled in the sides would line up with the holes in the shelves for the threaded inserts. Not to mention that I needed to make sure that the threaded inserts were screwed in straight, otherwise nothing would line up properly.
I took my time with each shelf, one side at a time. I must have quadruple-checked my marks 20 times before I committed to drilling. I just couldn’t afford to make a huge mistake. I think setting up and drilling the holes took me an entire day in the shop. I had to be sure everything would work. When all was said and done, thankfully, everything lined up and went together without incident. Measuring 47 times and drilling once really does pay off.

My Big Rectangle is...Square?
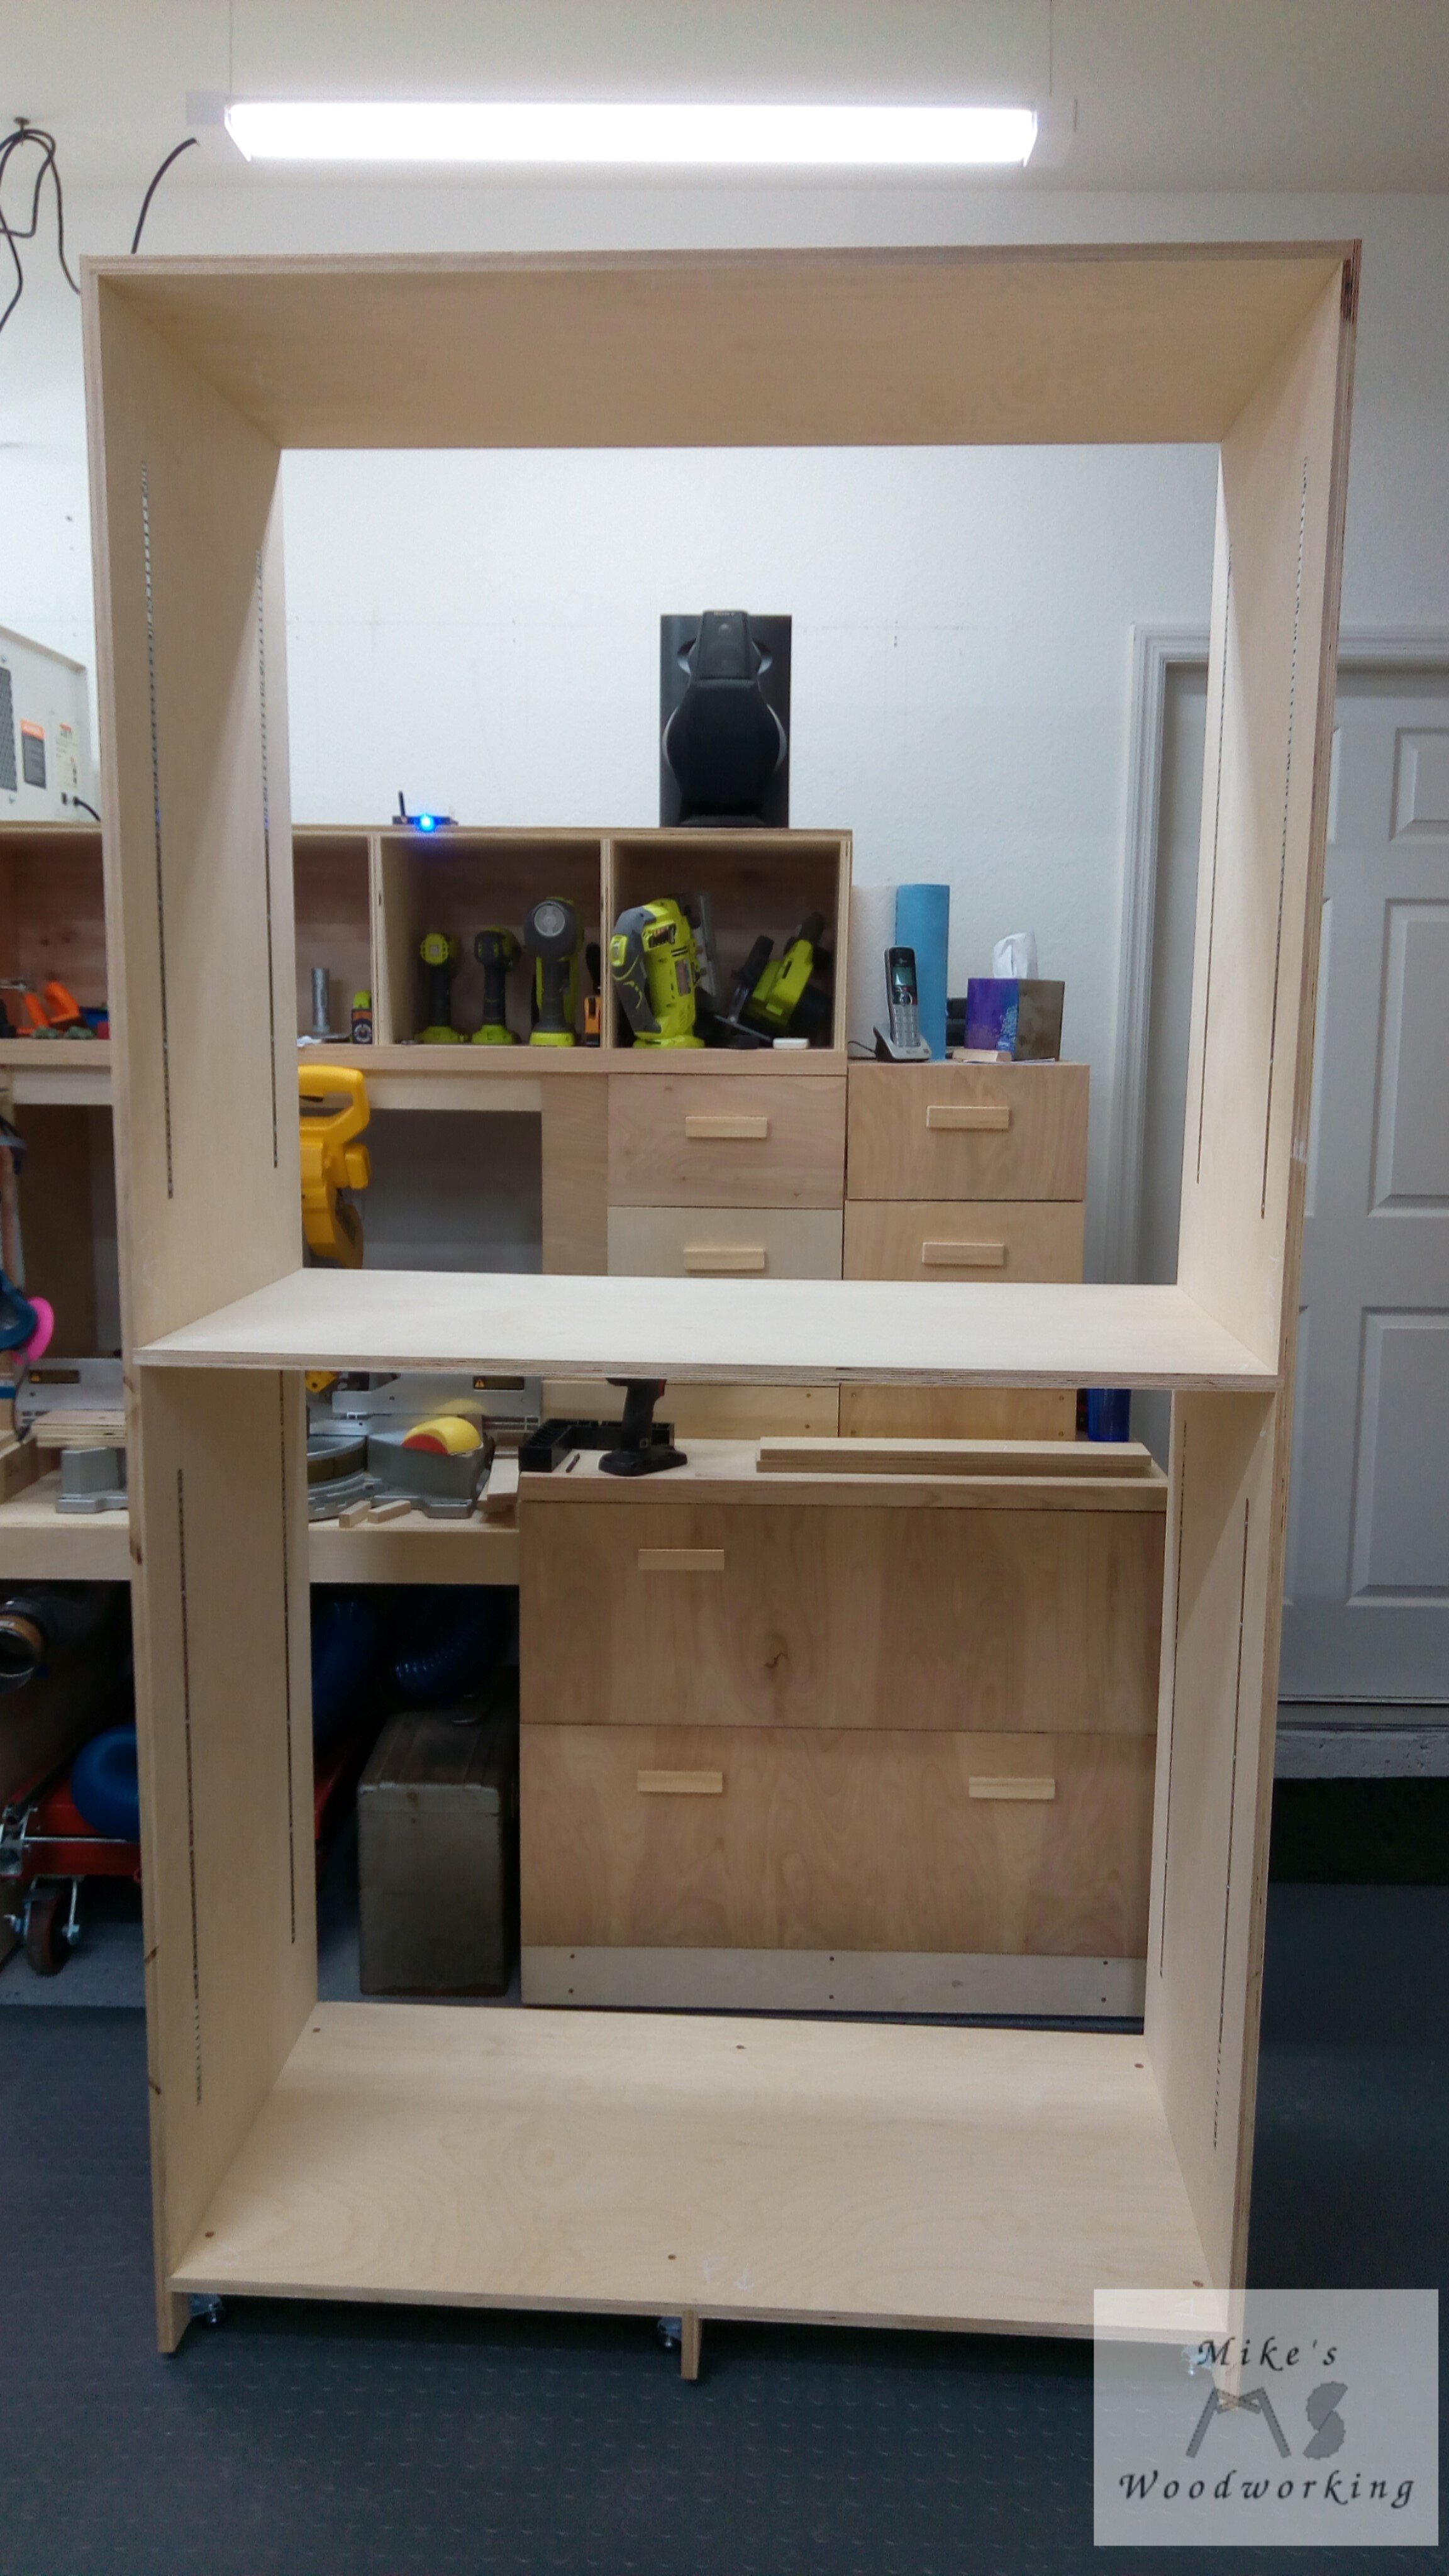
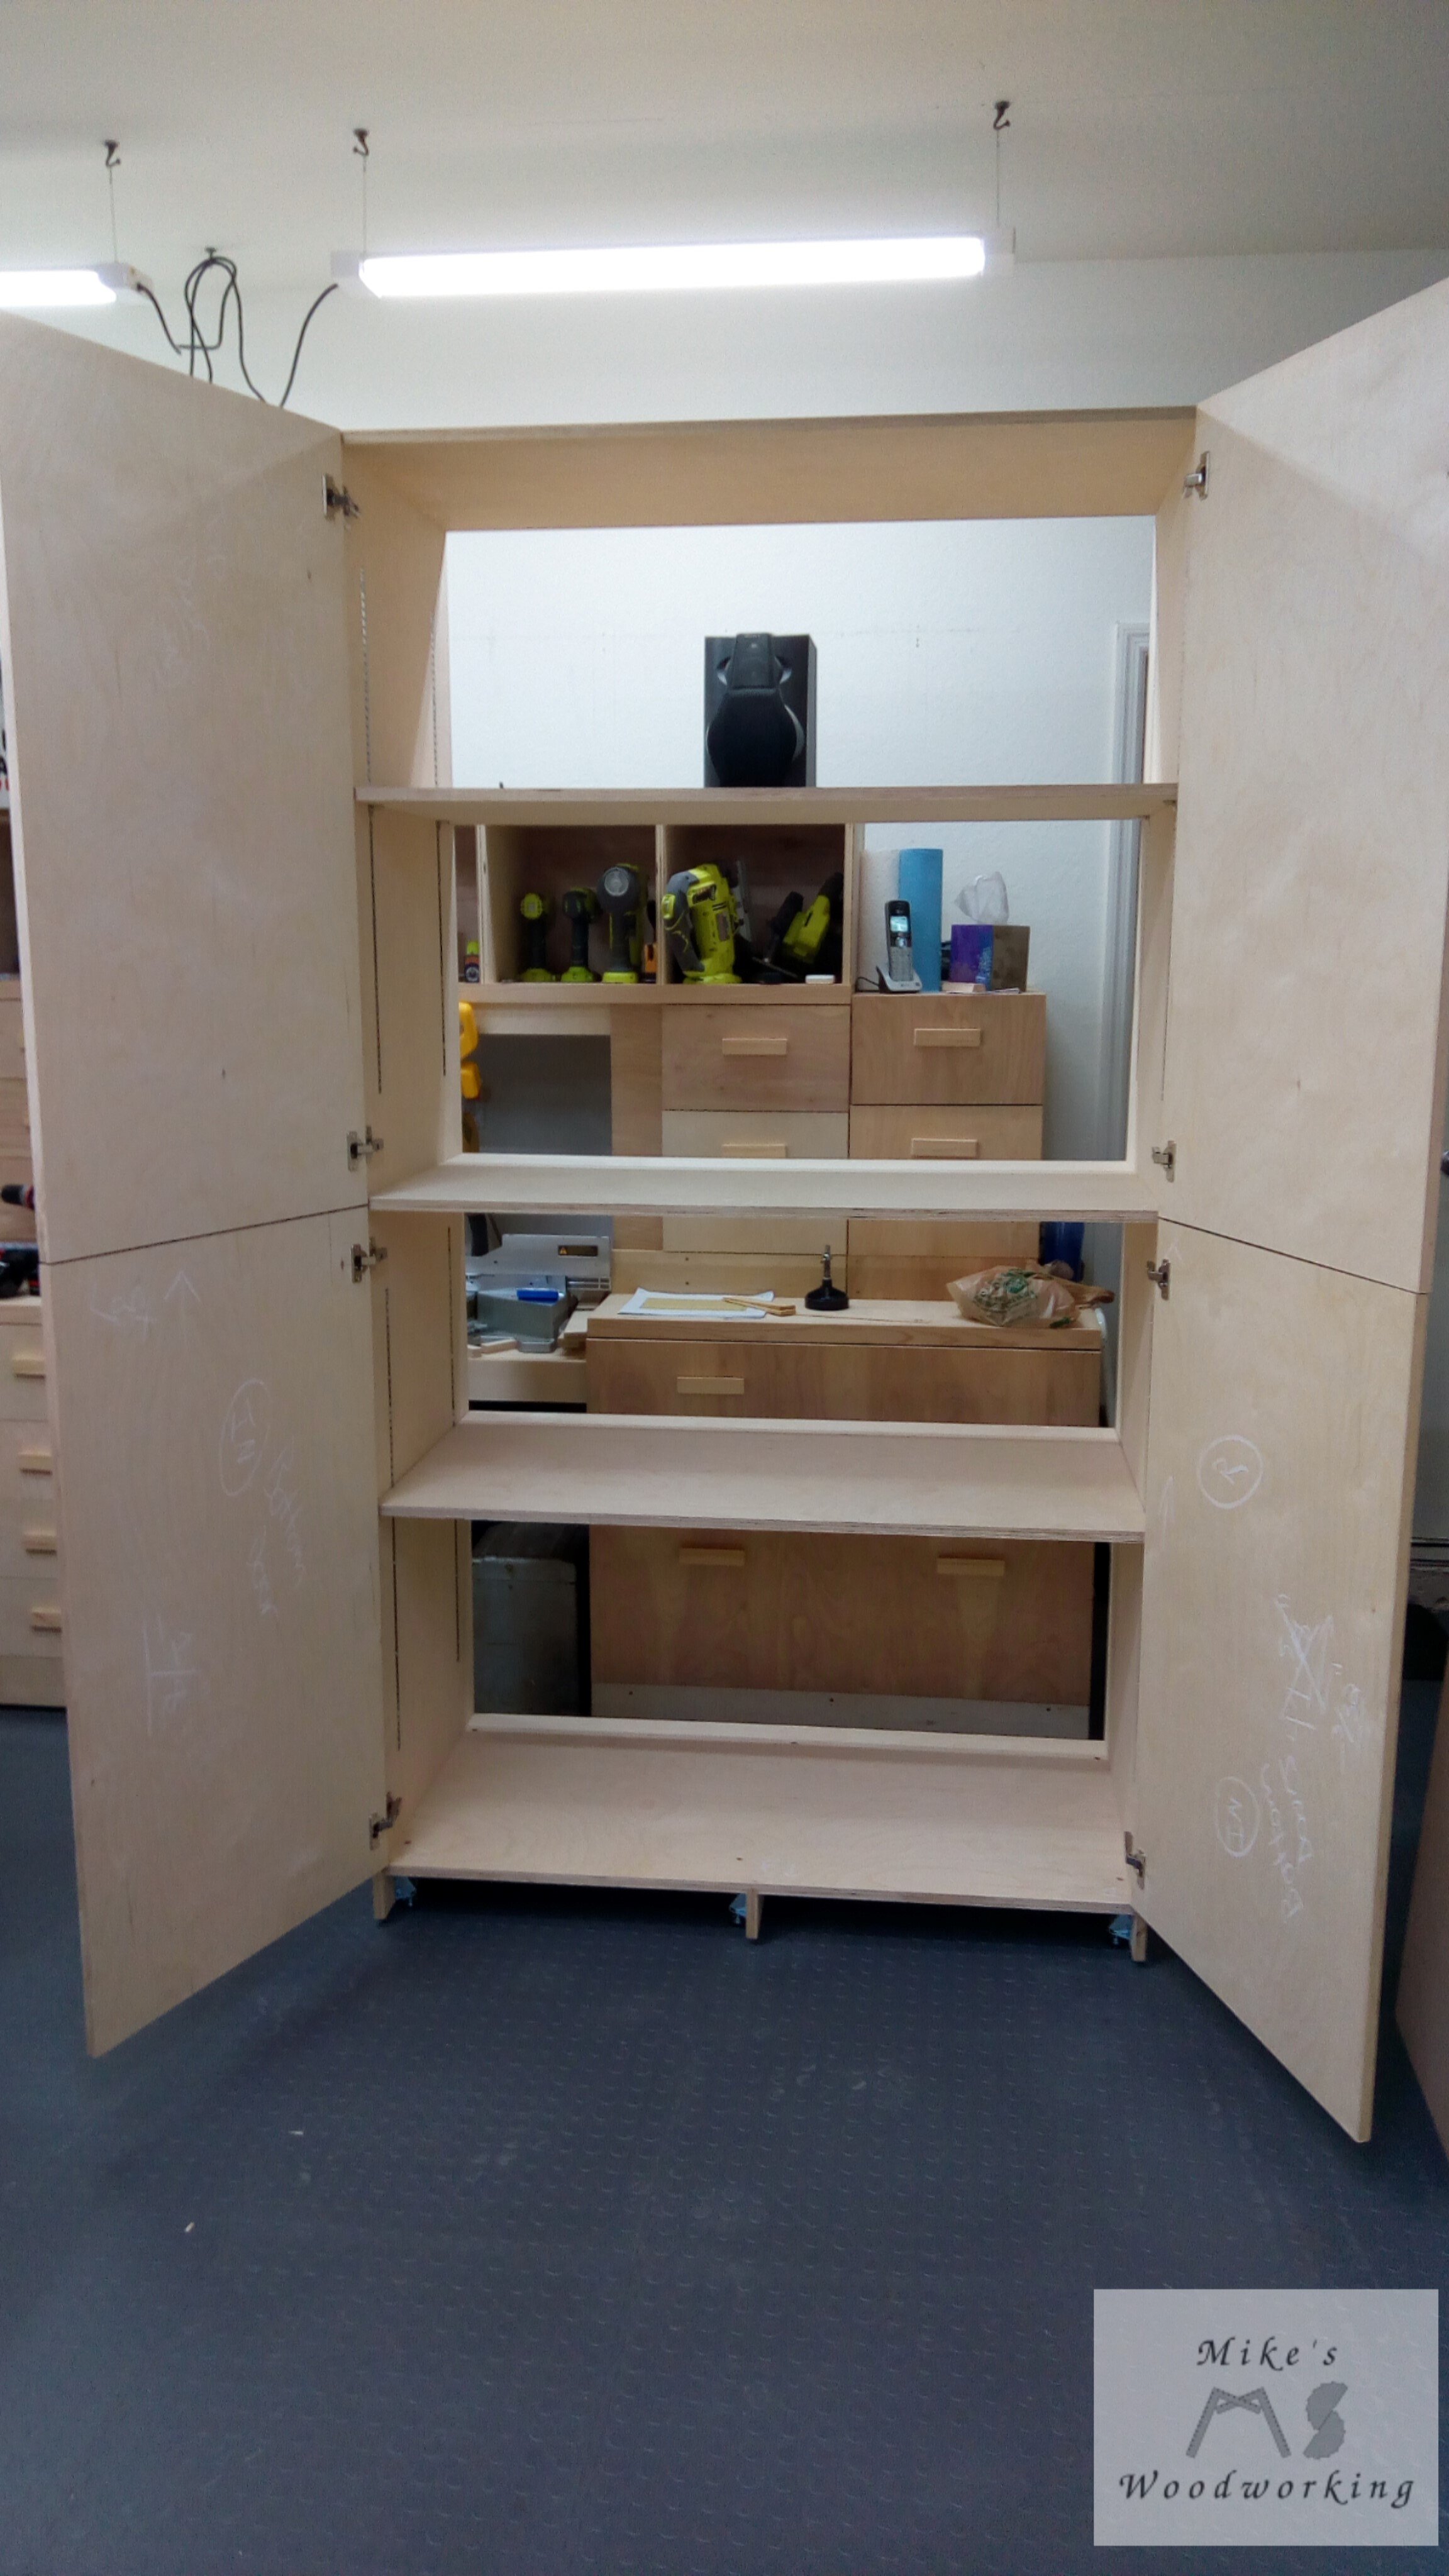
Once all of the holes were drilled and the threaded inserts were in place, I decided that I wanted to stand this thing up in the shop to see it in all of its glory. I had to do this on the floor of the shop...the uneven floor, mind you. Assembling it face down was a little bit of a pain, but I got it done. Next came lifting this beast so that it was upright. HOLY CRAP!!! This thing was heavy. I mean, I knew it was going to be heavy, but I didn’t think it would be THAT heavy. It didn’t even have the two adjustable shelves, the back or the doors on it yet. This was another reason for assembling the finished cabinet in place in the spare room.
The cabinet was fully upright, finally. I got it leveled on the shop floor to make sure it wouldn’t fall on me. I was thrilled. So many times my projects just take a turn for the worse but this one was moving along pretty smoothly. While it was upright and level, I wanted to double-check that this monstrosity was square. In the words of Miss Mona Lisa Vito, it was dead-on balls accurate. Since it was confirmed to be square, I took the measurements so that I could cut the 1/4” back panel to size later. I opted to just screw the back panel in place instead of insetting it to allow for better ability to remove it in the future, plus it was just one less groove I had to make.
Jigs...They’re Not Just Dances Anymore
The next step was to cut the adjustable shelves to the correct width. I wanted to wait until the cabinet carcass was in its final dimensions to cut the shelves. We all know that 3/4” plywood isn’t that exact measurement, and I didn’t want to have to make more cuts than I needed when sizing the shelves. Not to mention that the dados for the shelves might not have been exactly 3/8” either, which would skew the measurements as well. I installed the shelves onto the standards and it was looking that much more like a finished cabinet. The finish line is that much closer.

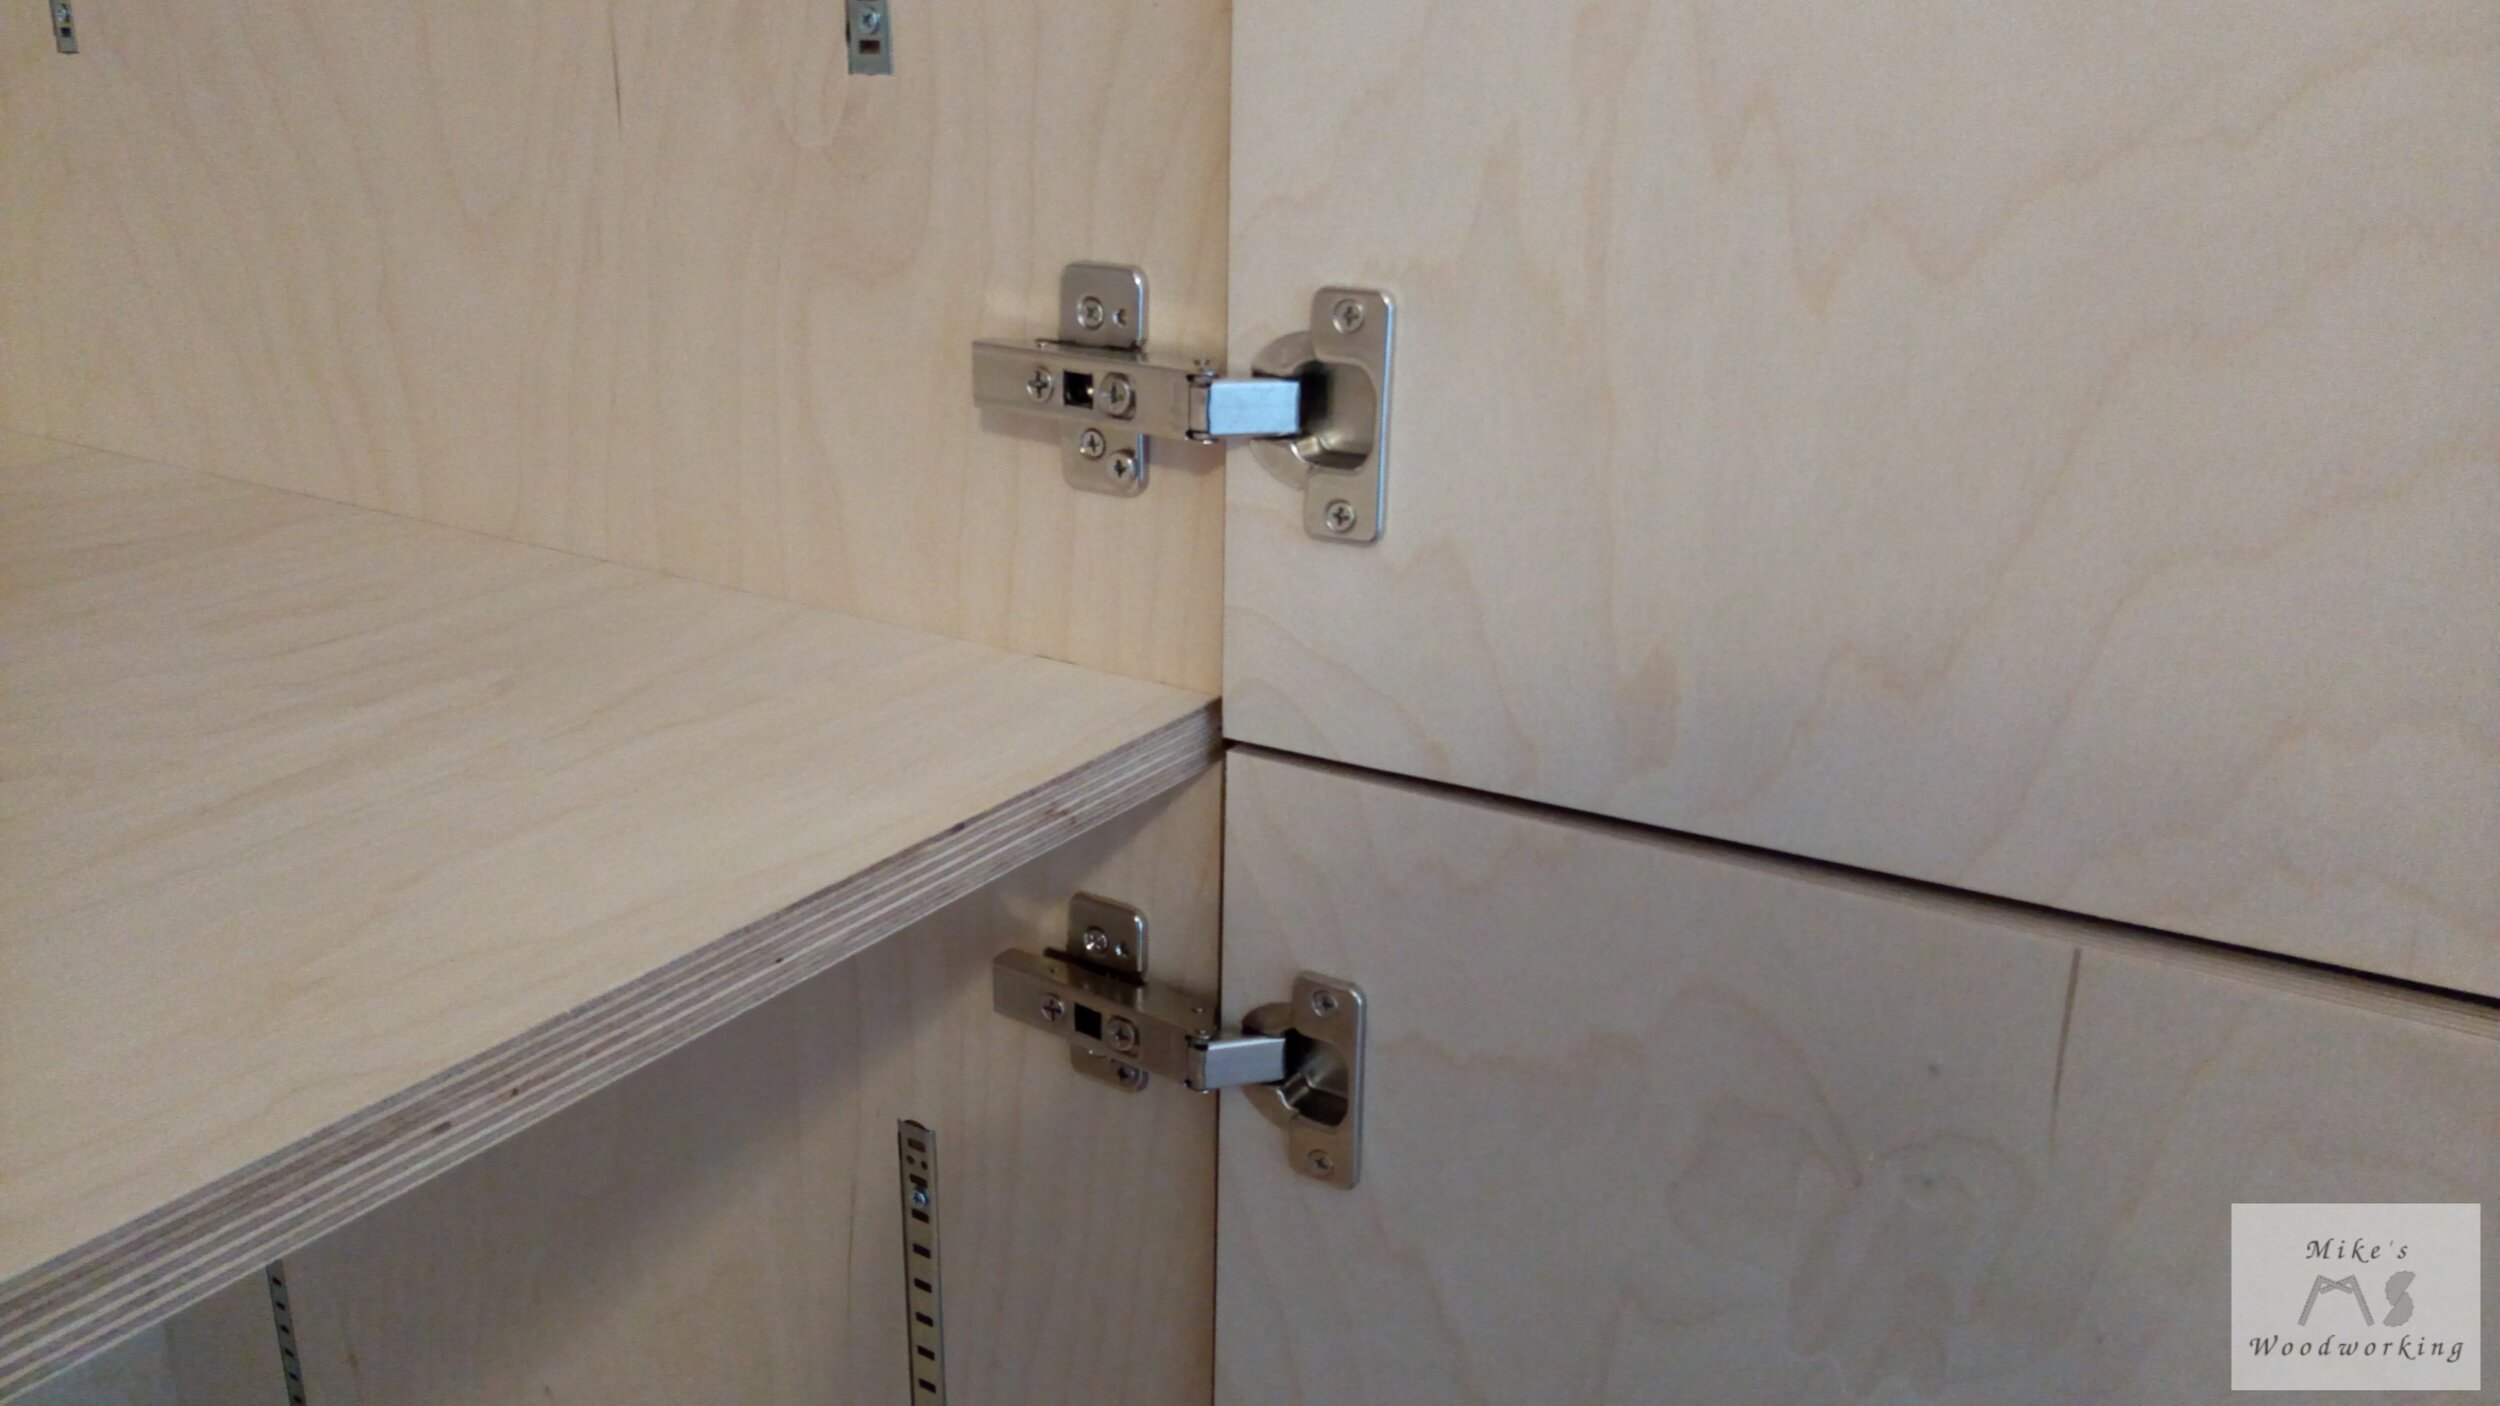
The final item to work on now was the doors. I bought some European-style hinges from Rockler to use on the cabinets. This was my first time using these so there was definitely going to be a learning curve. I made sure to get the right jigs I would need to drill all of the holes in the door and the sides. Rockler really makes this whole process a breeze, I must say.
I got out a piece of scrap Baltic birch plywood to try the hinge-drilling jig. I needed to get the depth correct on the jig to make sure the hinges were sitting properly. It took a couple of tries, but I got it ironed out. Now that I’d gotten the drilling jig set, I had to lay out the hinges on both the sides and on the door themselves. First, I cut all of the doors to proper size. This was fairly straightforward. The doors were full overlay with a 1/8” gap between them. I simply measured the width, subtracted 1/8” and made my cuts. For the height, there was a little bit more calculating. I needed to account for the trim on the bottom as well as the extra 1/8” gap between the trim and the bottom doors. With that in mind, I made my other cuts.
I decided that it would be best to take everything apart again when measuring for the hinge layout. By doing it this way, I could lay the sides flat on the assembly table with the doors right next to them, ensuring that everything was even. With my 1/8” shim in place, all of my doors were confirmed to be cut perfectly and the layout for the hinges was a breeze. I had to make sure that I labeled which doors were which when it came time for drilling for the hinges. I put a Post-It note on each door after the initial layout to guarantee I didn’t screw anything up. This was especially handy when drilling the holes for the cabinet knobs as well. It was far too late in the game for errors at this point.
When One Door Closes...Make Sure It’s Not Crooked
I took my time when drilling. Even though my test holes with the jig were correct, I continued to take it easy and double-check each hinge after drilling. Eight holes later, the hinges were all installed on the doors. The easy part of the operation was drilling for the hinge plates on the sides. I lined up the jig with my marks, clamped the jig in place and drilled the holes with a self-centering bit. That was it. The plates were installed, all in the correct orientation, and it was time to put the cabinet back together and install the doors.
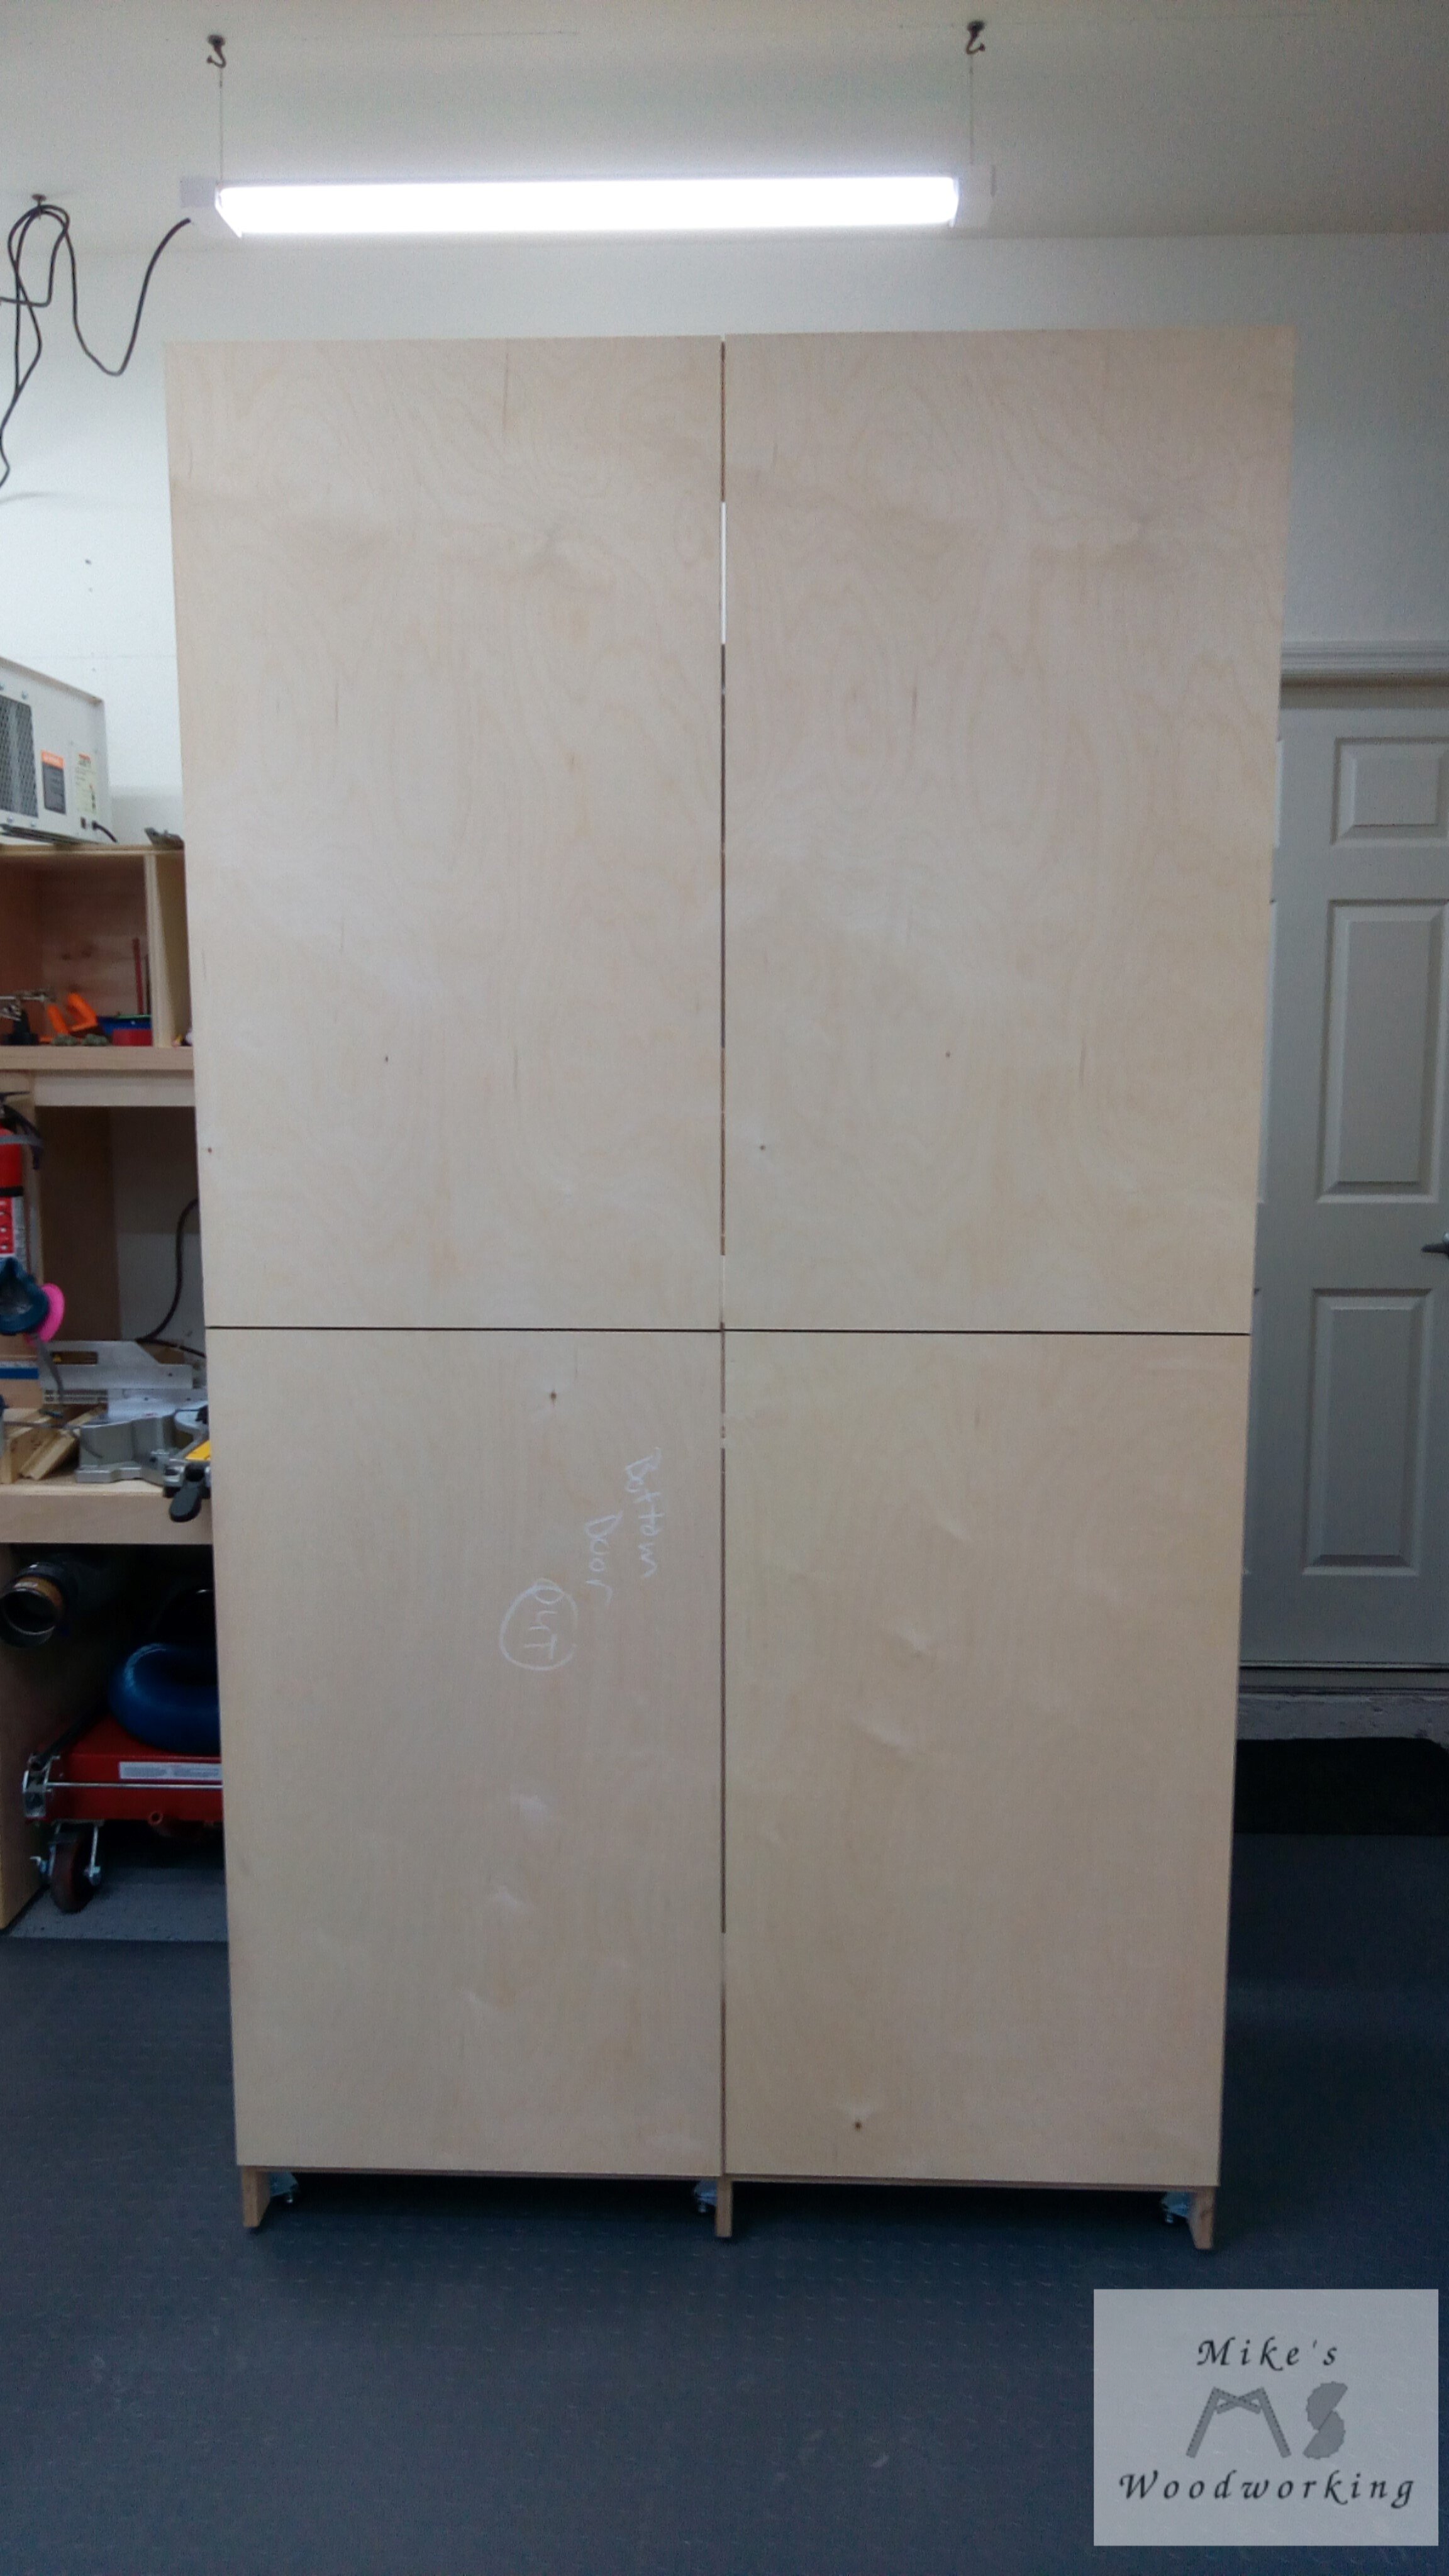
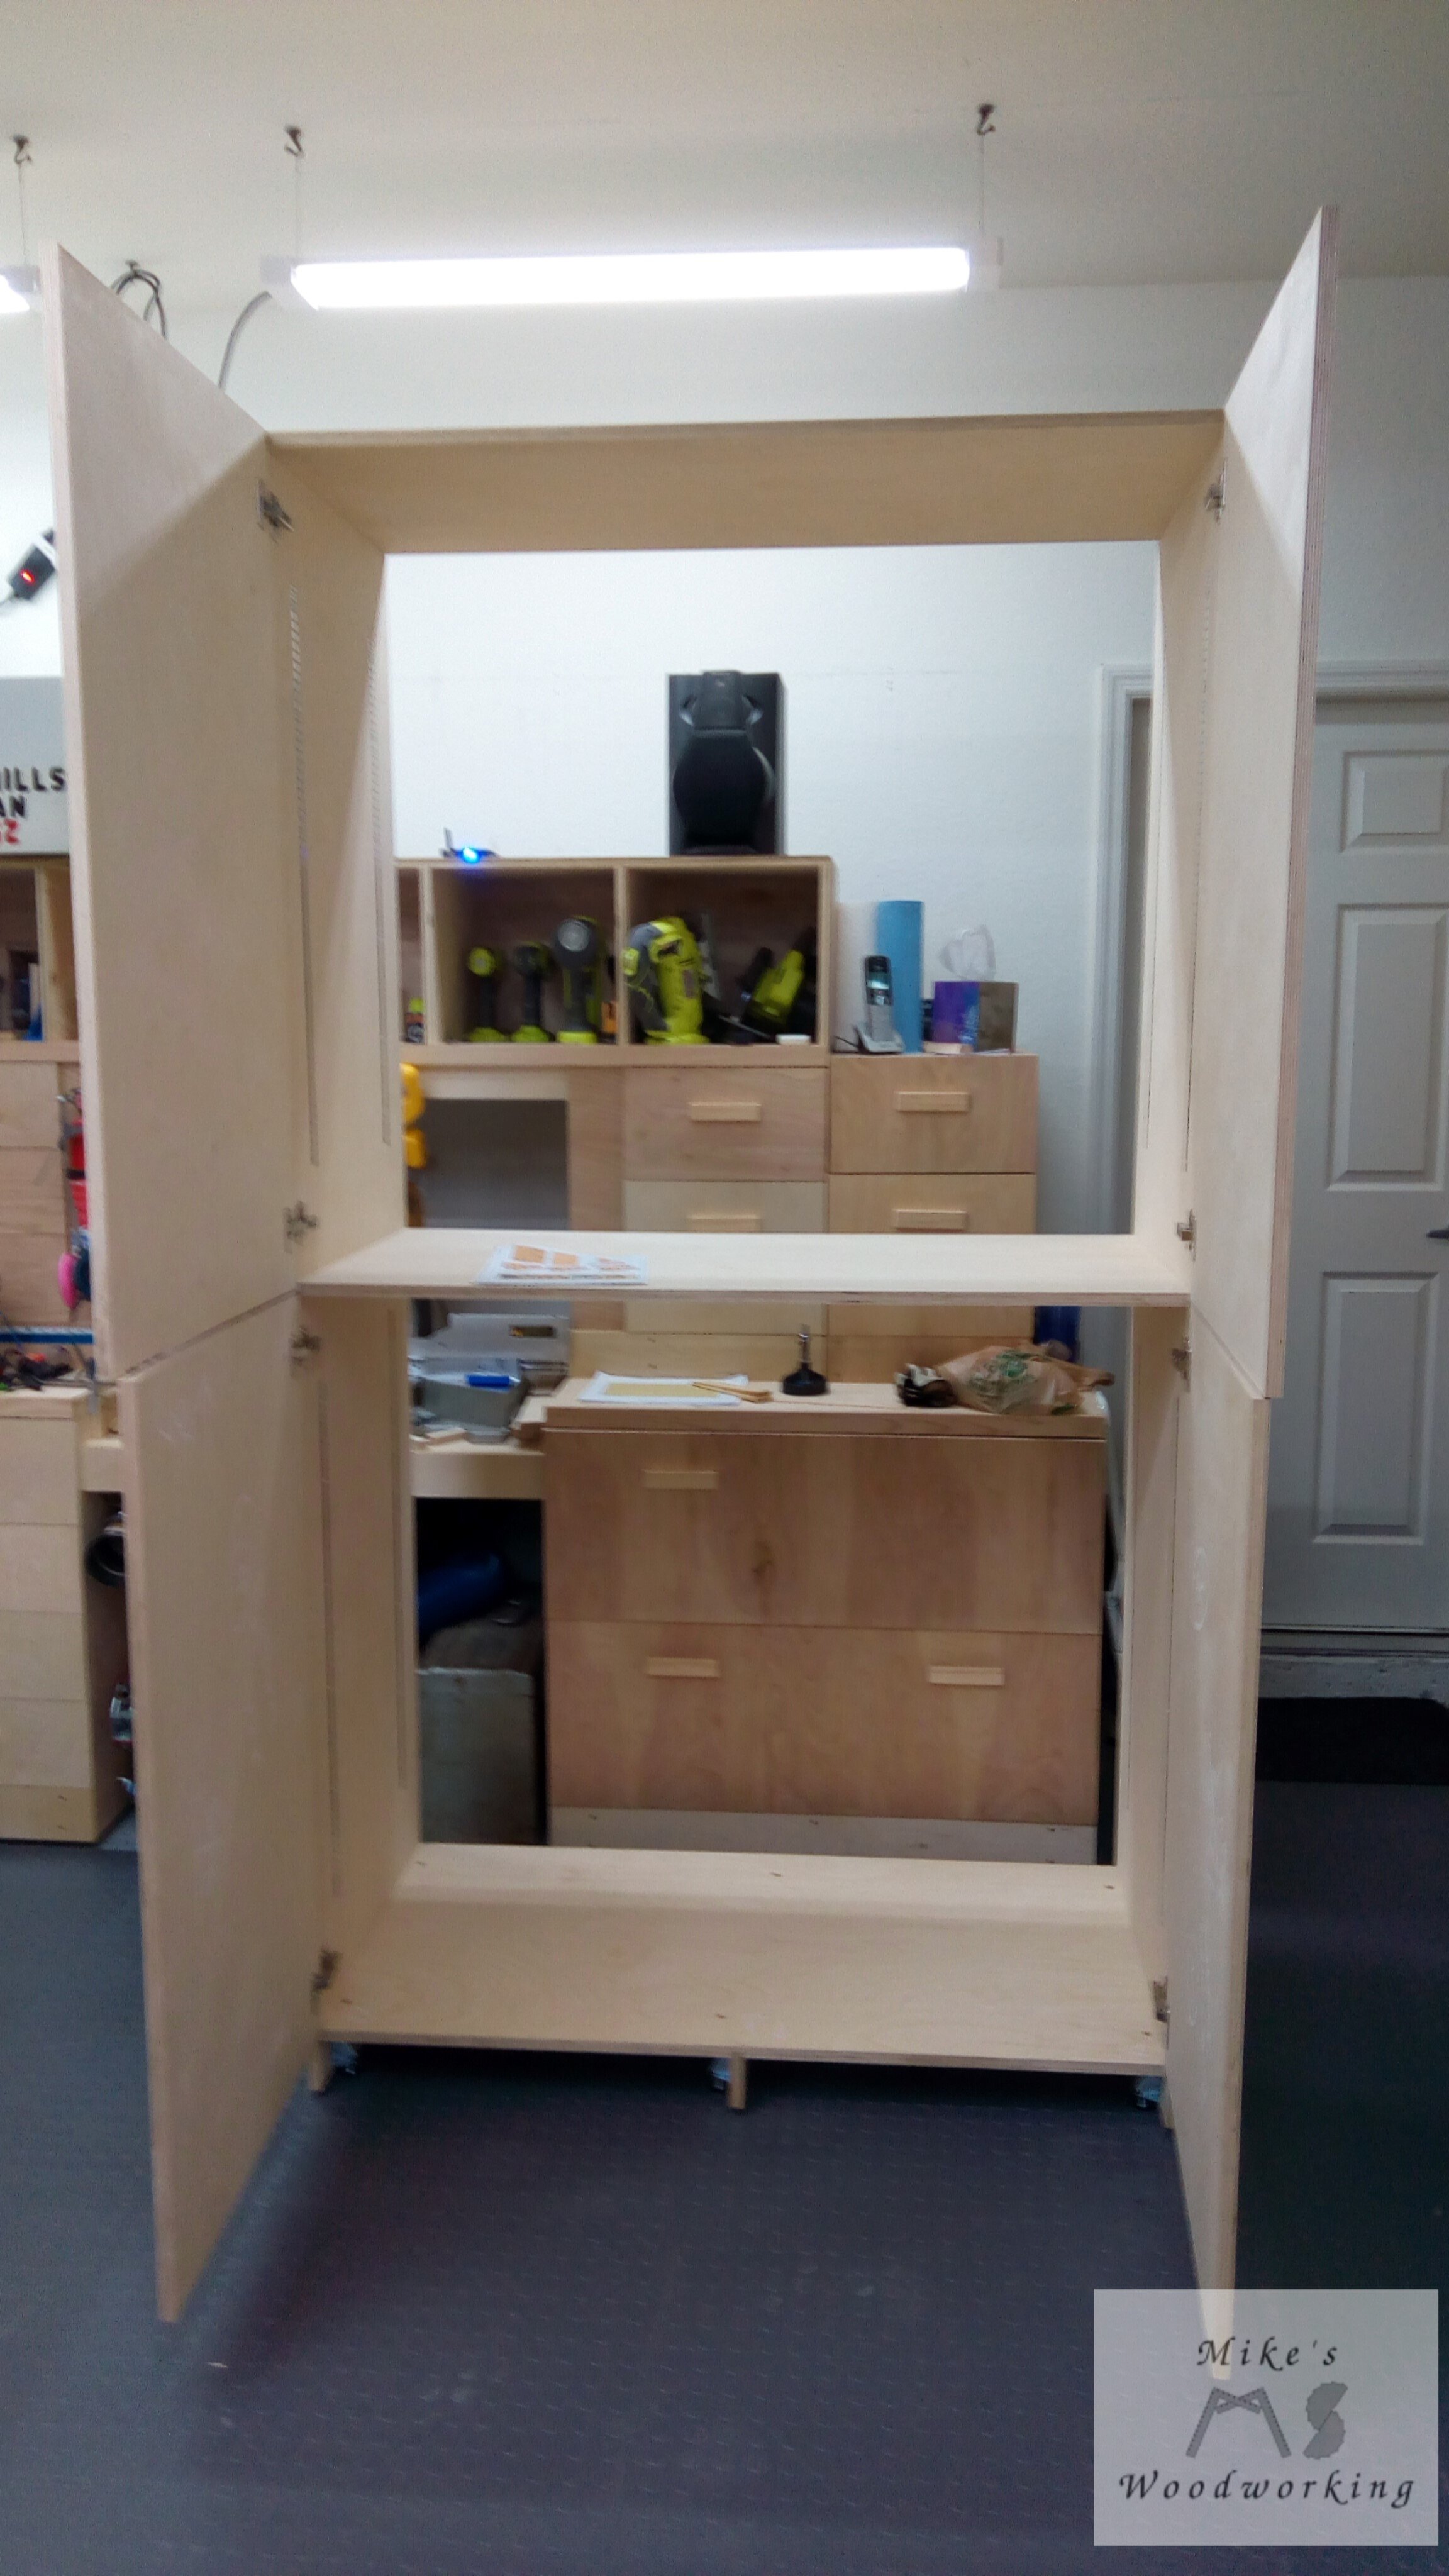
It really is literally a snap to install these hinges. The arm of the hinge is placed onto the corresponding hook on the hinge plate, snapped into place and that’s basically it. Once all four doors were up, I had to adjust them to ensure the proper gaps. This was easy enough with the adjustment screws on the hinges. I closed all of the doors, stepped back and admired the nearly finished cabinet. It was absolutely perfect. It came out exactly like my drawing in Sketchup. I could not be happier. Well, I actually could be happier if I didn’t have to take it all apart, again, to sand everything before final assembly could begin.
Sand in the Place….Hey Hey Hey!!! That’s David Picciuto’s Line, Buddy
I removed the doors and the adjustable shelves. I gingerly lowered the cabinet face down on the floor, again, and it occurred to me that I still needed to cut the back to size. I stopped at this point and got the back cut to about 1/4” over-sized on its sides. This allowed me to put the back in place, line it up in its final place on the top and bottom, put a couple of screws to hold it down and flush trim the back even with the sides. This also allowed me points of reference when it came time to install the back once it was in the spare room.
Now that the back was ready to go, I took the rest of the cabinet apart, removed all of the hinge hardware and got things ready to sand. At this point in time, it was about a week before Lisa and I were scheduled to drive up to Maryland for Christmas. It was going to take me a long time to sand this whole thing by myself, so I asked for her help with the sanding.
The Baltic birch was already pretty smooth, so we started with 120 grit and then went straight to 180 grit. The 180 grit left a great finish so we stopped there. There was not going to be any kind of finish applied to the cabinets, given their location and minimal use, so we called it a day at that point. All of the pieces were cleaned off and then brought into the spare room. We finished the sanding on a Sunday afternoon, so the assembly wasn’t going to happen until the following day.
If You Build It...You’ll Be Done (not quite “Field of Dreams”, but close enough)
I decided to tackle the assembly by myself on Monday morning. Lisa works from home during the day, and I didn’t want to wait until she got off of work to get the cabinet together. It actually went fairly quickly. I got the sides and fixed shelves screwed together first. I made sure to have them the correct distance from the wall while on the floor to allow me to simply raise the cabinet into its final position. I now had to turn the cabinet on its side for the next step. The two stretcher pieces, which I had measured for and cut prior to the last disassembly in the shop, and the trim still needed to be installed. The stretchers were attached with pocket screws from the front, so their installation was quick and easy. The trim piece was screwed in place through the back of the stretchers, with the aid of a few clamps to hold its position. Finally came the back panel. I first needed to put the cabinet face down on the floor. This made it easy to line up the back with the previous screw holes made earlier in the build. I added a few more screws to hold the back in place and it was time to get this baby standing up and in its final position.
I had one little problem before I could lift it up. I had forgotten to have something on the floor for the top shelf to sit on to allow me to slip my hands under the cabinet for the lift. It took me a minute to get it raised up enough to get my hands under there. This was it. There was no going back once I started the lift. I already knew how heavy it was going to be from lifting it in the garage, but that didn’t include the plywood back. That thin 1/4” Baltic birch plywood added a few more pounds than before. Once I got it off the floor, making sure to use my legs and not my back, and got it to the point where I could get my hands in a pushing position, it was smooth sailing from there. The space I left near the wall was good. I installed the doors, leveled the whole cabinet and installed the adjustable shelves in their final positions.


Great Job...Now Do It Again!!!
This cabinet was finished, installed and ready to be loaded up. I took a step back to admire my work again. This came together exactly like I had planned, pretty much from start to finish. Most importantly, the upper left door cleared the ceiling fan blades with no problems (I’m so glad I caught that in time).
The second cabinet would not be completed until after we got back from our trip to Maryland. Everything went together much faster on the second one as I didn’t have the learning curve on the jigs and other things that I had with the first one. Both of them are now sitting side-by-side in the spare room, and all of the stuff we had in boxes and bins on the floor and in the garage is now housed inside the cabinets and out of sight.
European-style hinges installed w/doors attached.

Covers on top of the hinges for a clean/finished look.

These are the connector bolts I used to attach the sides with the threaded inserts in the fixed shelves. The antique bronze was the only color I could find in the length that I wanted.

When selecting the knobs for the doors, I made sure to find ones that matched the connector bolts on the sides of the cabinets. You can only see the one set of bolts, but I still wanted things to match. They look great.
This project was much larger than anything I’d ever done previously (even the miter saw station, I think). It was a custom piece that we needed, and I’m sure it was cheaper and of better overall quality than anything else we could have found. Most importantly, it was my first time back in the shop after my accident only a month or so prior. While I was careful not to hurt my finger while doing work in the shop, I wasn’t scared when it came time to use any of the tools during the build. That alone makes this a total success.